Learn how to build a full data stack using Airbyte Cloud, Terraform, and dbt to move data from Notion -> BigQuery -> Pinecone for interacting with fetched data through an LLM and form a full fledged RAG.
Summarize this article with:
Welcome to the "Data-to-Pinecone Integration" repository! This repo provides a quickstart template for building a full data stack using Airbyte, Terraform, and dbt to move data from Notion -> BigQuery -> Pinecone for interacting with Notion data through an LLM.
This quickstart is designed to minimize setup hassles and propel you forward.

We'll source Notion pages to make the content searchable in Pinecone. Follow the Notion source docs for information on configuring a Notion source.
BigQuery will store the raw API data from our sources and also the transformed data from dbt. You'll need a BigQuery project and a dataset with a service account that can control the dataset. Airbyte's BigQuery destination docs lists the requirements and links describing how to configure.
Pinecone is the vector database we will use to index documents and their metadata, and also for finding documents that provide context for a query. You'll need a Pinecone account, an API key, and an index created with 1536 dimensions, as OpenAI returns vectors of 1536 dimensions. See the Pinecone docs for more information.
OpenAI is used both in processing the query and also provides the LLM for generating a response. The query is vectorized so it can be used to identify relevant items in the Pinecone index, and these items are provided to the LLM as context to better respond to the query. You'll need an OpenAI account with credits and an API key. If you already have an account with OpenAI, you can generate a new API key by visiting this link: platform.openai.com/api-keys
Get the project up and running on your local machine by following these steps:
1. Clone the repository (Clone only this quickstart):
2. Navigate to the directory:
3. Set Up a Virtual Environment:
• For Mac
• For Windows
4. Install Dependencies:
The following steps will execute Terraform and dbt workflows to create the necessary resources for the integration. To do this, you'll need to provide some configuration values. Copy the provided .env.template file to .env and set its values. Then run the following command to source the environment variables into your shell so they are available when running Terraform and dbt:
Don't forget to re-run the above command after making any changes to the .env file.
Create the sources and destinations within your Airbyte environment, you can follow the create connections to define connections between them to control how and when the data will sync.
You can find the Airbyte workspace ID from the URL, e.g. https://cloud.airbyte.com/workspaces/{workspace-id}/connections.
Airbyte allows you to create connectors for sources and destinations, facilitating data synchronization between various platforms. In this project, we're harnessing the power of Terraform to automate the creation of these connectors and the connections between them. Here's how you can set it up:
1. Navigate to the Airbyte Configuration Directory:
Change to the relevant directory containing the Terraform configuration for Airbyte:
2. Modify Configuration Files:
Within the infra/airbyte directory, you'll find three crucial Terraform files:
• provider.tf: Defines the Airbyte provider.
• main.tf: Contains the main configuration for creating Airbyte resources.
• variables.tf: Defines variables whose values are populated from the .env file.
If you're using Airbyte Cloud instead of a local deployment you will need to update the Airbyte provider configuration in infra/airbyte/provider.tf, setting the bearer_auth to an API key generated at https://portal.airbyte.com/.
3. Initialize Terraform:
This step prepares Terraform to create the resources defined in your configuration files.
4. Review the Plan:
Before applying any changes, review the plan to understand what Terraform will do.
5. Apply Configuration:
After reviewing and confirming the plan, apply the Terraform configurations to create the necessary Airbyte resources.
6. Verify in Airbyte UI:
Once Terraform completes its tasks, navigate to the Airbyte UI. Here, you should see your source and destination connectors, as well as the connection between them, set up and ready to go.
If you're using Airbyte Cloud, we configured Terraform to assemble the URL for you:
will print something like:


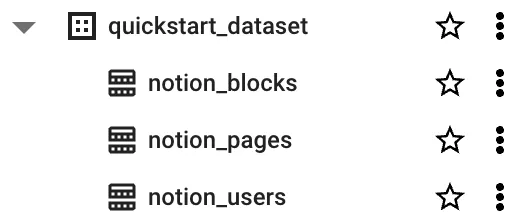
Before building the dbt project, transforming the raw notion data, the source tables must exist in the BigQuery dataset. Open the Airbyte UI and navigate to the Connections page. Click the Sync Now button for Notion to BigQuery to start the sync.

Once the sync is complete you can inspect the tables in BigQuery.

dbt (data build tool) allows you to transform your data by writing, documenting, and executing SQL workflows. Setting up the dbt project requires specifying connection details for your data platform, in this case, BigQuery. Here’s a step-by-step guide to help you set this up:
1. Navigate to the dbt Project Directory:
Change to the directory containing the dbt configuration:
You'll find a profiles.yml file within the directory. This file contains configurations for dbt to connect with your data platform, and is preconfigured to pull the connection details from environment variables.
2. Utilize Environment Variables (Optional but Recommended):
To keep your credentials secure, you can leverage environment variables. An example is provided as the keyfile config in profiles.yml.
3. Test the Connection:
Once you’ve updated the connection details, you can test the connection to your BigQuery instance using:
f everything is set up correctly, this command should report a successful connection to BigQuery.
4. Run the Model
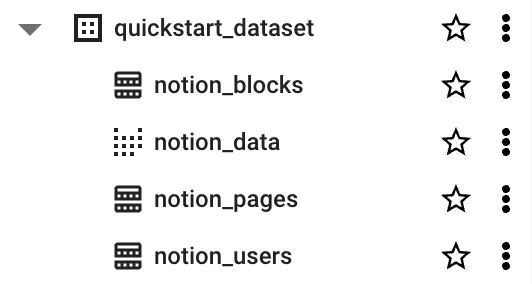
With the connection in place, you can now build the model to create the notion view in BigQuery, which the configured Airbyte connection will use to sync Notion pages into Pinecone.
You can inspect the provided dbt_project/models/notion.sql to see how it collates Notion blocks into a single text field which can be vectorized and indexed into Pinecone.
You should now see the notion_data view in BigQuery.

With the source data transformed it is now ready to publish into the Pinecone index. Head back to the Connections and start a sync for Publish BigQuery Data to Pinecone.

After Airbyte has published the Notion page text into your Pinecone index, it is ready to be interacted with via an LLM model. After providing a couple more environment variables, the provided query.py will provide an interactive session to ask questions about your data.
Once you've set up and launched this initial integration, the real power lies in its adaptability and extensibility. Here’s a roadmap to help you customize and harness this project tailored to your specific data needs:
stuff chain type requires the query and discovered documents all fit within a single tokenized input to the LLM. This is fine for short queries and documents, but if you use longer sources you will need to use another chain type such as map_reduce.Download our free guide and discover the best approach for your needs, whether it's building your ELT solution in-house or opting for Airbyte Open Source or Airbyte Cloud.
