Build a quick full-stack AI application which arranges your Asana tasks for you in order of priority using MIlvus, Airbyte Cloud, and Next.js.
Summarize this article with:
With all the AI hype in the world right now, building apps that incorporate has been more exhilarating than ever. More interestingly, building something that you would use yourself is even more exciting, and what better use case than to have AI organize your daily life for you!
With great ideas however, come great pains, and having an unstructured or scattered dataset from which you cannot infer anything is the greatest one. Imagine you have to build a search feature - how would you even do it if you didn't know what data had to be moved, consolidated, and organized? I may have a solution for you that is quite relieving!
To make any sort of AI app, we really have to understand how data flows through it—it's the foundation that enables advanced features like semantic similarity search and contextual retrieval.
In this tutorial, we are going to run through practical steps on how to build a task prioritization app with a basic chatbot UI, which takes in keywords that represent the task you are searching for, and its relevance.
We are using task data from Asana, conducting a simple vector similarity search using the Milvus vector database, as well as Airbyte’s tooling to handle the data flow. Next.js is the main tech stack, as the API routes super easy to handle through App Router. With this, you can spin up a simple chatbot, with running one command (npm run dev) to run the entire server and client (unlike most AI apps smh!).
To give us some context on what the architecture of this app may look like, this diagram could be useful:
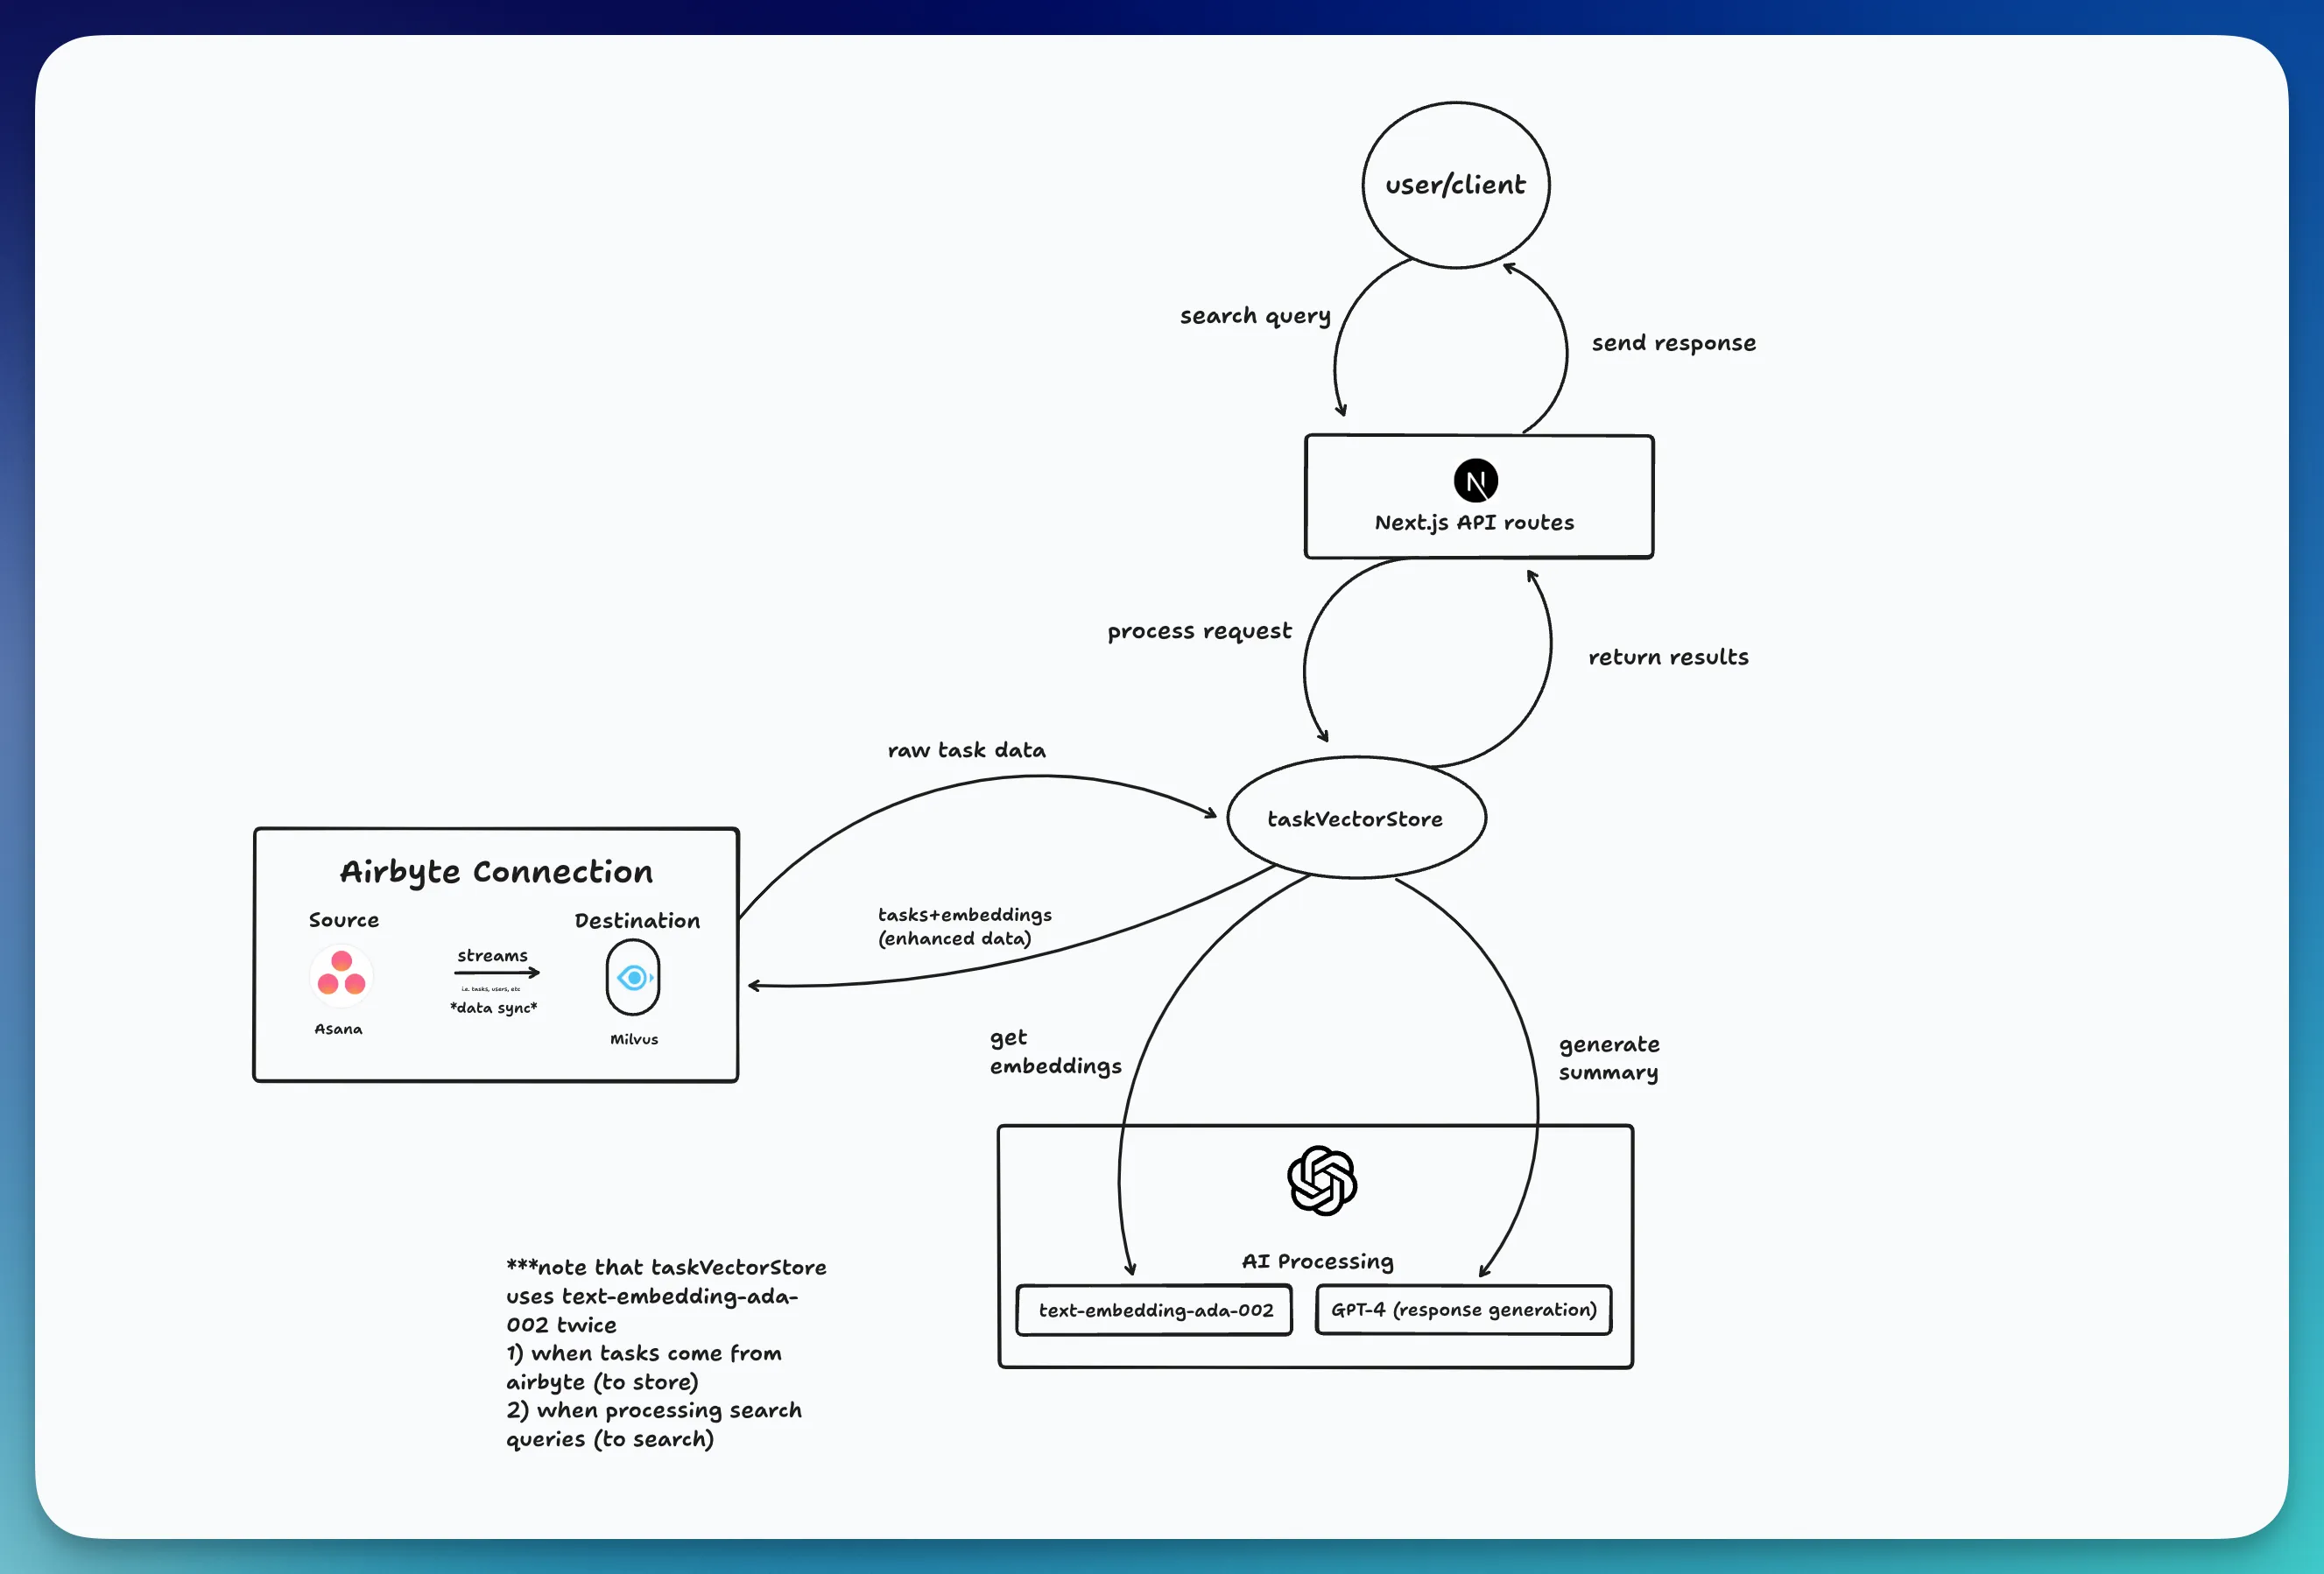
You can also find a link to a repository here for reference: https://github.com/AkritiKeswani/asana-milvus-tasklist
Before diving into the Airbyte Connection part first, as that is ultimately how the data will be moved from Asana to Milvus, we must ensure we have these pre-requisites as they will help prevent silly errors in the future which may be discouraging in the process of building!
npx Next.js command on the docs to generate any Next.js app from scratch. Run npm run dev to see if you have a blank version of Next.js running. Now that we have some basic setup done, we can move on to the data movement layer!
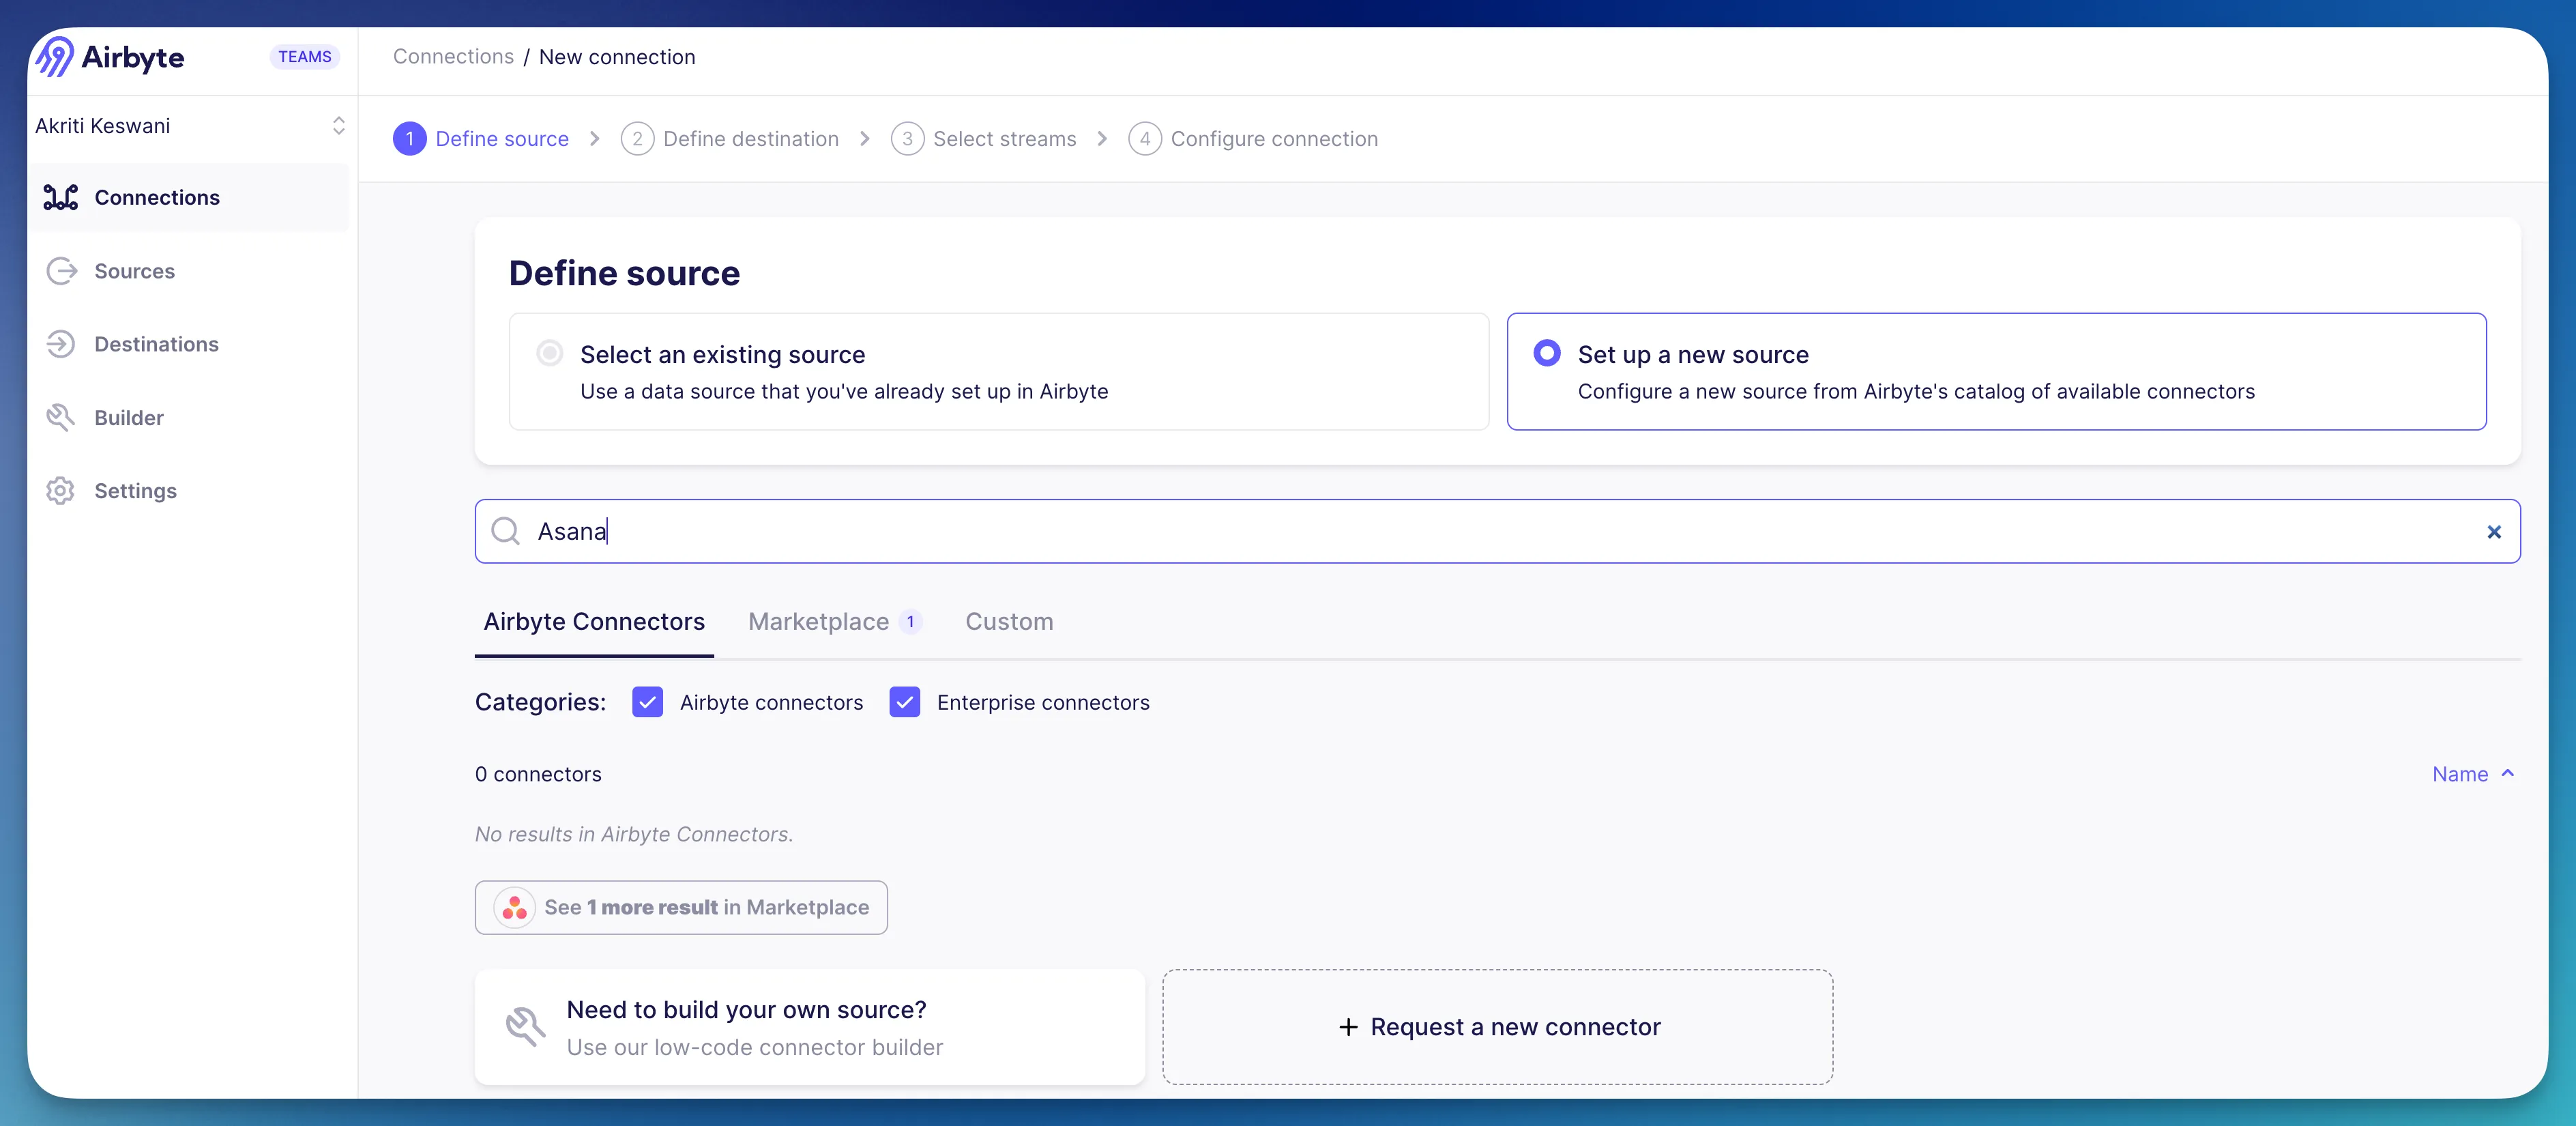
First, let’s start out by entering the Airbyte Cloud UI, and navigating to Connections in your specific workspace.
Go to the Connections tab, and create a new connection.

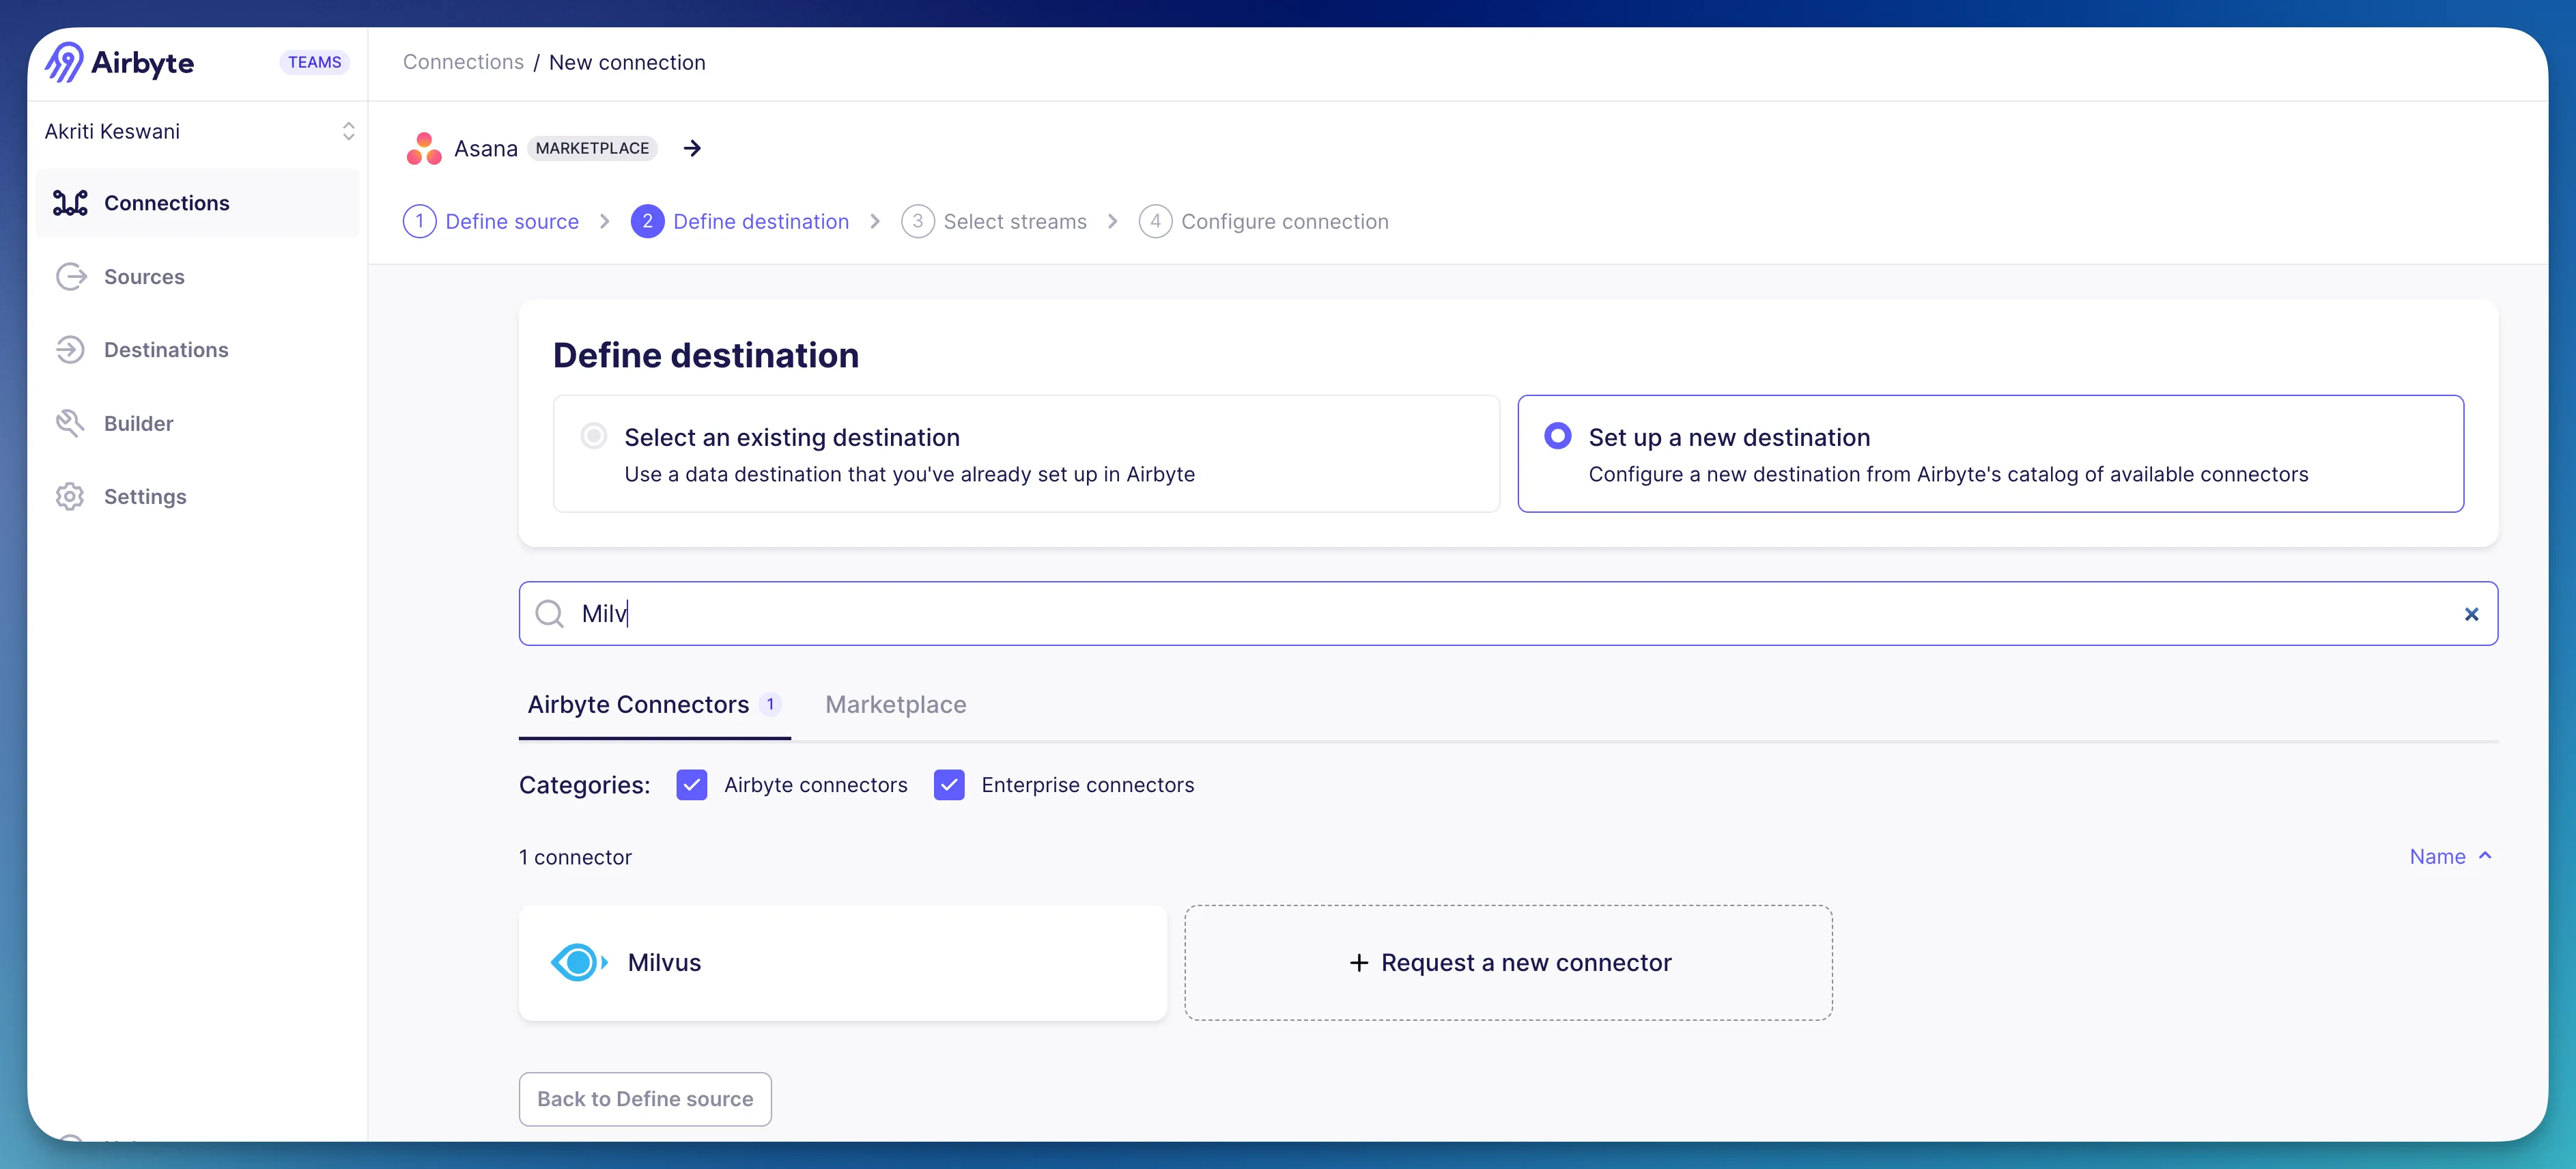
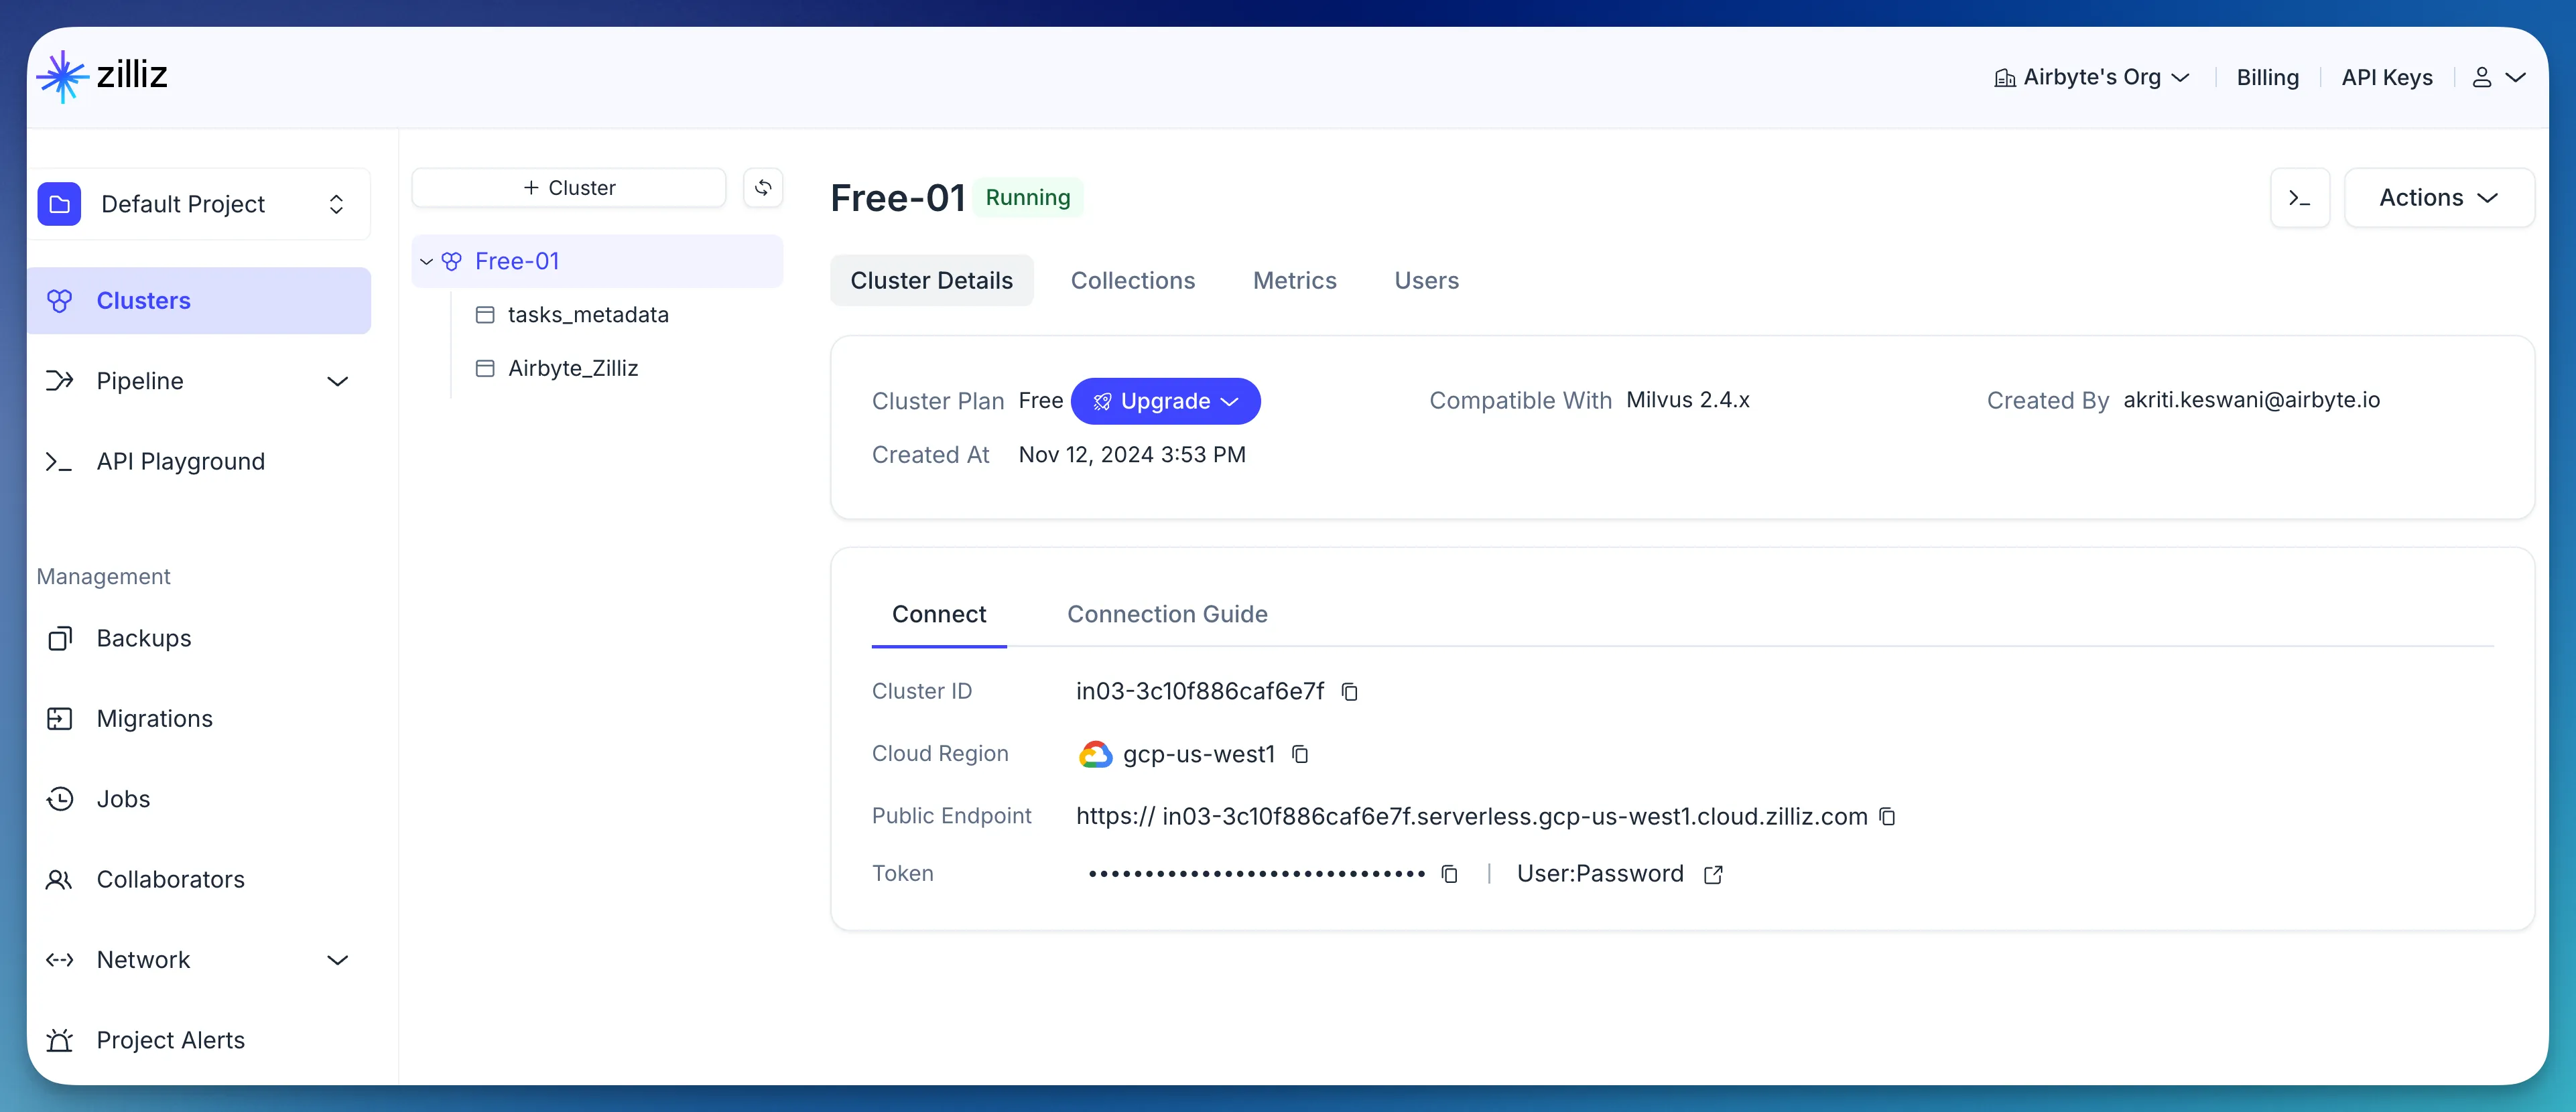
In order to access the Milvus vector database, we now have to go through the Zilliz cluster (set up a Zilliz account) and take the public endpoint URL and token as shown. Note that you will have to define a cluster and subsequently a collection in which we will see our embeddings later.
You can enter the details accordingly in the Airbyte Cloud UI as shown below.
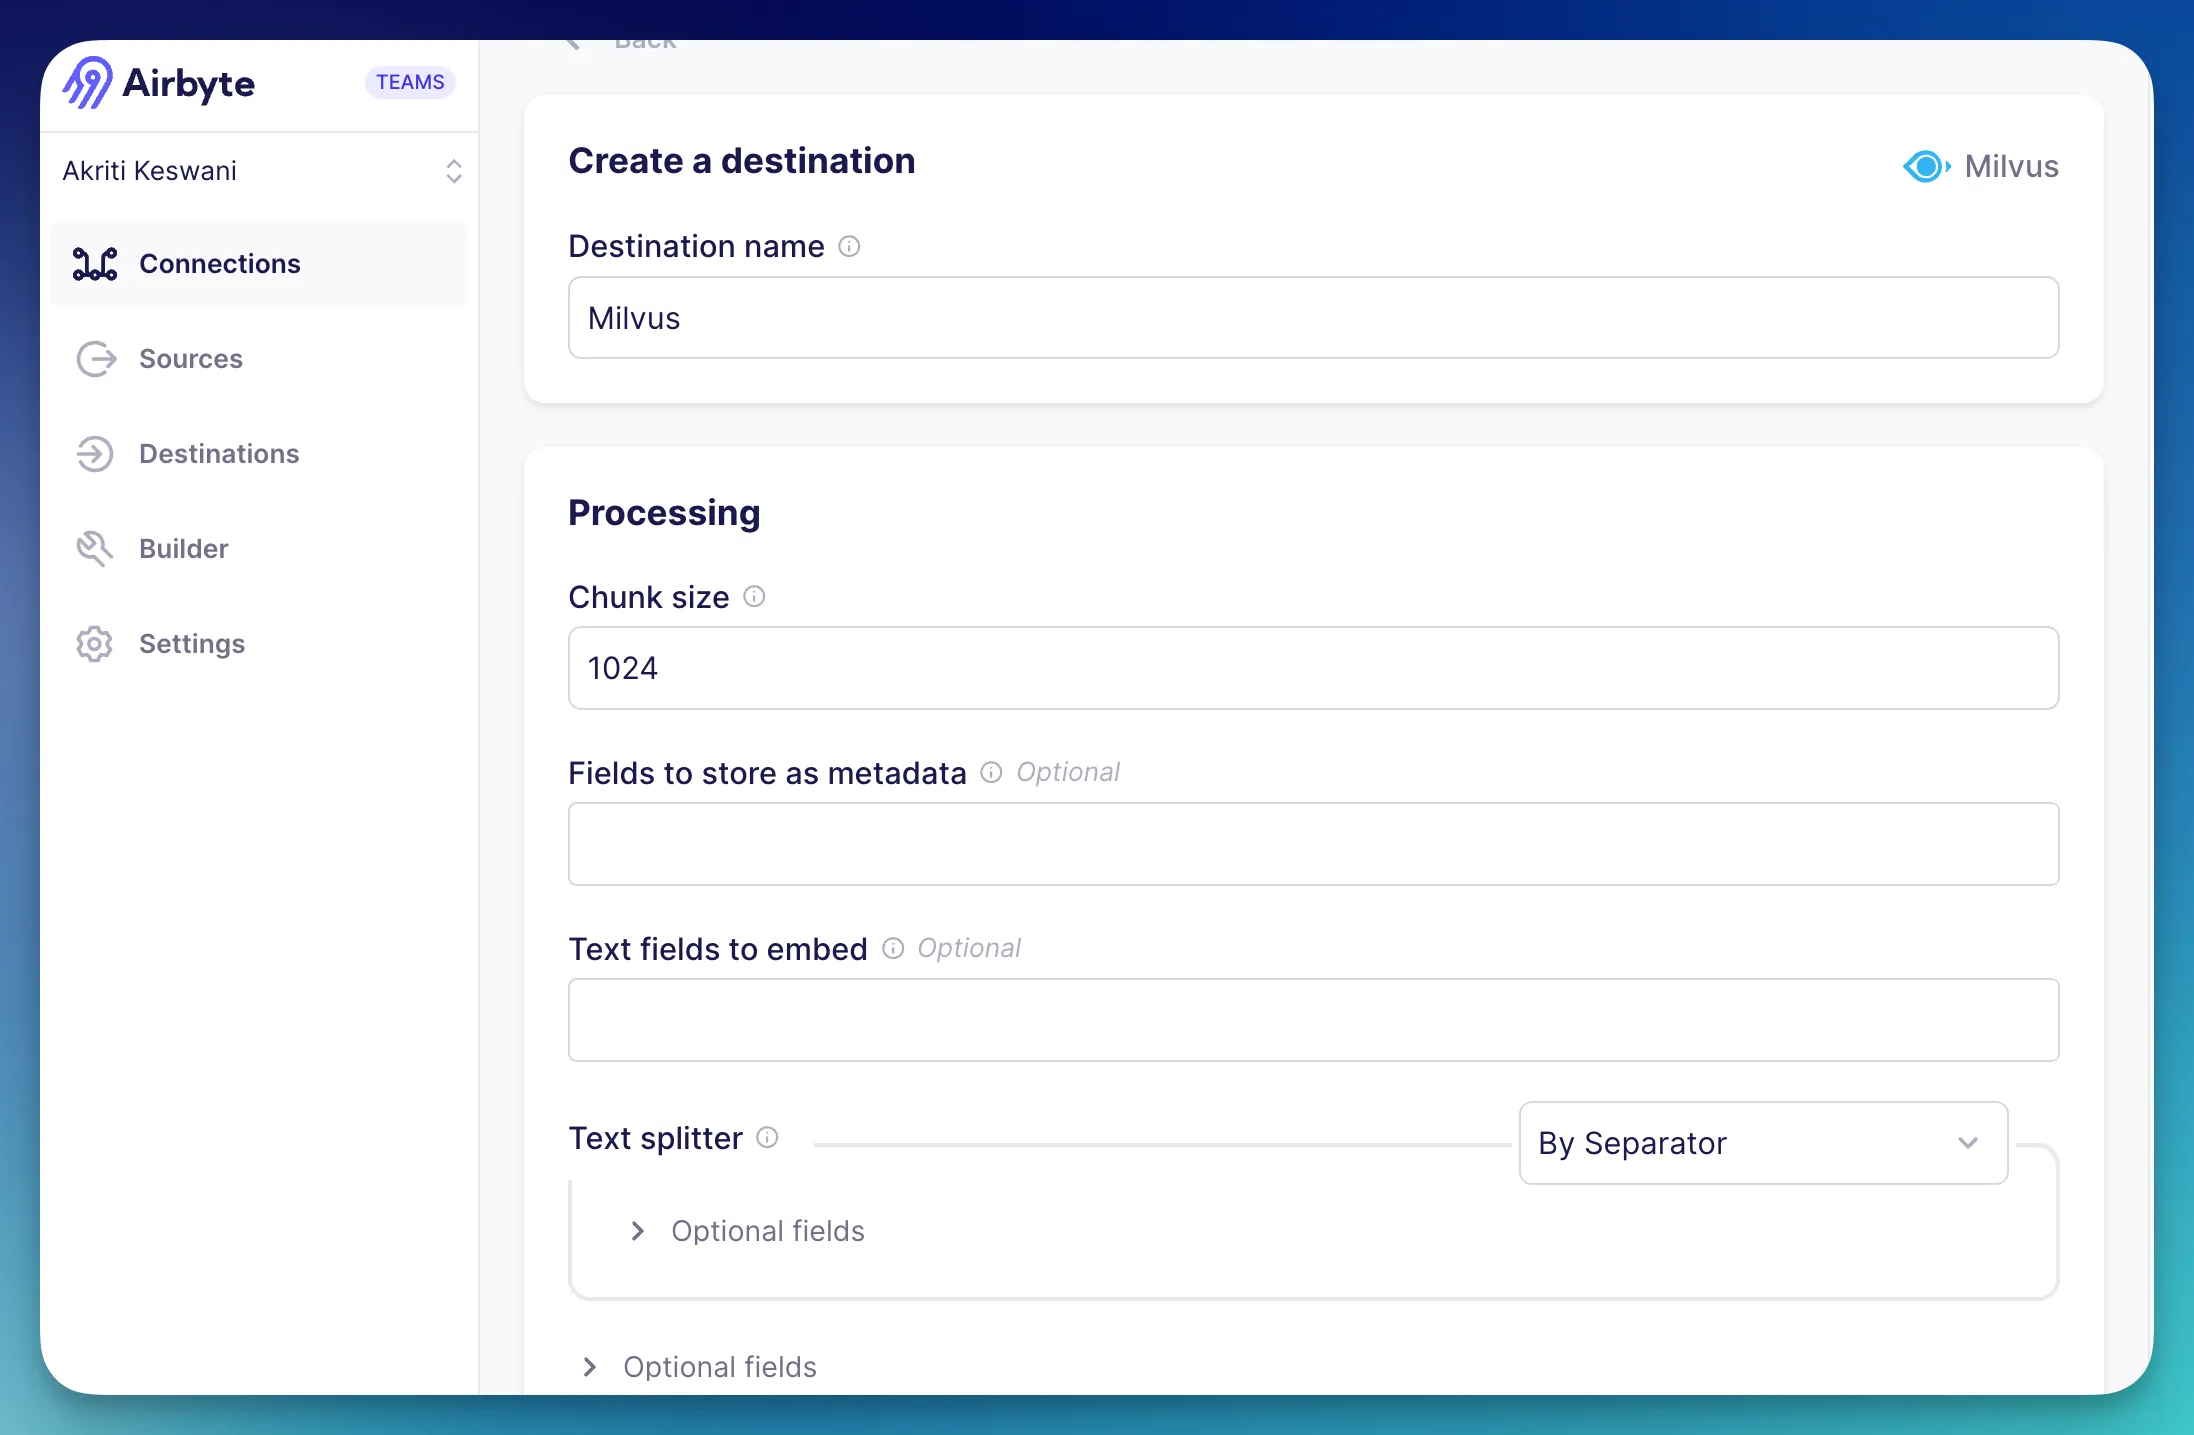
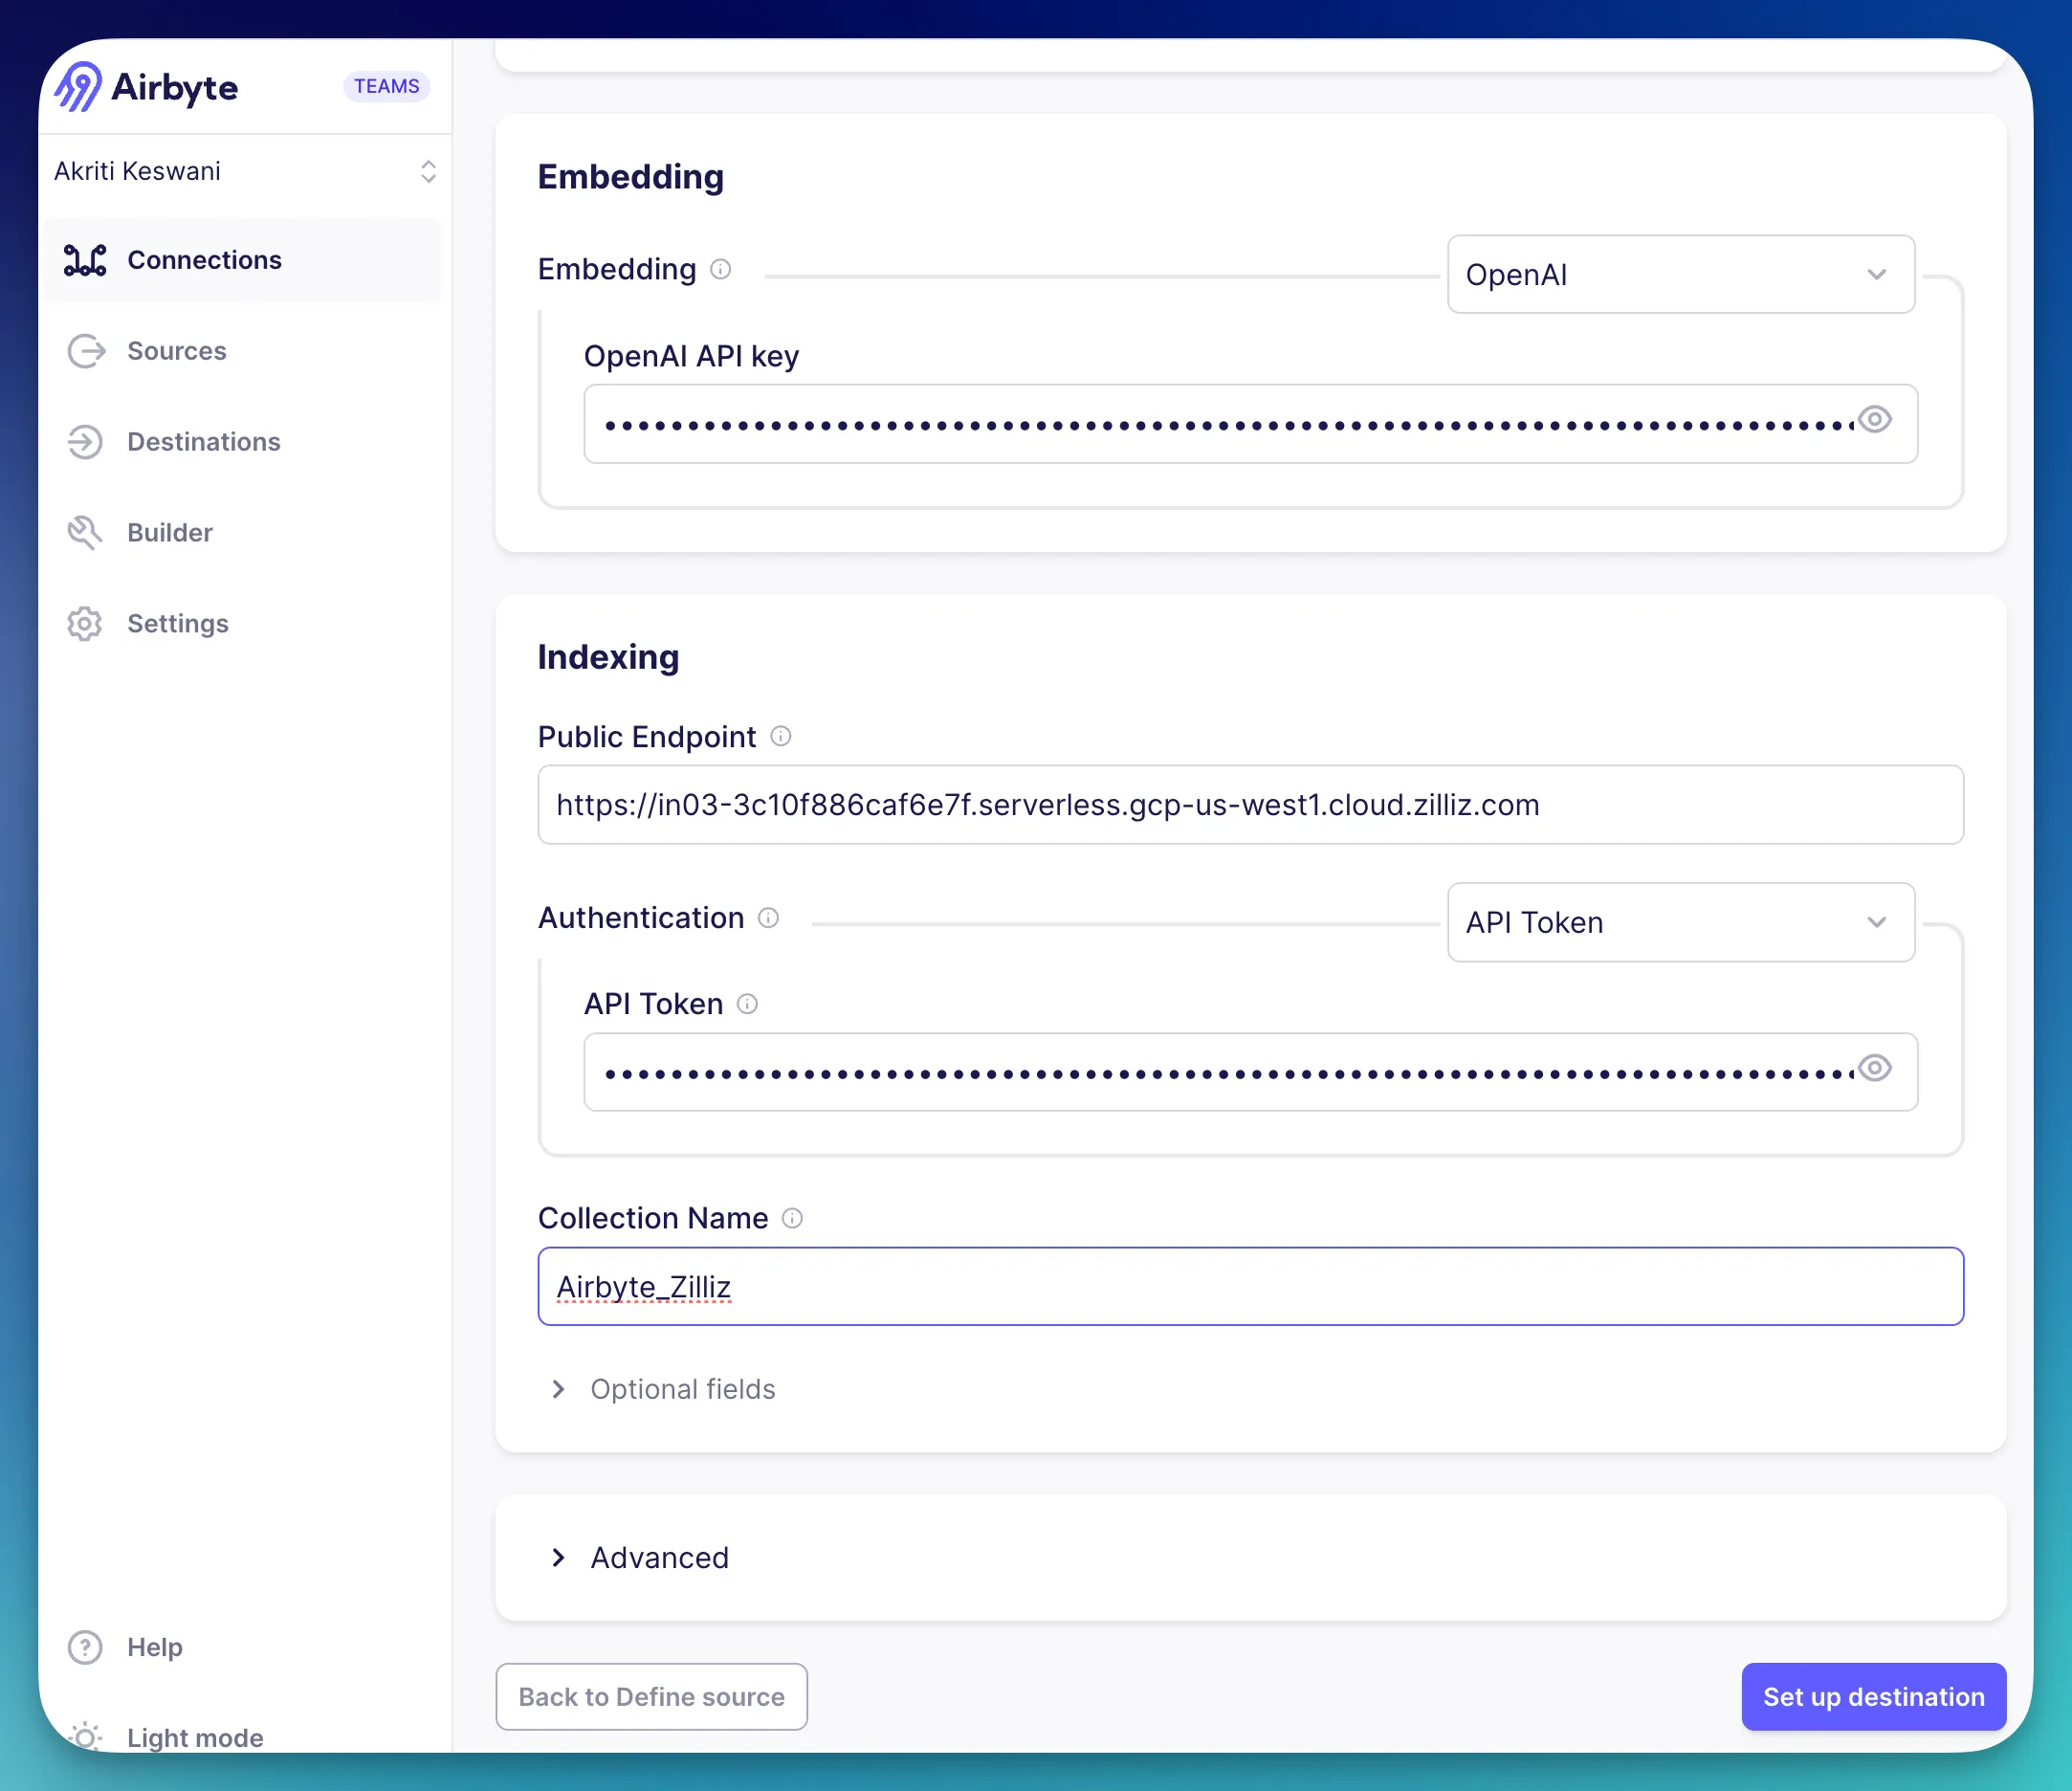
Note that for the Embedding section, the OpenAI is selected as we need the OpenAI API Key from the developer platform. This is needed specially because we are connecting to OpenAI first for vectorization and response generation.
In the Airbyte Cloud UI, you should see Airbyte-related Milvus docs that would give you good context for this project. The next step is to just hit the purple "Set up destination" button and we can now select our relevant data streams. These represent the type of data you are trying to funnel from Asana to Milvus.
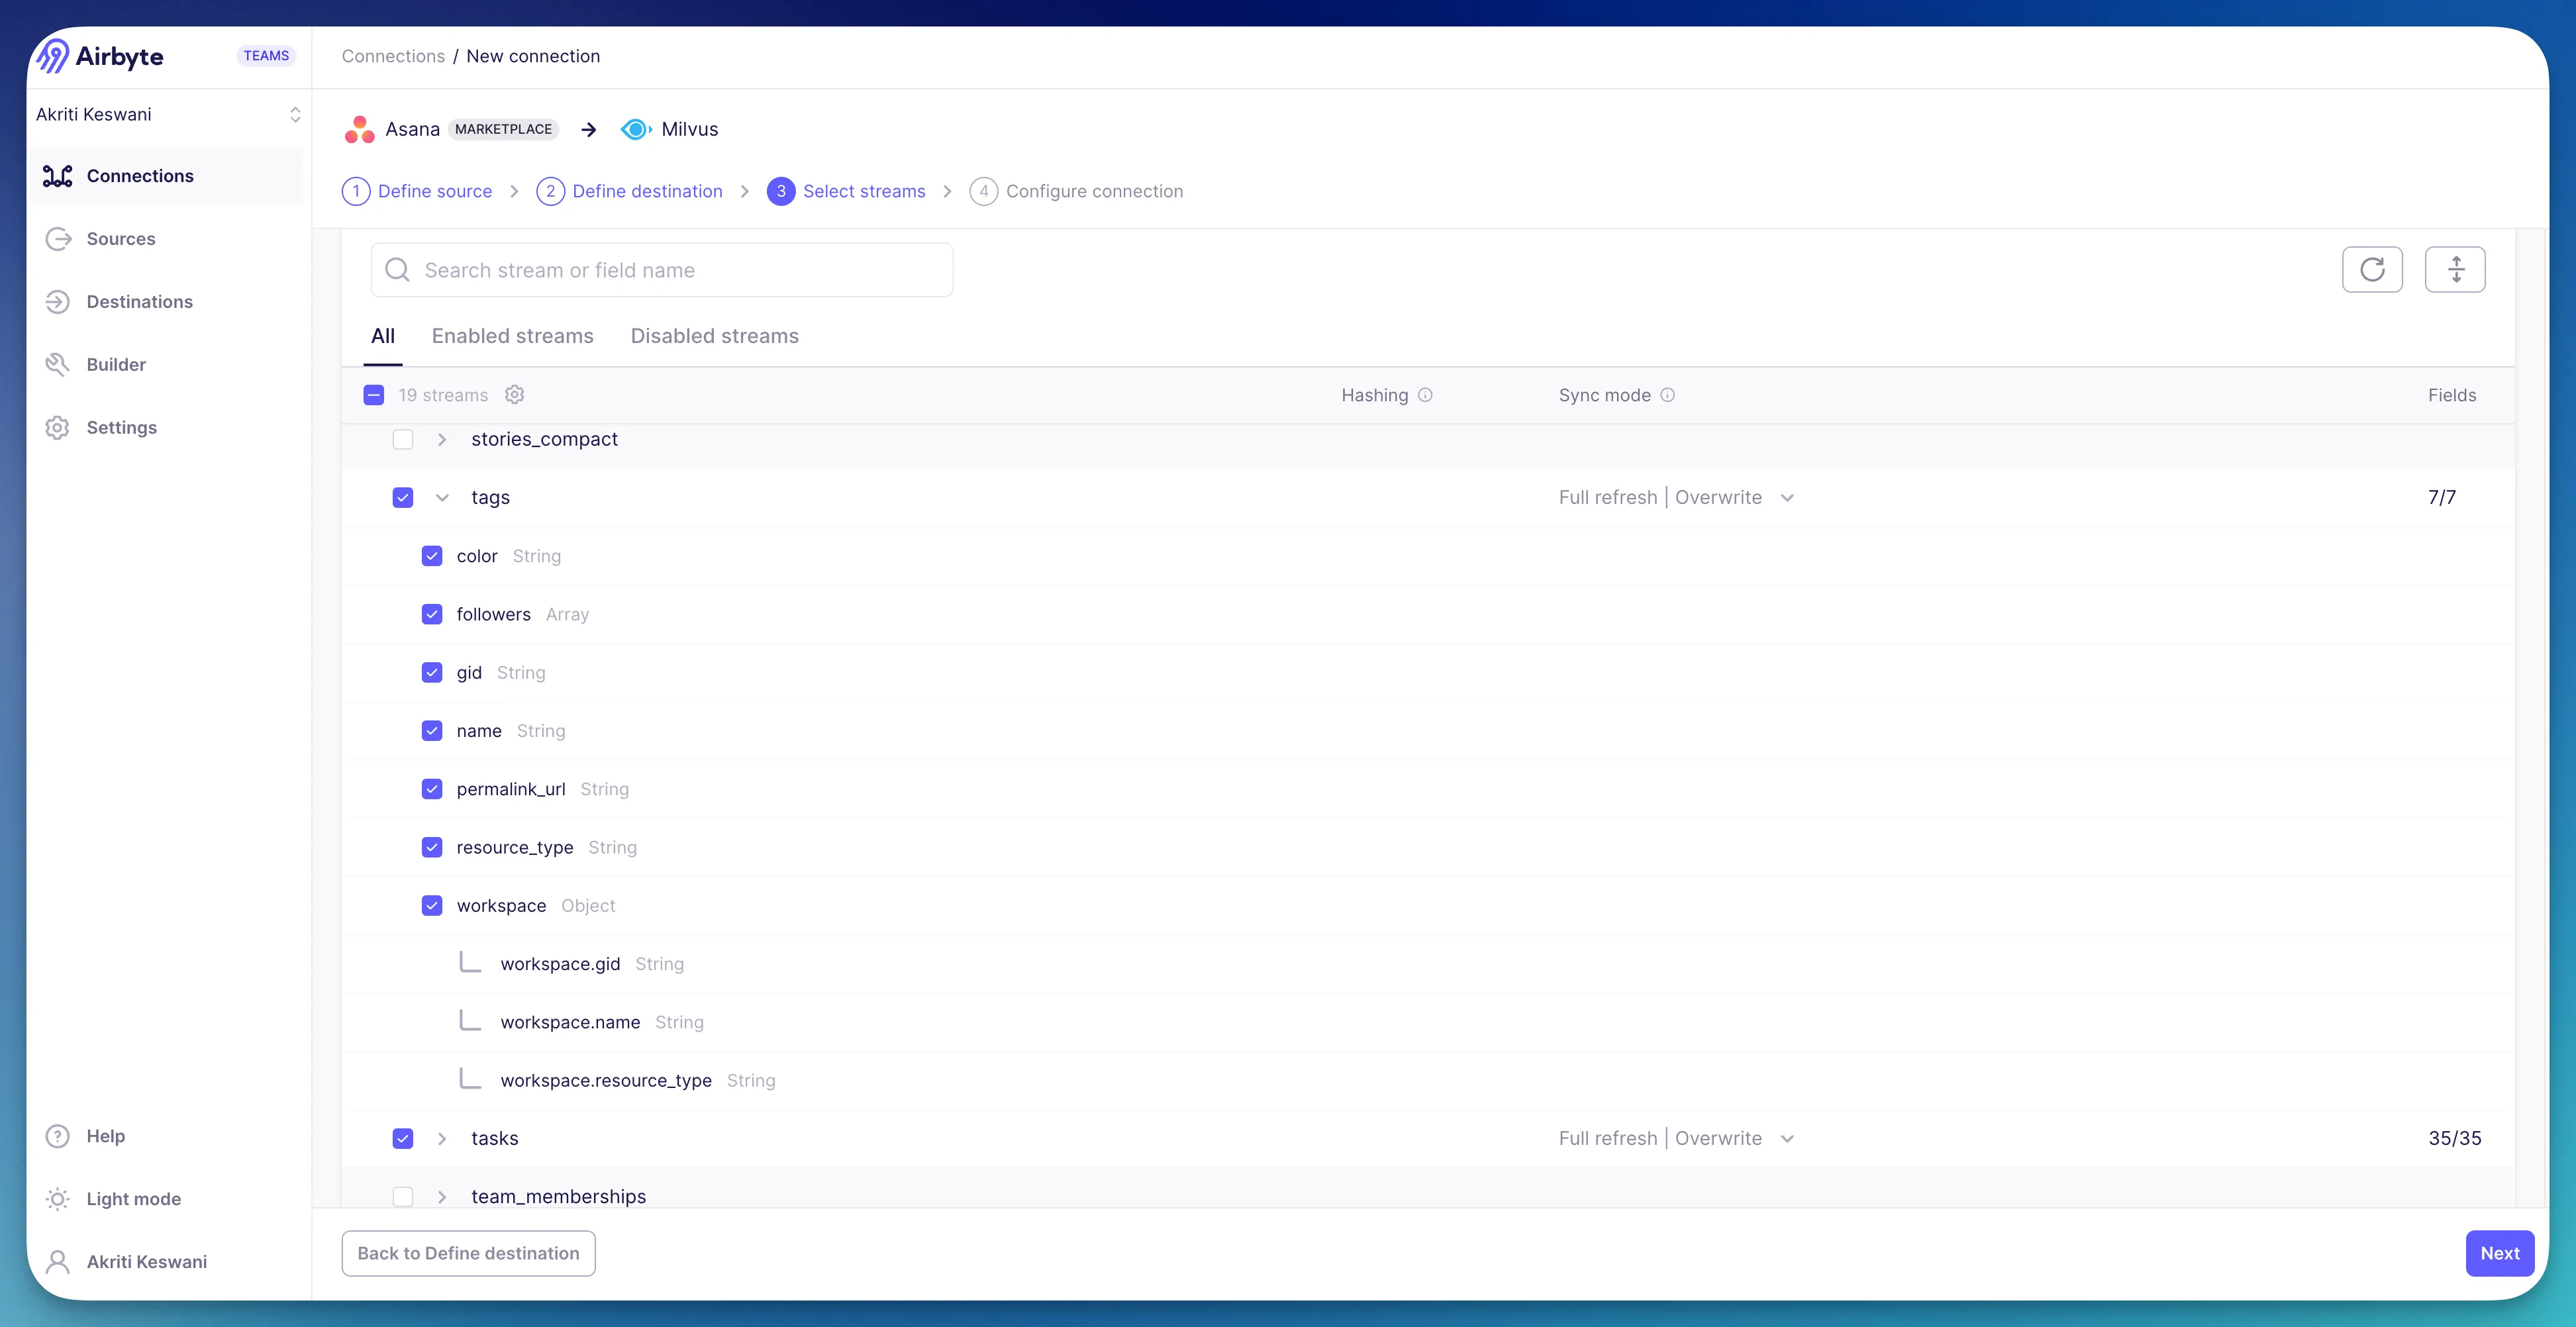
Clicking the Next button to proceed, we need to configure the connection in order to proceed with the sync.
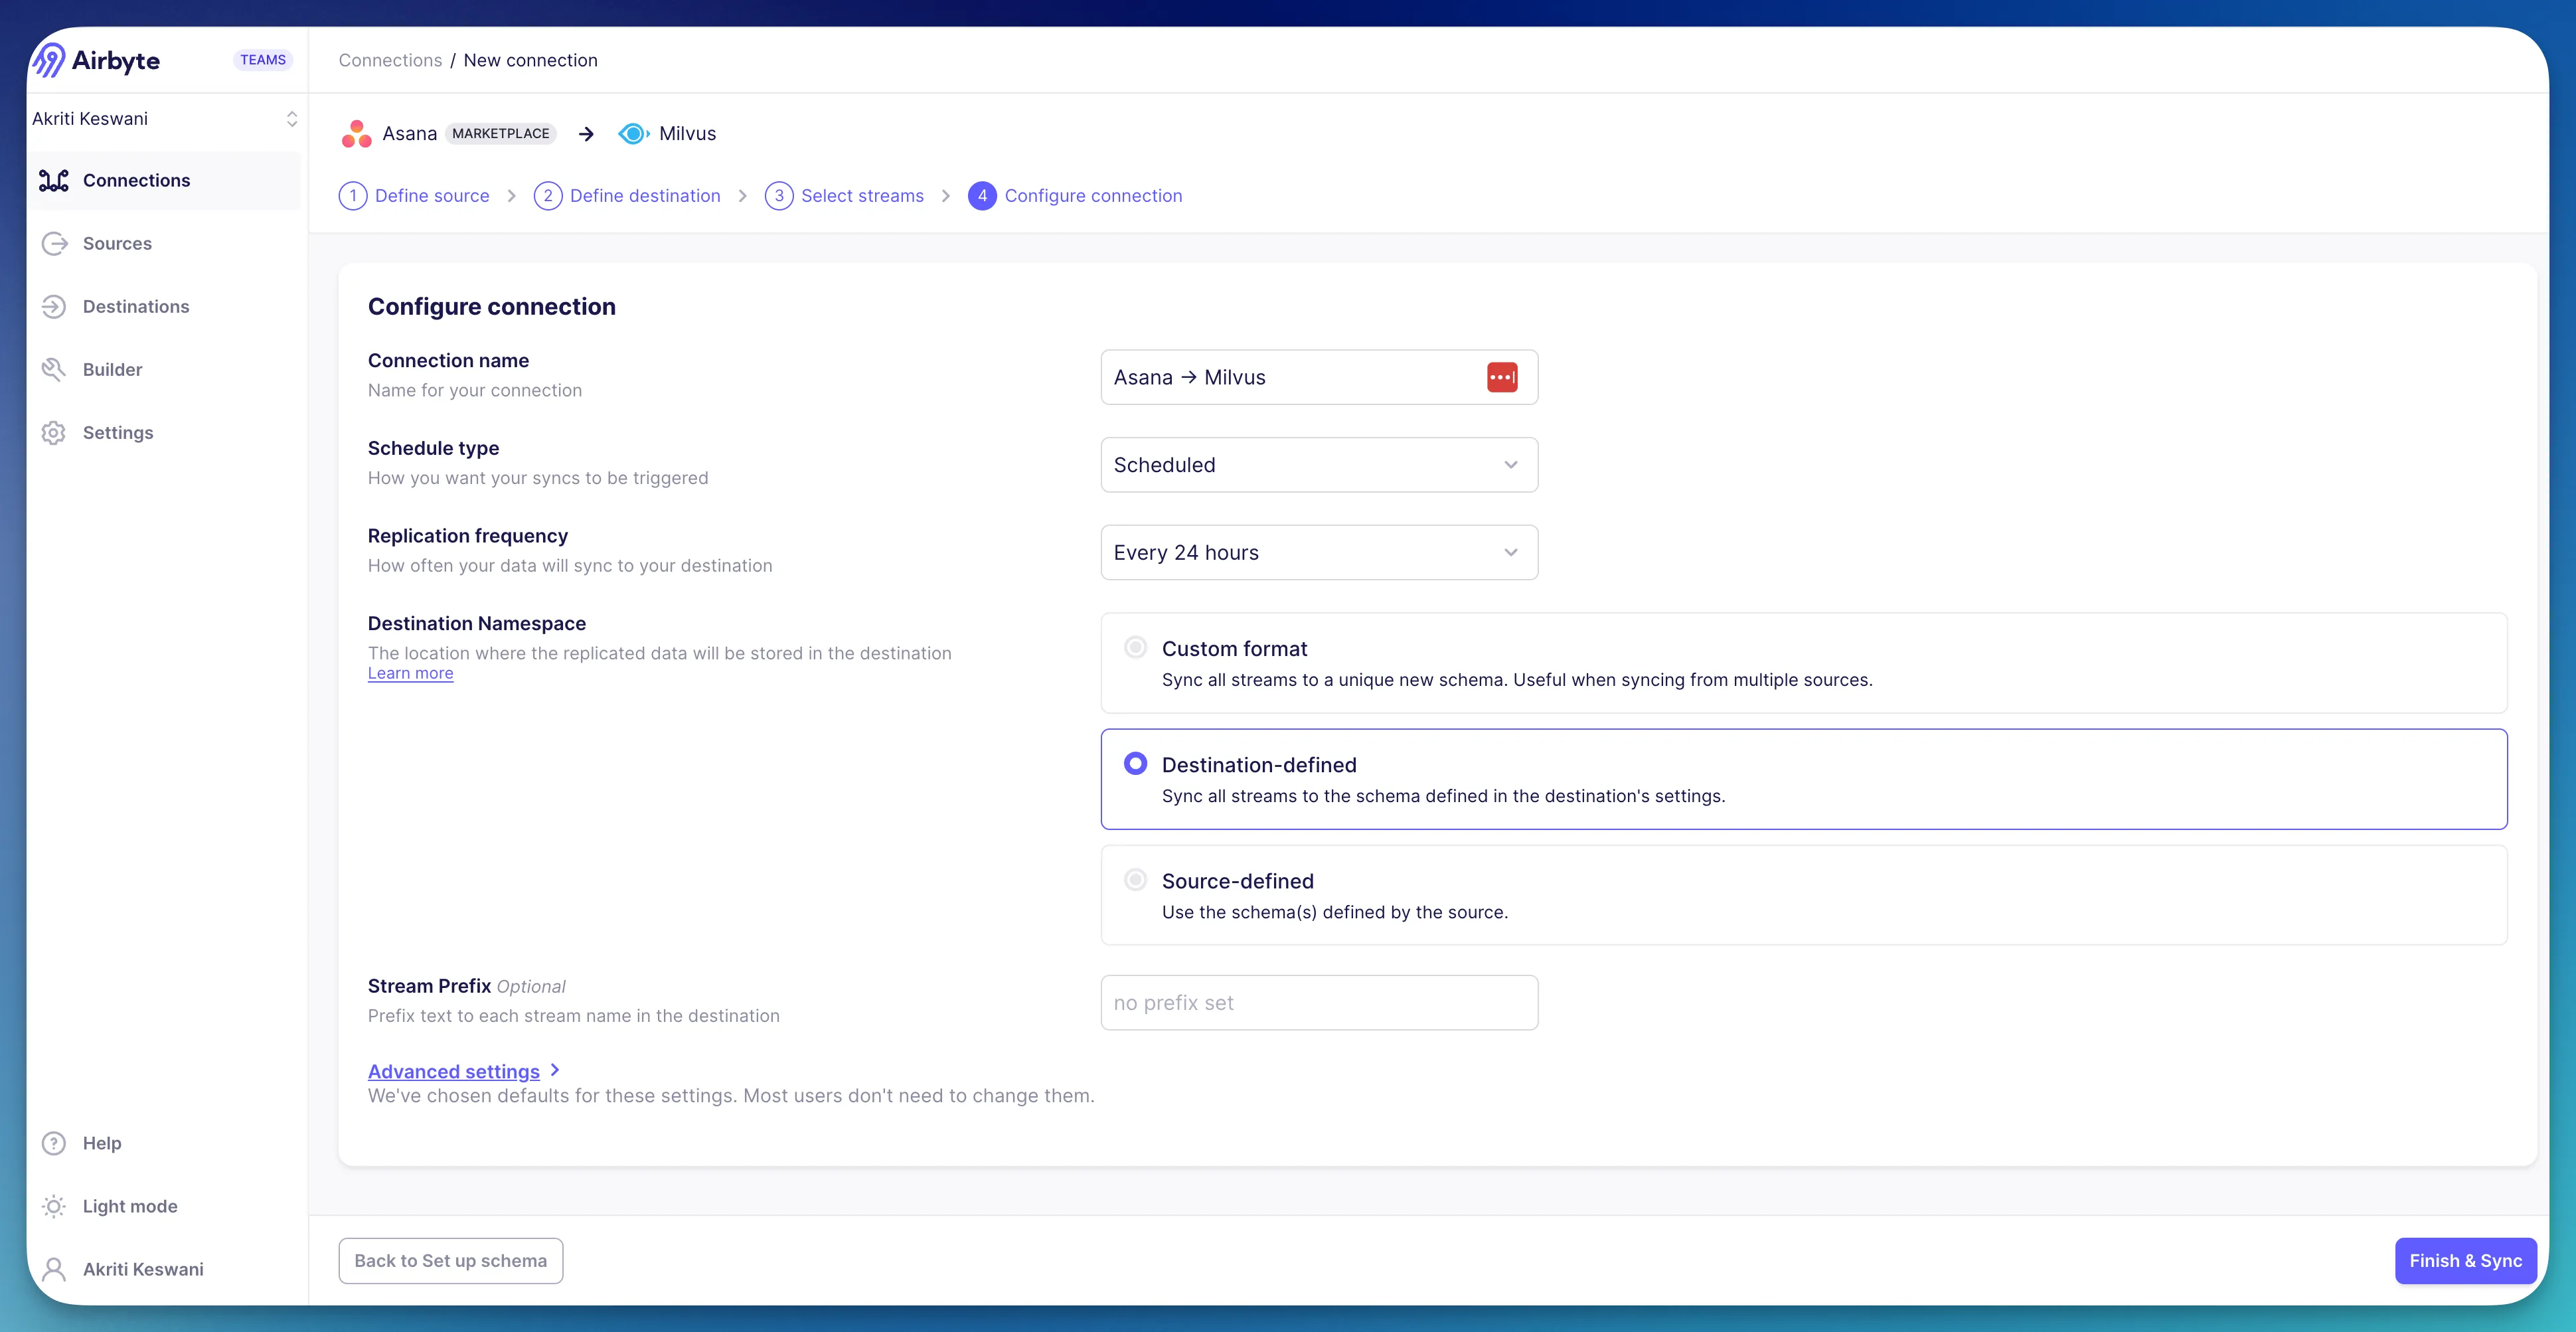
Note that the namespace is set to destination-defined here in this example, due to complex nature of vector databases and simplicity. Click “Finish & Sync” and your data is syncing now, and you should see your streams loading like this.
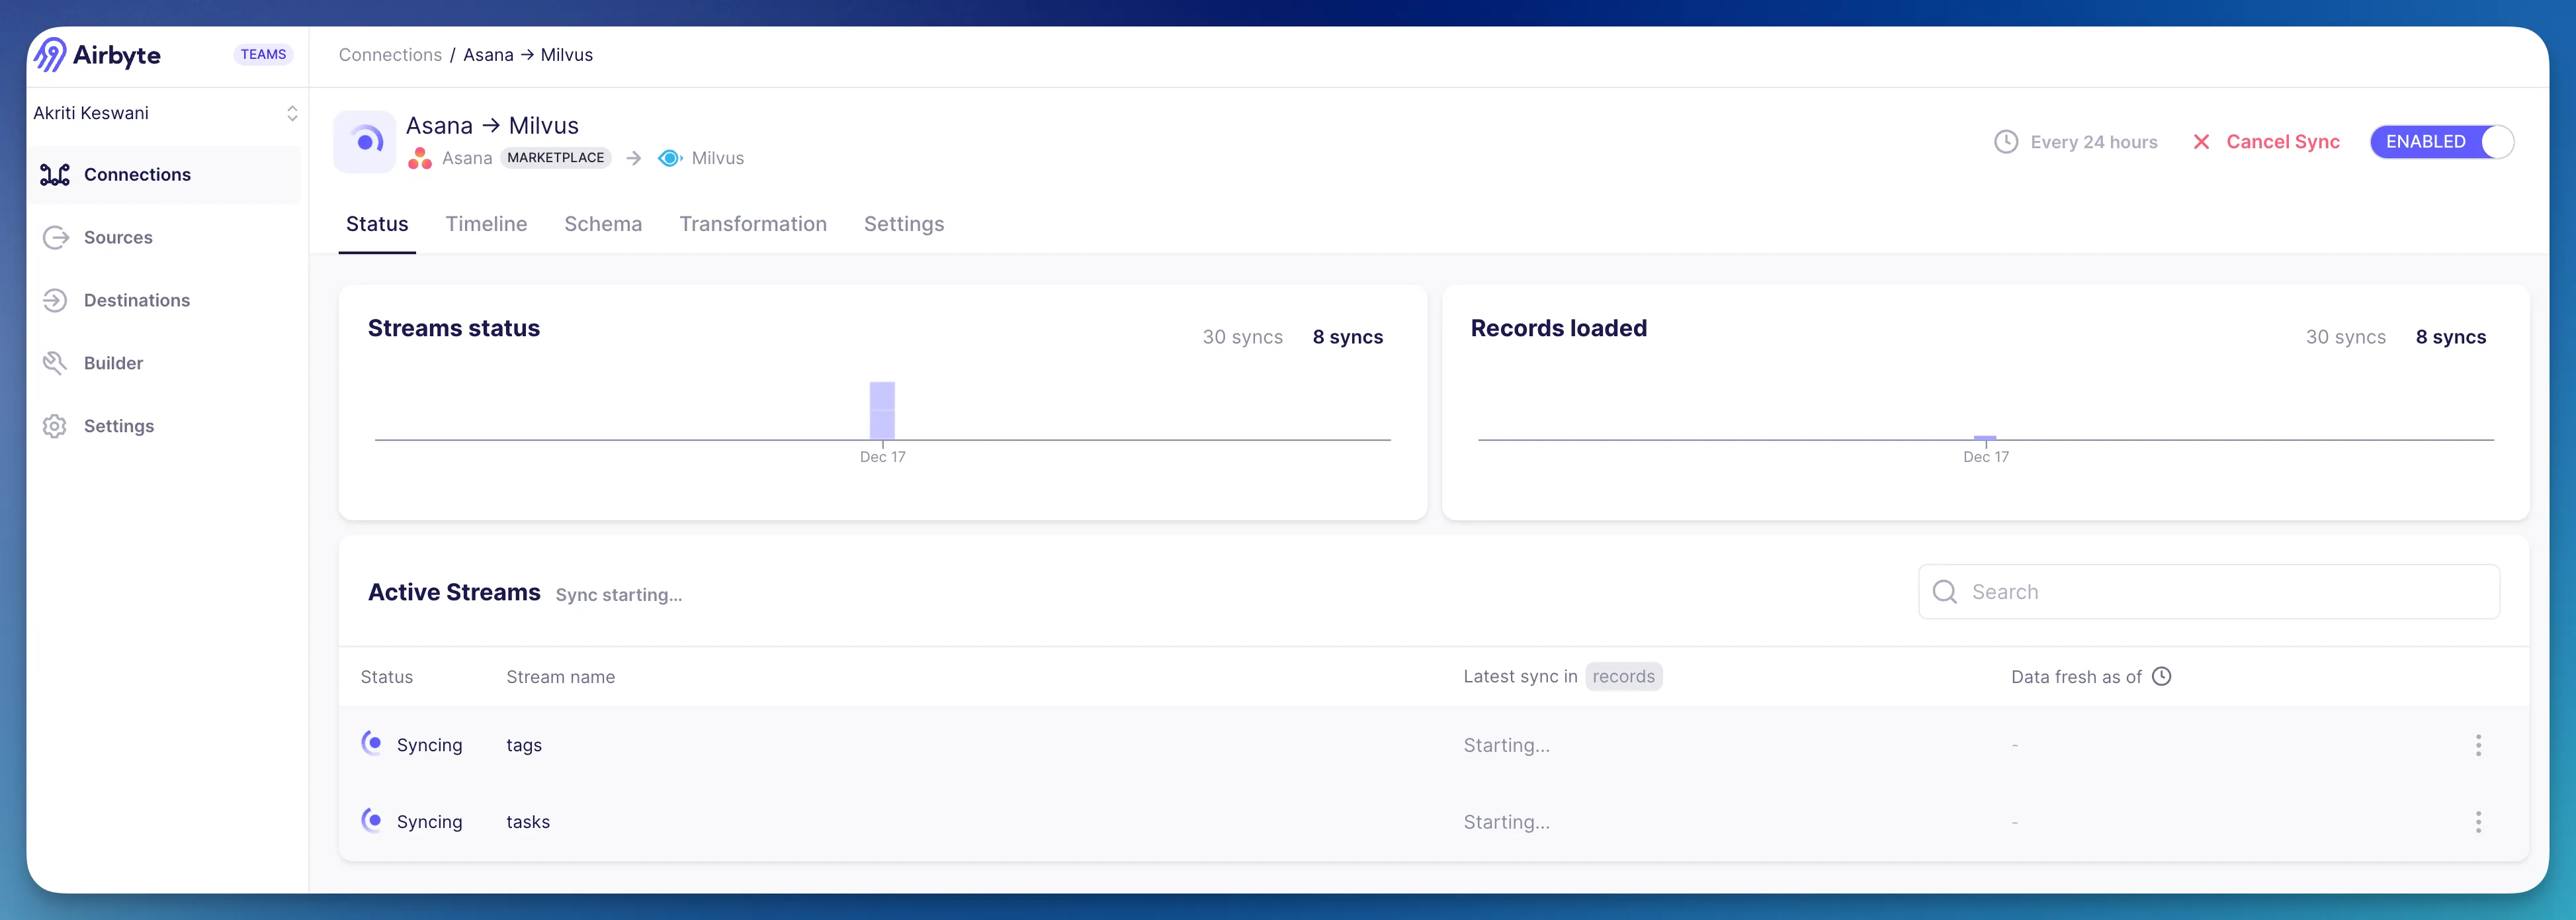
Now that the pipeline has been setup, you must be thinking, how do we even know the data was properly moved and vectorized? Well, a good way to check is by going into the Zilliz cluster & collection, and clicking on Data Preview. Should look something similar to this.

Having populated records is a good sign, and means data has indeed been converted/moved!
Great! Now that the connection and collection has been set, how do we build this app? It’s pretty easy to get lost in this process but with some neat steps, we can begin performing our AI operations!
In order to get a better idea of the structure of this app, now that we have built in some files, we can reference this directory structure for simplicity. Your app of course, does not have to replicate this, but it could be nice since we are using the App Router pattern (src/app), keeping API routes organized under /api, and placing relevant features in their respective folders such as shared components in utilities.
You can create a Next.js app using npx create-next-app@latest [project-name] [options] and start setting up the API routes.
If you want to be fancy, and are using the Cursor IDE, you can create a .cursorrules file in your project root that helps maintain the directory structure you want!
We will start of by setting up the .env.local file, as that contains our environment variables and secrets.
.env.local (project root)
Then we would set up our core services that accomplish the following:
The files corresponding to these would be set up following this structure:
/utils/openAI.ts - handles text embeddings and GPT responses using OpenAI's API
/utils/milvusClient.ts - initializes text embeddings and GPT responses using OpenAI's API
/utils/milvusConnection.ts - tests and verifies Milvus database connectivity
Now that we have the Milvus connection setup done, we need to find a way to maintain new tasks with vectors and more importantly, a way to search within those tasks for similarity. Setting up a taskVectorStore.ts class using a Singleton pattern sounds like a good solution here.
/utils/taskVectorStore.ts - core interface between the Milvus database and application logic
Oof, that’s lot, but we do need this Singleton pattern for some operations implemented by our /utils/asanaService.ts
This only handles the task names for simplicity, but ultimately as you select more data streams on the Airbyte platform when moving Asana data to Milvus, you can update this logic accordingly.
Lastly, we have to setup the most crucial route, the search! This is the ultimate magic do-er as it queries Milvus for similar tasks to the search keyword.
/api/tasks/search/route.ts - API endpoint that converts search text to embeddings and queries Milvus for similar tasks
Setting this route up should be a good indicator of whether the vector similarity search is working at all, as the Milvus connection needs to be tested for this, and more importantly, whether there is relevant data populated in the Milvus collection.
We have now handled everything from the data sync and vector operations to the API layer that actually accesses all this data. Now, the only step remaining is to make the app pretty, and do some UI, or in more technical terms, rendering this handy information on the frontend!
Start by creating a simple Dashboard.tsx component, in src/app.
This will be in src/app/dashboard/page.tsx as Next.js uses a file-system based router aka App Router. You may have noticed that these frontend files or components are .tsx and not .ts files - this is because they use JSX and helper functions (such as our utility files i.e. milvusConnection.ts) are fine with just being simple .ts files.
Now that we have ran through the initial dev setup, data pipeline, Next.js project, and frontend specifications, we are finally ready to compile, run, and deploy!
Running the app locally on http://localhost:3000/ will allow you to see the chatbot app and use the functionality!
You can also look back at the video of the app in action to see it in action!
With these steps, you can build a full-stack web application that ingests Asana data and performs useful AI operations on it! The data is always fresh and ready to be synced, and all you have to do is leverage the autonomy you have over when data is sent, and how it’s moved through our platform. Hopefully this saves you the crazy amounts of time on translating complicated API docs for every use case while ingesting and moving data. Happy coding! :)
Ready to build your own AI-powered application? Start with Airbyte - your future self will thank you! Start with a 14-day free trial and check out the product! We also have a Slack community to connect with other Airbyte users building cool stuff!
Download our free guide and discover the best approach for your needs, whether it's building your ELT solution in-house or opting for Airbyte Open Source or Airbyte Cloud.
