Learn how to scrape customer reviews from an Amazon product page, loading the data into Snowflake Cortex, and performing summarization.
Summarize this article with:
Analyzing customer reviews is crucial for businesses to gauge product sentiment, identify areas for improvement, and make data-driven decisions. By scraping and summarizing these reviews, businesses can gain valuable insights into customer preferences and opinions.
In this tutorial, we'll walk you through the process of scraping customer reviews from an Amazon product page, loading the data into Snowflake Cortex, and performing summarization. By the end, you'll have a comprehensive understanding of how to extract valuable insights from customer feedback using advanced data tools.
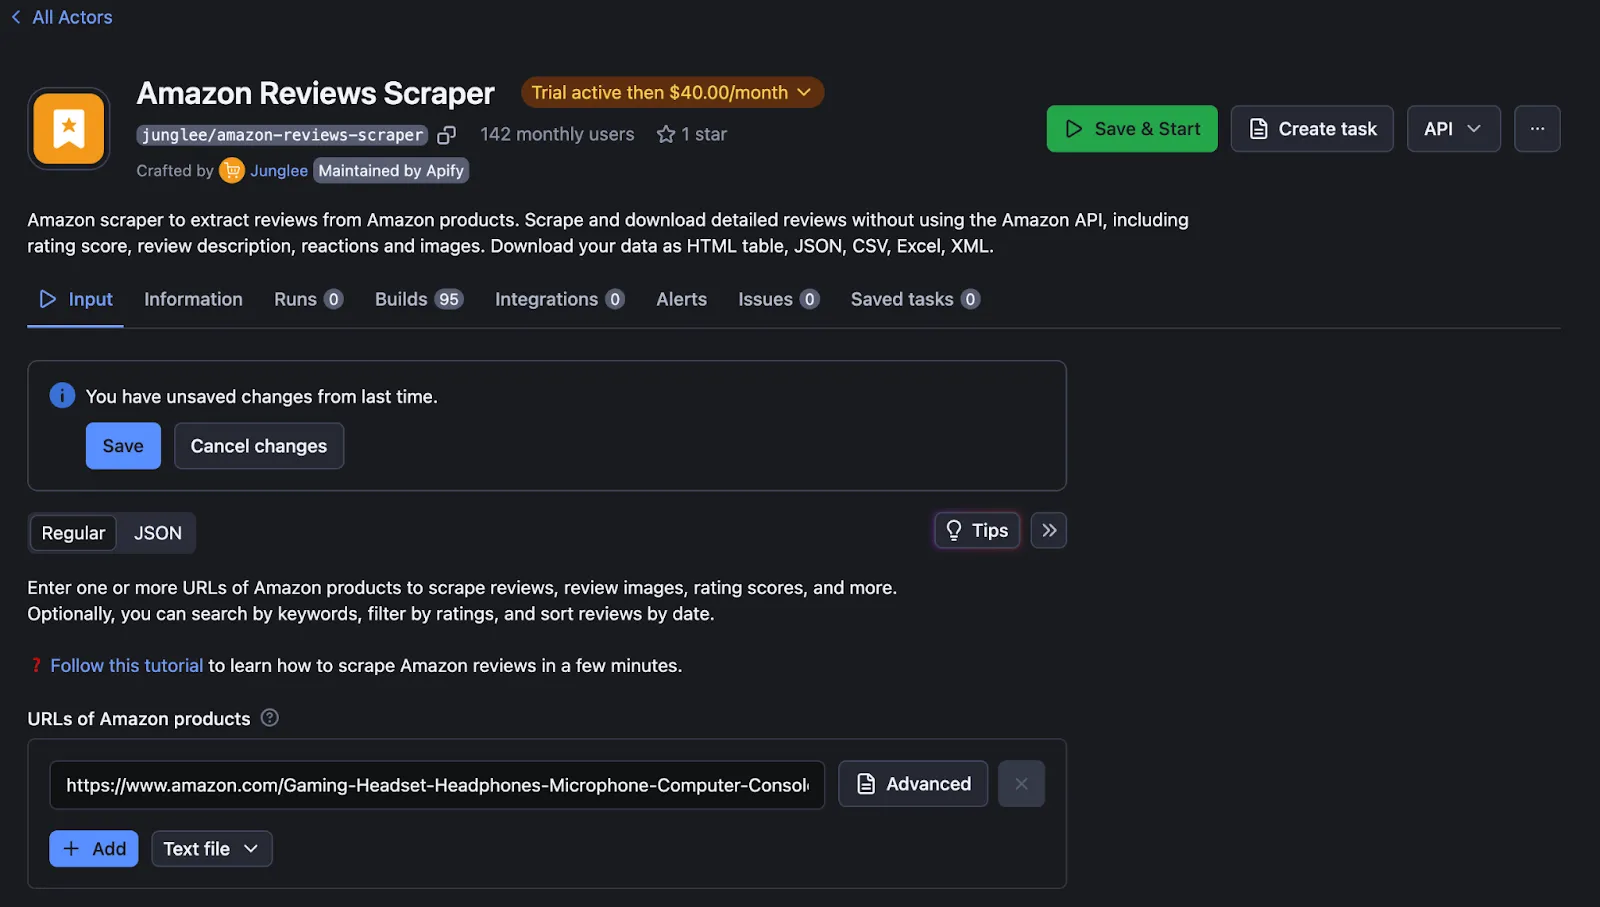
To begin analyzing the reviews of an Amazon product, first, locate and copy the URL of the product you wish to analyze. With the URL at hand, proceed to the Apify console to utilize the Amazon Review Scraper.
In the Apify console, search for the Amazon Review Scraper. Enter all the necessary details, including the URL of the product, any specific parameters for the review scraping, and any additional relevant information. Once all the required fields are filled out, save your settings and run the scraper.

After initiating the run, monitor its progress until completion. Upon completion, navigate to the storage section on the left-hand side of the Apify console. Here, you will find the dataset that contains the scraped reviews. Copy the dataset ID from this section, as it will be needed for the next steps.

Next, visit Airbyte Cloud to set up the data integration. Once logged in, click on the "Source" option and search for "Apify Dataset". When prompted, enter the dataset ID you copied earlier and your API token from Apify.

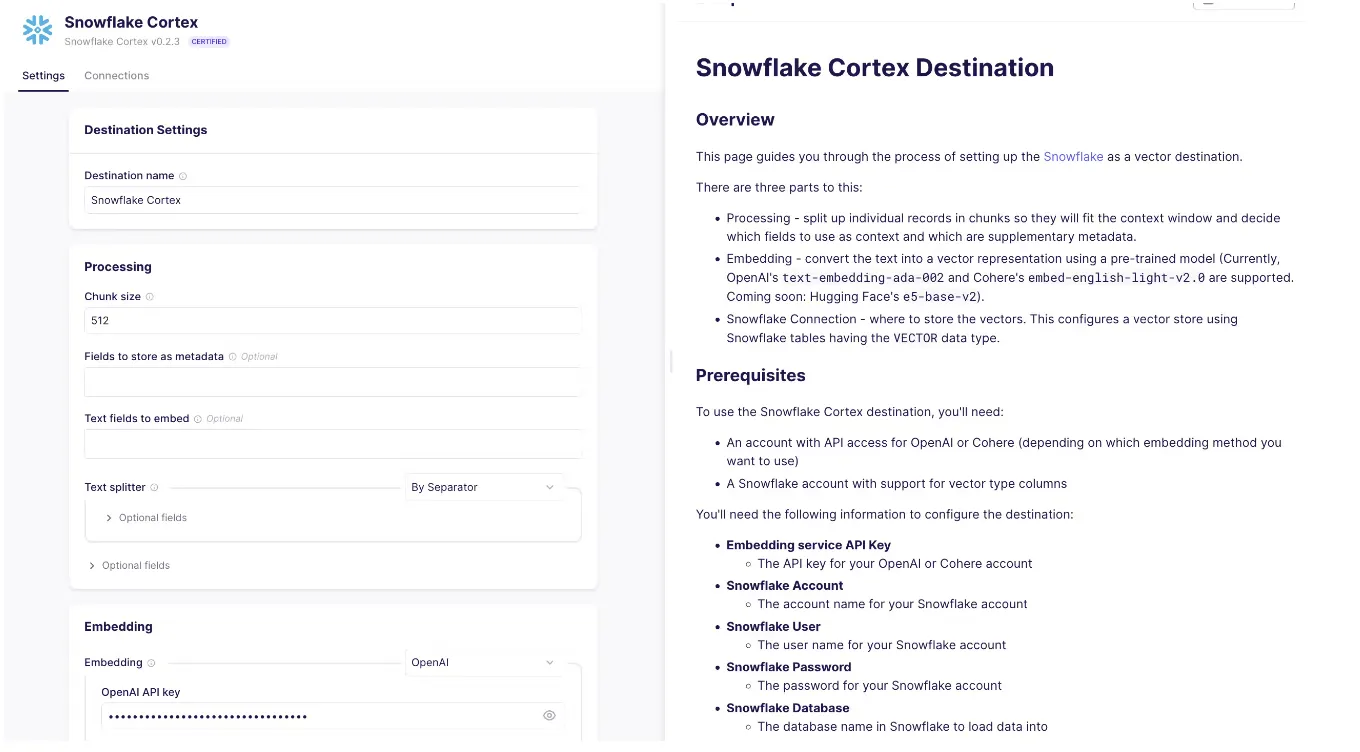
To select Sonwflake Cortex as destination in airbyte cloud, click on destination on left tab -> select new destination -> search "snowflake cortex" -> select "snowflake cortex"
Start Configuring the Snowflake Cortex destination in Airbyte:
To get the detail overview of snowflake cortex destination, checkout this

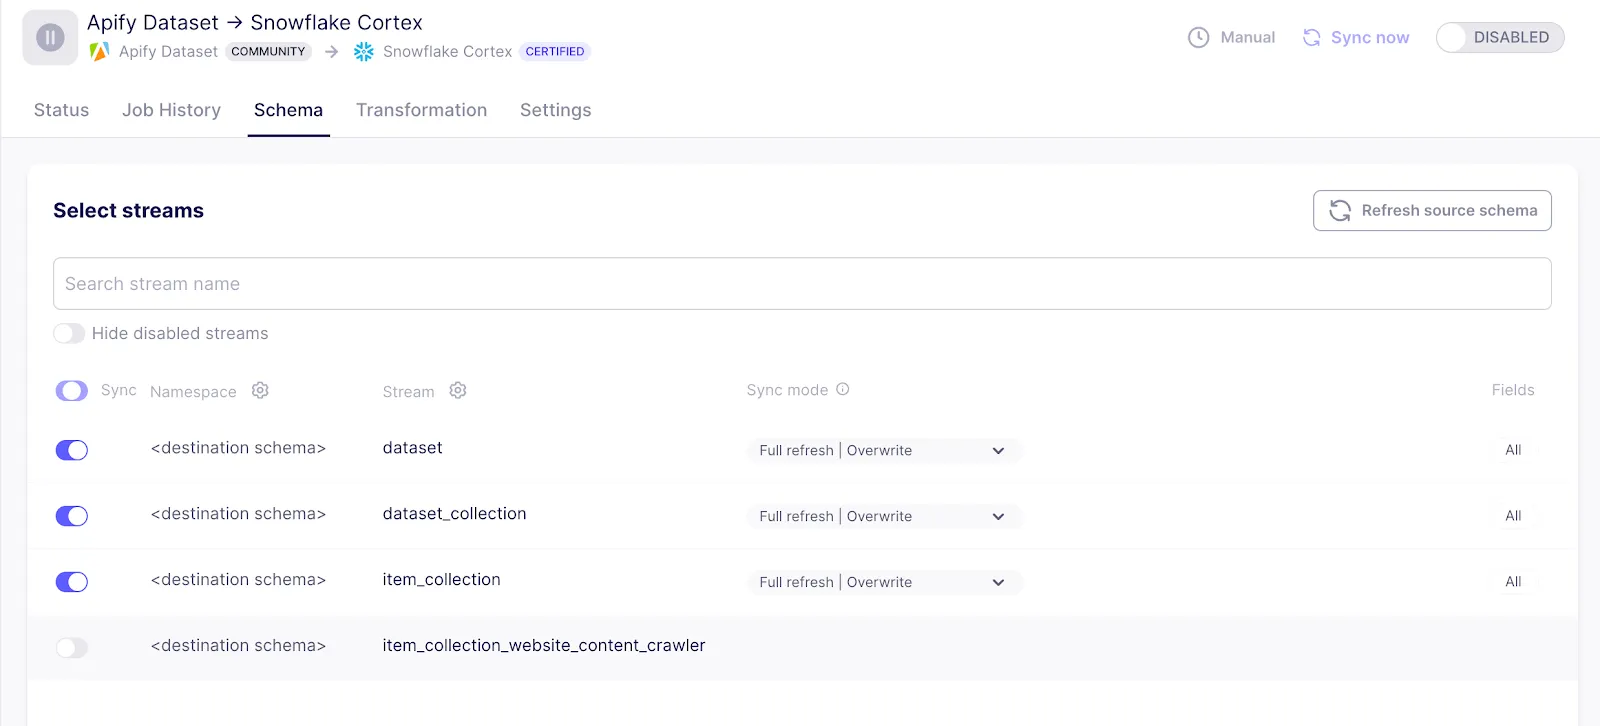
Now click on connection on left tab-> click on new connection -> Select Apify->Select snowflake cortex -> Now you will be able to see all stream you have created in apify source, Activate the streams (Remember to Turn off the item_collection_website_content_crawler stream otherwise the sync will fail) and click next on bottom right conner -> Now select schedule of jobs and click setup the connection

Now we can sync data from Apify_dataset to Snowflake Cortex

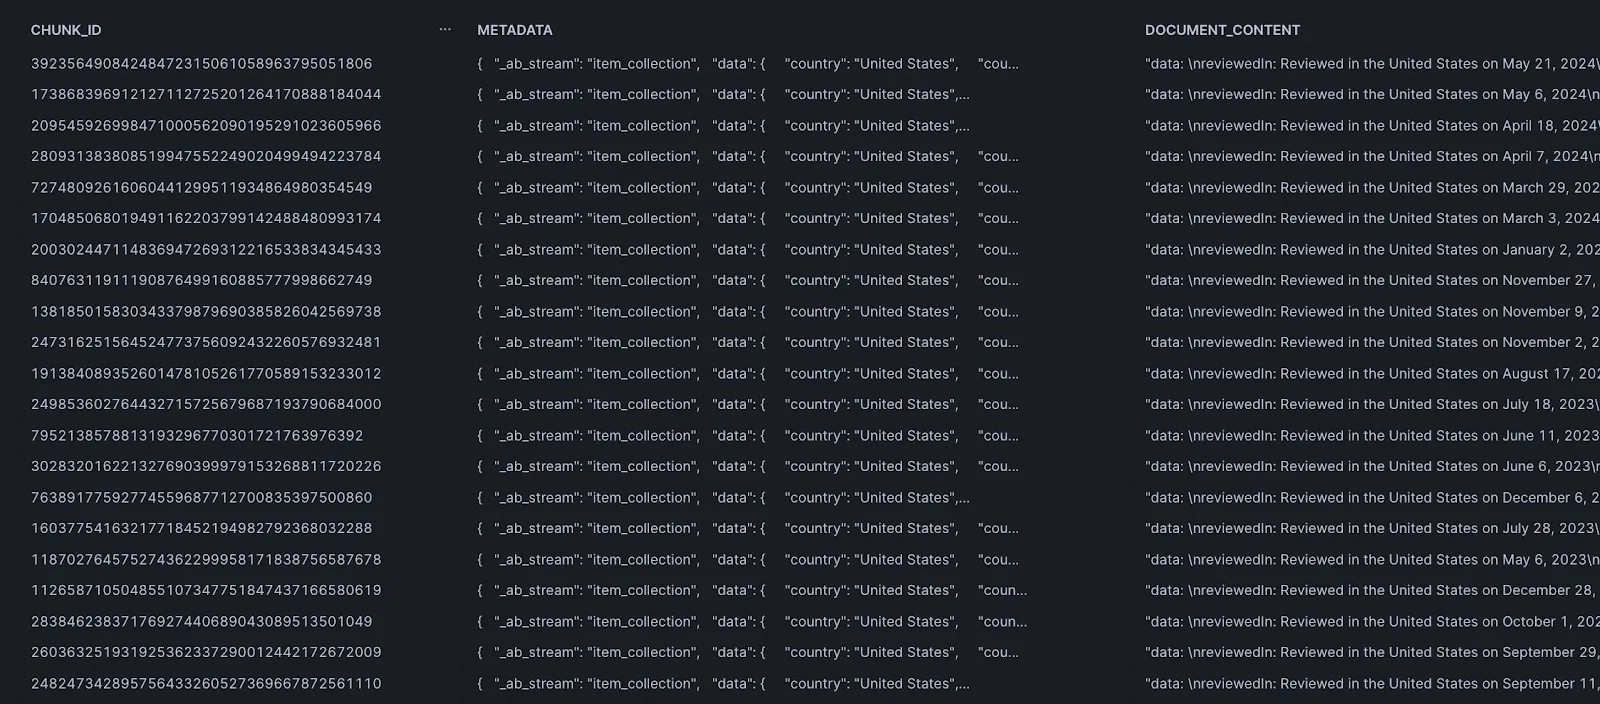
You should be able to see data in Snowflake. Each table corresponds to the stream we set up in Apify.
All tables have the following columns
Following is how data in snowflake looks like:

Retrieval-Augmented Generation (RAG) is an advanced natural language processing technique that combines retrieval-based and generation-based approaches to enhance the analysis and summarization of text data, such as customer reviews. The system first retrieves relevant documents or snippets from a large corpus of text. For review analysis, this involves selecting the most pertinent reviews based on keywords, topics, or specific queries and You can also ask different question just like chatgpt but on your reviews data.
For convenience, we have integrated everything into a Google Colab notebook. Explore the fully functional RAG code in Google Colab. You can copy this notebook and perform RAG . Please note that your table names and sources might be different from what's provided in the notebook.
When using the get_response method, you can pass either a single table name or a list of multiple table names. The function will retrieve relevant chunks from all specified tables and use them to generate a response. This approach allows the AI to provide a more comprehensive answer based on data from multiple sources.
Using Airbyte to integrate Apify and Snowflake Cortex for summarizing Amazon customer reviews provides several benefits. Airbyte simplifies the data pipeline setup, allowing seamless data extraction from Apify and loading into Snowflake Cortex without extensive coding. This integration enables efficient handling of large datasets, automated data flow, and real-time updates. Additionally, Snowflake Cortex's powerful summarization capabilities provide actionable insights into customer sentiment and key points from the reviews. Overall, this approach enhances productivity, reduces manual effort, and delivers valuable business intelligence for data-driven decision-making.
Download our free guide and discover the best approach for your needs, whether it's building your ELT solution in-house or opting for Airbyte Open Source or Airbyte Cloud.
