

Intercom is a customer messaging platform that helps businesses communicate with their customers in a personalized and efficient way. It offers a suite of tools that enable businesses to engage with their customers through targeted messaging, live chat, and email campaigns. Intercom also provides customer data and analytics to help businesses understand their customers better and make informed decisions. The platform is designed to help businesses build strong relationships with their customers, increase customer satisfaction, and ultimately drive growth. Intercom is used by thousands of businesses worldwide, including Shopify, Atlassian, and New Relic.
Chargify is a billing and revenue management system for B2B SaaS companies that provides a SaaS billing solution to handle free trial periods, one-time fees, promotions, refunds, email receipts. It is a recurring billing and subscription management platform designed for subscription-based businesses which aims to end the billing bottleneck for Web 2.0 and SaaS companies, allowing them to easily launch new products. Chargify is a worldly-recognized leader in the Recurring Billing and Subscription Management space that turns billing into a competitive edge

1. First, navigate to the Intercom source connector page on Airbyte.com.
2. Click on the "Create new connection" button.
3. Enter a name for your connection and click "Next".
4. Enter your Intercom credentials, including your Access Token and App ID.
5. Click "Test" to ensure that your credentials are correct and that Airbyte can connect to your Intercom account.
6. Once the test is successful, click "Next".
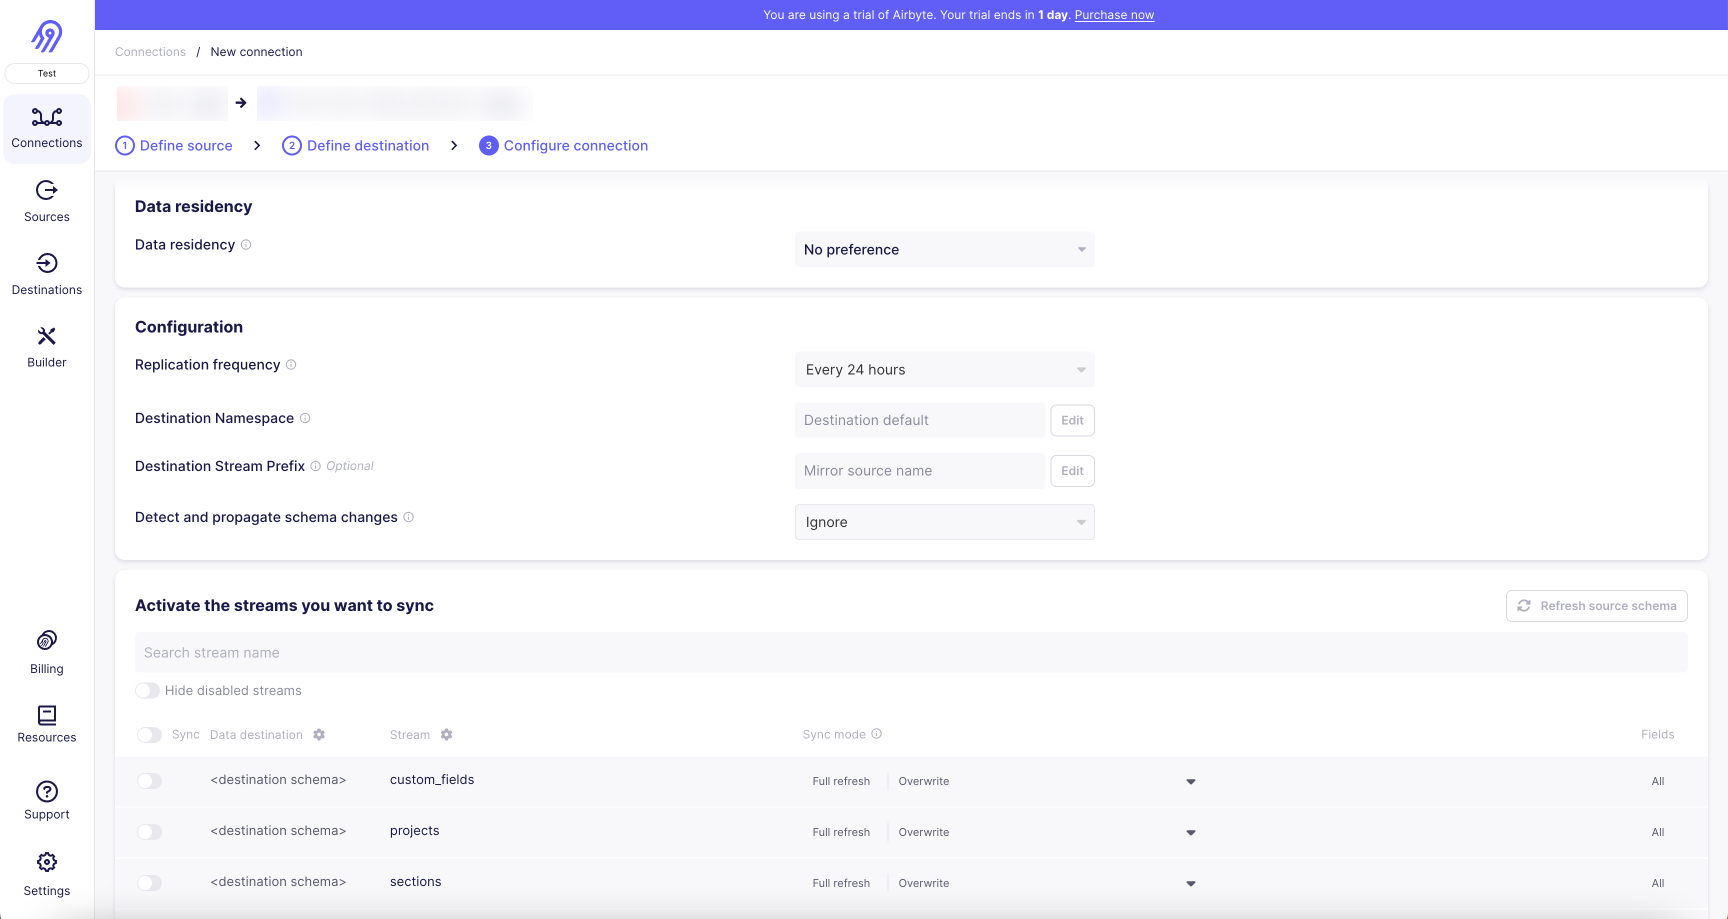
7. Select the data you want to replicate from Intercom, including conversations, users, and companies.
8. Choose the replication frequency and the destination where you want to send the data.
9. Click "Create connection" to finalize the setup.
10. Your Intercom source connector is now connected to Airbyte, and you can start replicating your data to your desired destination.
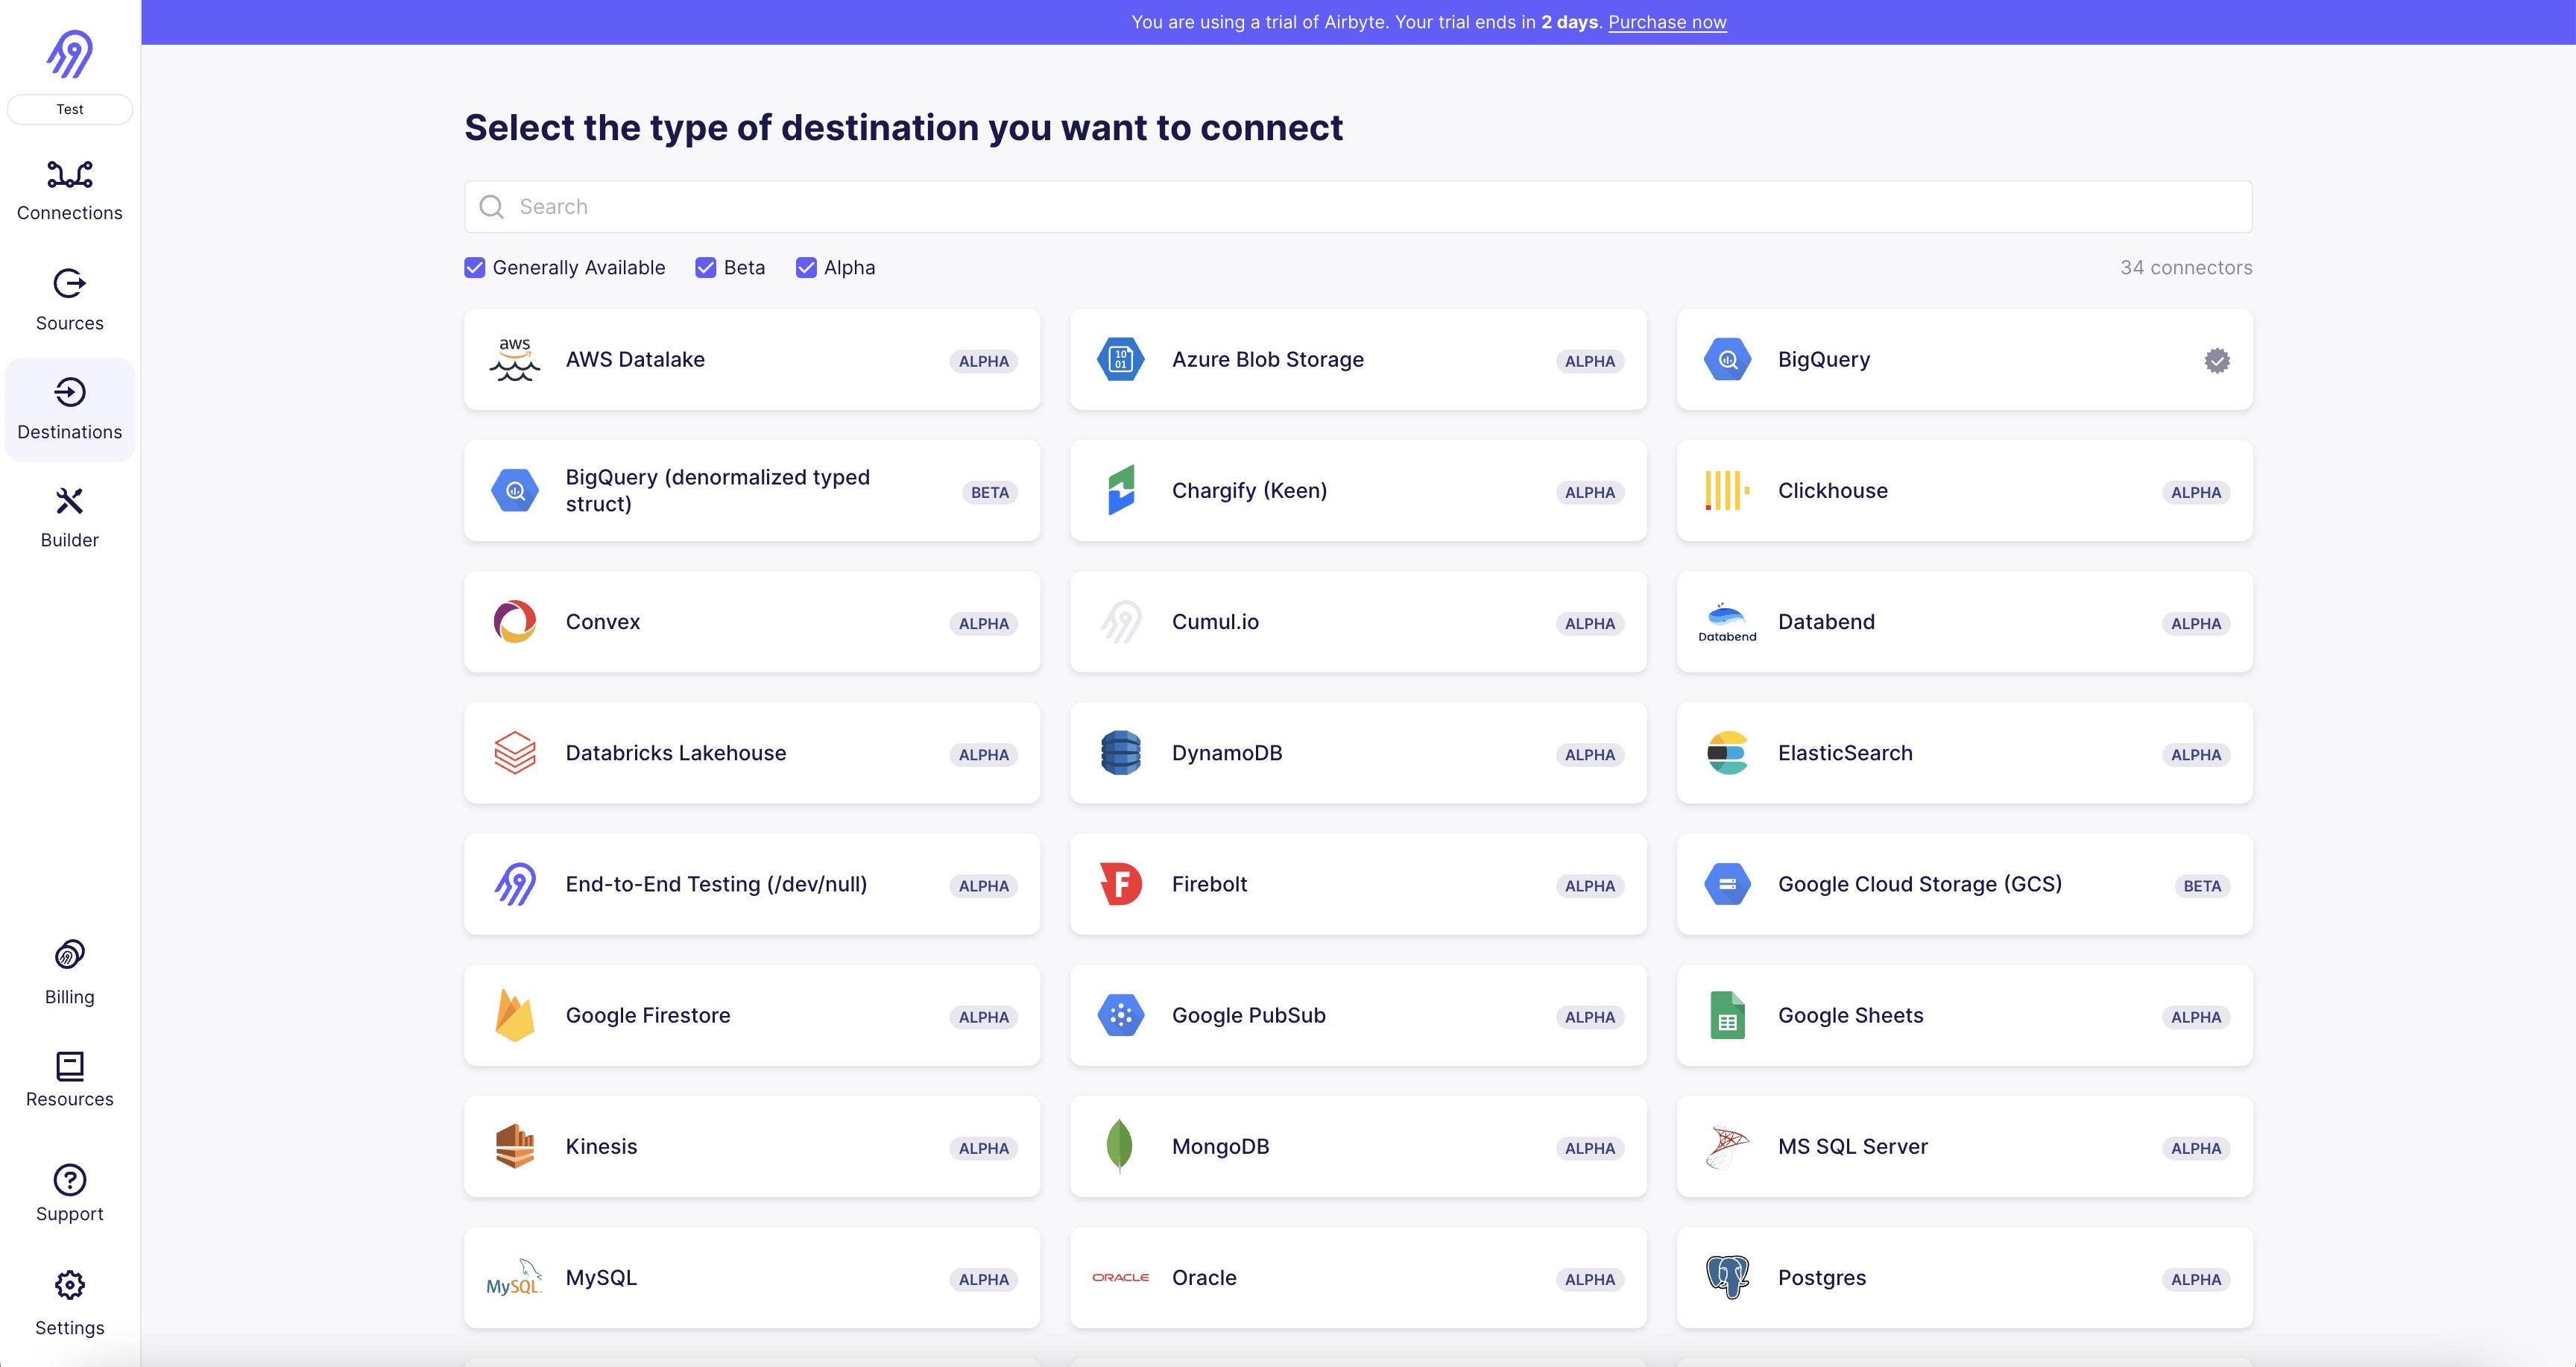
1. First, log in to your Airbyte account and navigate to the "Destinations" tab on the left-hand side of the screen.
2. Click on the "Add Destination" button and select "Chargify" from the list of available connectors.
3. Enter your Chargify API key and subdomain in the appropriate fields. If you don't have an API key, you can generate one in your Chargify account settings.
4. Choose the data you want to sync from Airbyte to Chargify by selecting the appropriate tables and fields.
5. Map the fields from your source data to the corresponding fields in Chargify. This will ensure that the data is properly formatted and can be successfully synced.
6. Test the connection by clicking on the "Test" button. This will verify that Airbyte can successfully connect to your Chargify account and that the data is being properly synced.
7. Once the test is successful, click on the "Save" button to finalize the connection. Your Chargify destination connector is now set up and ready to use.
With Airbyte, creating data pipelines take minutes, and the data integration possibilities are endless. Airbyte supports the largest catalog of API tools, databases, and files, among other sources. Airbyte's connectors are open-source, so you can add any custom objects to the connector, or even build a new connector from scratch without any local dev environment or any data engineer within 10 minutes with the no-code connector builder.
We look forward to seeing you make use of it! We invite you to join the conversation on our community Slack Channel, or sign up for our newsletter. You should also check out other Airbyte tutorials, and Airbyte’s content hub!
What should you do next?
Hope you enjoyed the reading. Here are the 3 ways we can help you in your data journey:


What should you do next?
Hope you enjoyed the reading. Here are the 3 ways we can help you in your data journey:
Should you build or buy your data pipelines?
Download our free guide and discover the best approach for your needs, whether it's building your ELT solution in-house or opting for Airbyte Open Source or Airbyte Cloud.

Ready to get started?
Frequently Asked Questions
Intercom's API provides access to a wide range of data related to customer communication and engagement. The following are the categories of data that can be accessed through Intercom's API:
1. Users: Information about individual users, including their name, email address, and user ID.
2. Conversations: Data related to customer conversations, including the conversation ID, message content, and conversation status.
3. Companies: Information about companies that use Intercom, including company name, ID, and size.
4. Tags: Data related to tags assigned to users and conversations, including tag name and ID.
5. Segments: Information about user segments, including segment name, ID, and criteria.
6. Events: Data related to user events, including event name, ID, and timestamp.
7. Custom attributes: Information about custom attributes assigned to users, including attribute name, value, and type.
8. Teammates: Data related to Intercom team members, including name, email address, and role.
Overall, Intercom's API provides a comprehensive set of data that can be used to analyze customer behavior, improve communication strategies, and enhance overall customer engagement.