Learn how to set up an end-to-end RAG pipeline using Airbyte Cloud, Amazon S3, and Snowflake Cortex.
Summarize this article with:
In this tutorial, we will guide you through setting up an end-to-end Retrieval-Augmented Generation (RAG) pipeline using Airbyte Cloud, Amazon S3, and Snowflake Cortex. Setting up a pipeline with Snowflake Cortex is quick, allowing you to load data from over 300 sources into your Snowflake-backed vector store in just a few minutes.
We will guide you through loading vector data into Snowflake using Snowflake Cortex and then leveraging Snowflake’s Cortex functions to perform Retrieval-Augmented Generation (RAG). Snowflake Cortex provides general-purpose ML functions, LLM-specific functions, and vector functions for semantic search, all backed by multiple models, without the need to manage or host the underlying infrastructure.
To select source s3 in airbyte cloud,
click on sources on left tab -> select new source -> search "S3" -> select "S3"
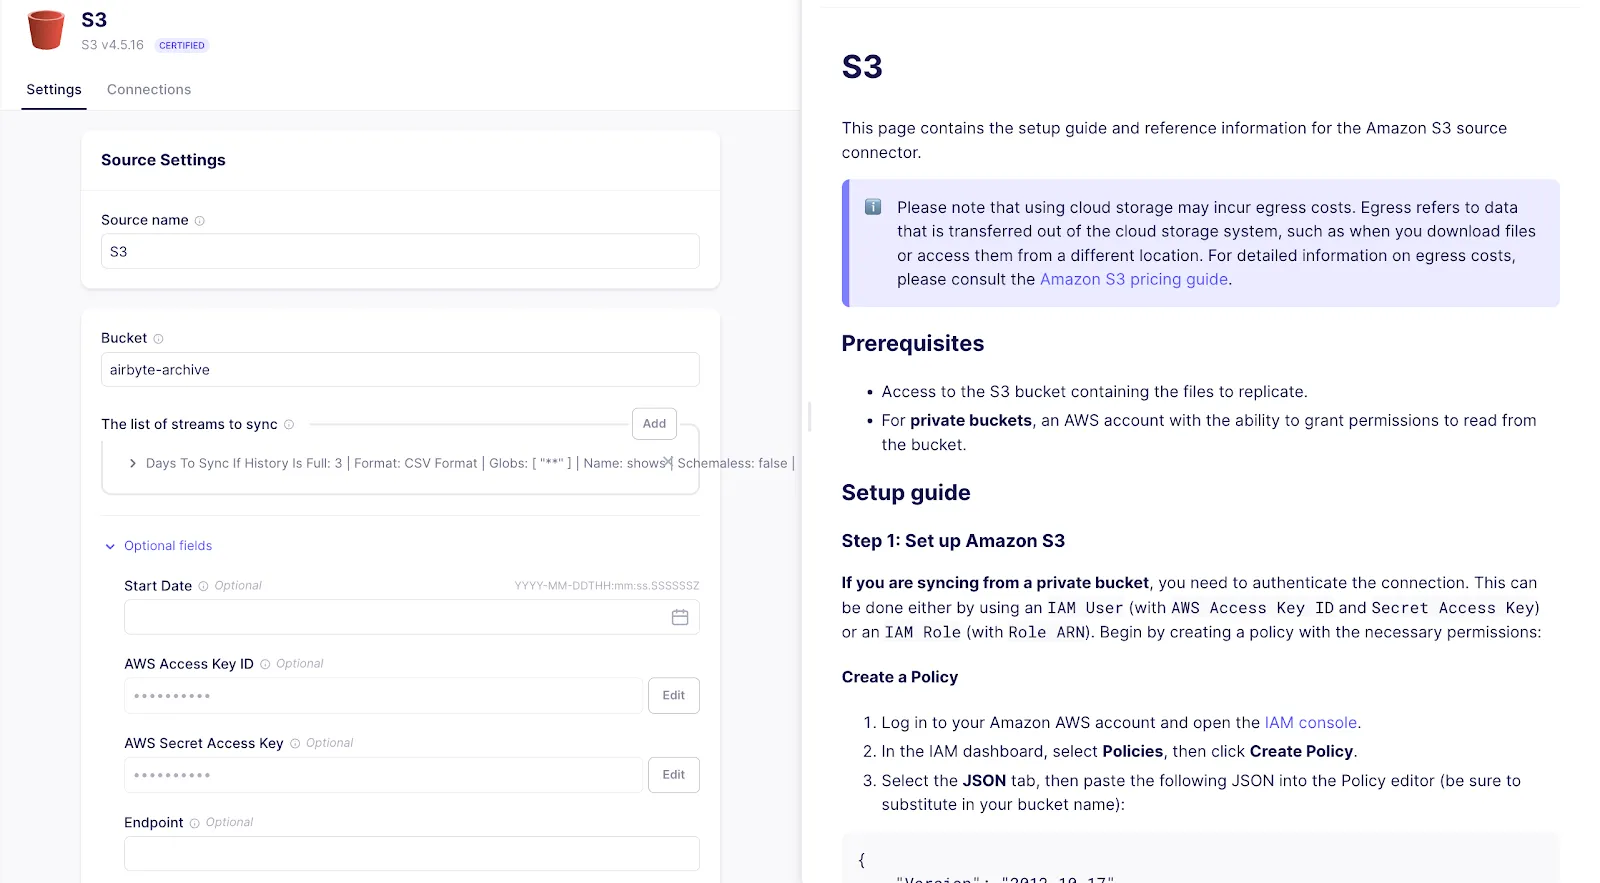
Follow the instructions in the AWS S3 Source Connector Documentation to set up your S3 bucket and obtain the necessary access keys.
To authenticate your private bucket:
More details about each field for S3 source setup are here.
All other fields are optional and can be left empty.
After this click on setup the source, once setup is successful we are ready to use S3 as a source.

To select Sonwflake Cortex as destination in airbyte cloud,
click on destination on left tab -> select new destination -> search "snowflake cortex" -> select "snowflake cortex"
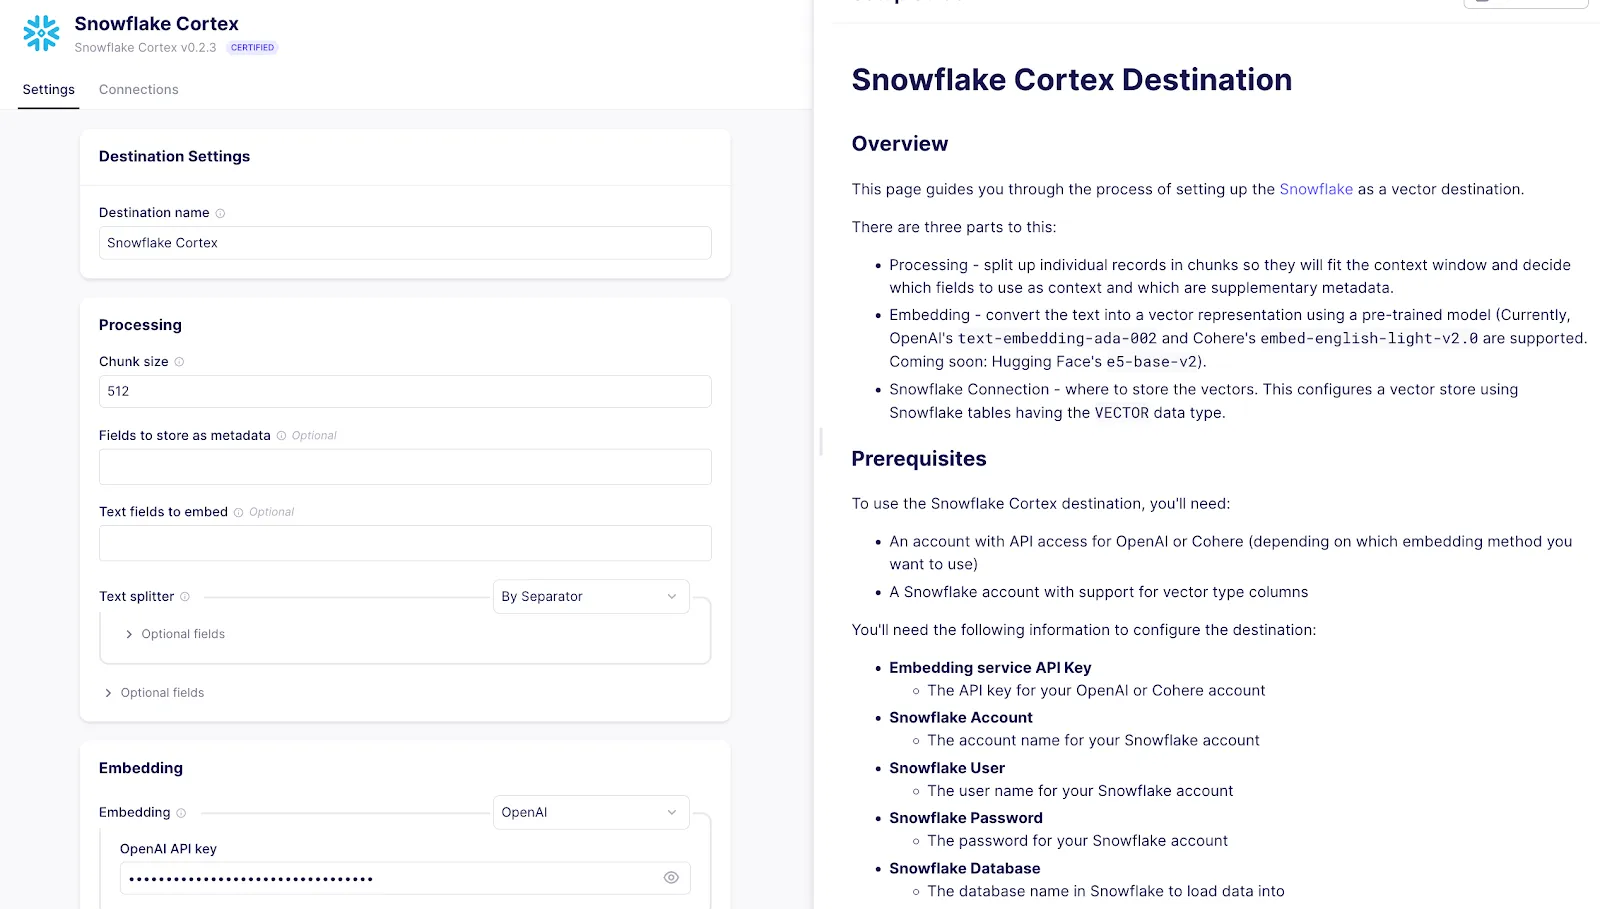
Start Configuring the Snowflake Cortex destination in Airbyte:
To get the detail overview of snowflake cortex destination, checkout this

Now click on connection on left tab->click on new connection -> Select S3 Source->
Select snowflake cortex -> Now you will be able to see all stream you have created in S3 source, Activate the stream and click next on bottom right conner -> Now select schedule of jobs and click setup the connection.
Now we can sync data from S3 to Snowflake Cortex

You should be able to see data in Snowflake. Each table corresponds to the stream we set up in S3.
All tables have the following columns
One of the result from table is

RAG enhances the capabilities of language models by retrieving relevant information from a database, thereby generating more accurate and contextually relevant responses. In this section, we'll walk you through setting up RAG using Snowflake Cortex.
For convenience, we have integrated everything into a Google Collab notebook. Explore the fully functional RAG code in Google Colab. You can copy this notebook and perform RAG .
# Putting it all together
def get_response(query, table_names, model_name="llama2-70b-chat"):
# Step 1: embed the query
embeddings = get_embedding_from_openai(query)
# Step 2: get similar chunks from sources/tables in Snowflake
chunks = get_similar_chunks_from_snowflake(embeddings.embed_query(query), table_names)
if (len(chunks) == 0):
return "I am sorry, I do not have the context to answer your question."
else:
# Step 3: send chunks to LLM for completion
return get_completion_from_snowflake(query, chunks, model_name)
When using the get_response method, you can pass either a single table name or a list of multiple table names. The function will retrieve relevant chunks from all specified tables and use them to generate a response. This approach allows the AI to provide a more comprehensive answer based on data from multiple sources.
# Ask a question
query = 'Which are the best comedy shows to watch?'
response = get_response(query, ["ITEM_COLLECTION"], "snowflake-arctic")
Console().print(f"\n\nResponse from LLM:\n\n[blue]{response}[/blue]")
In this tutorial, we demonstrated how to utilize Airbyte's Snowflake Cortex destination for Retrieval-Augmented Generation (RAG), showcasing how to seamlessly integrate data from S3 and leverage Snowflake's Cortex functions and OpenAI's language models. This powerful combination allows for building intelligent AI-driven applications, such as chatbots and knowledge management systems, that can answer complex questions based on comprehensive data analysis. Airbyte simplifies the process of connecting and loading data from over 300 sources into Snowflake, making it an invaluable tool for efficient and scalable data integration, ultimately enhancing the capabilities of your AI solutions.
Download our free guide and discover the best approach for your needs, whether it's building your ELT solution in-house or opting for Airbyte Open Source or Airbyte Cloud.
