Learn how to add custom sources built from the Connector Builder to PyAirbyte, Airbyte's open-source Python library.
Summarize this article with:
PyAirbyte is an open-source library that packages Airbyte connectors and makes them available in Python, while removing the need for hosted services. This library is built for developers, providing them with the capability to construct customized data pipelines that extract data from multiple sources.
You can explore all pre-built connectors, ready to be utilized in your data pipelines, through various methods. One way is by accessing the official repository of Airbyte connectors in the master branch of airbytehq/airbyte.
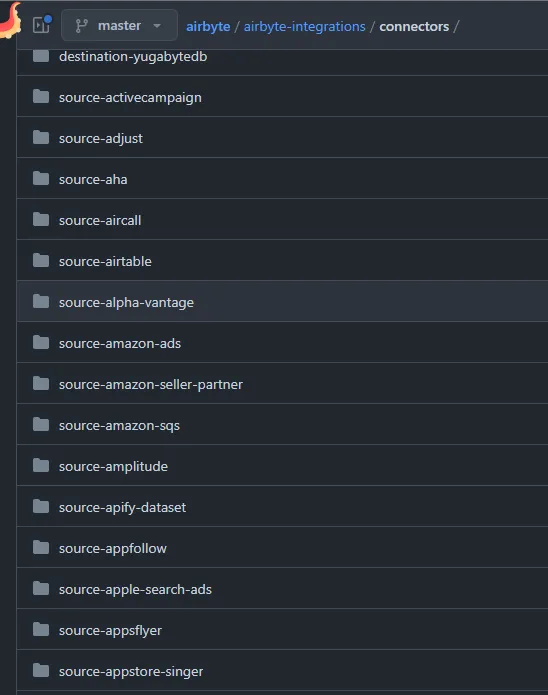
You can also obtain a list of all available connectors by installing Airbyte in a Jupyter Notebook using pip, then execute the following line of code:
There are several methods for building new connectors in Airbyte. Many of the connectors included in the PyAirbyte source are defined with a manifest.yaml file. This file defines all the specifications required for the connector to function, including the streams that define the data schema for syncing in the Airbyte platform. A stream often corresponds to a resource within your API.
Below is a sample YAML file that defines the source-pokeapi connector, which is available in the official repository of Airbyte connectors.\
To define our custom connector, we will utilize the platform provided by Airbyte for this purpose, known as the Connector Builder in Airbyte Cloud.
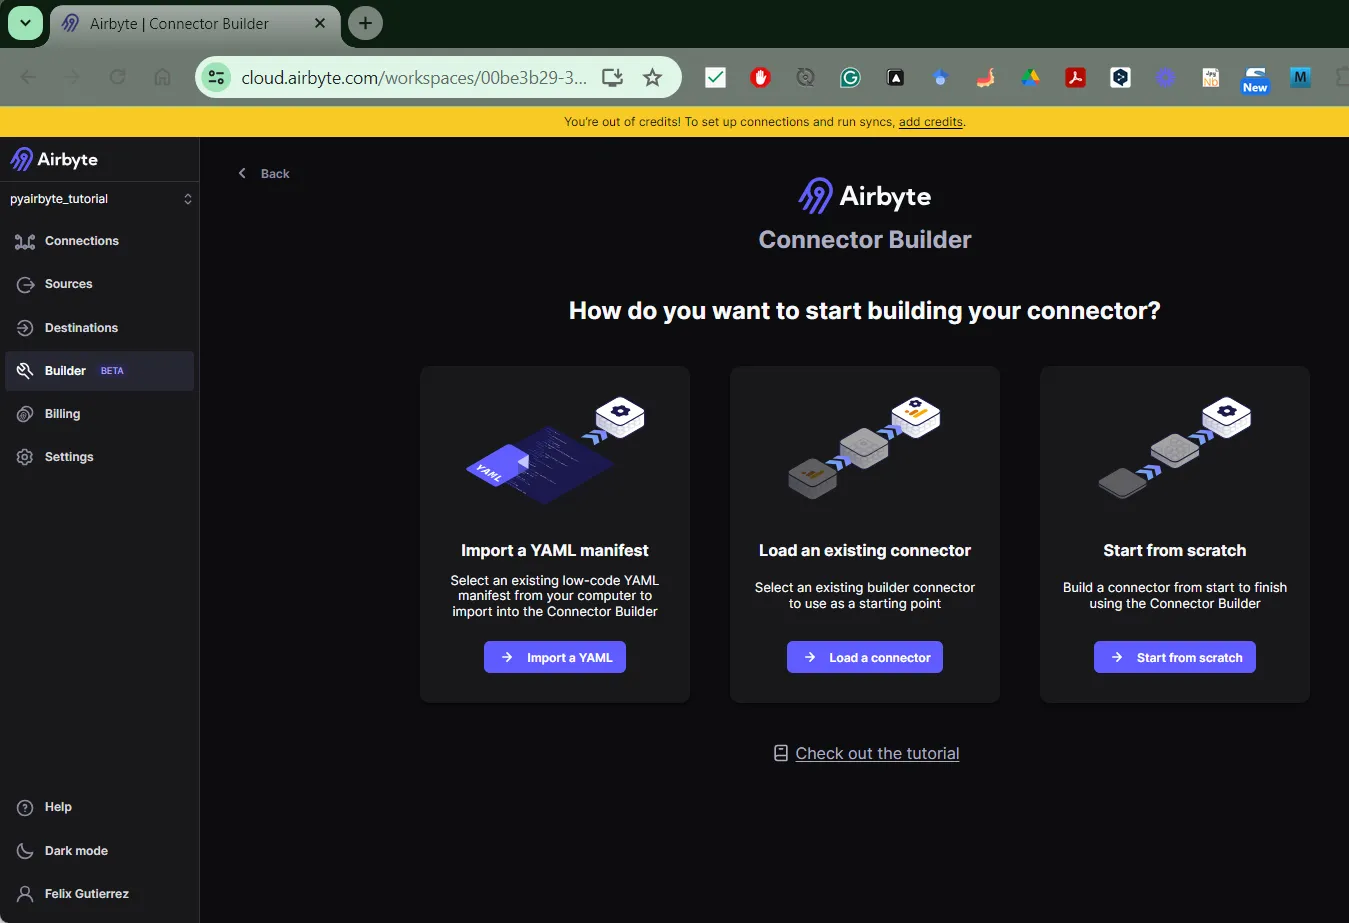
Shown below is the home page of the connector Builder. You can import a YAML file that you have developed on your own, load an existing connector (one of the manifest.yml available in the airbyte-integration GitHub page for example), or start a connector from scratch which we will show later in this blog post.
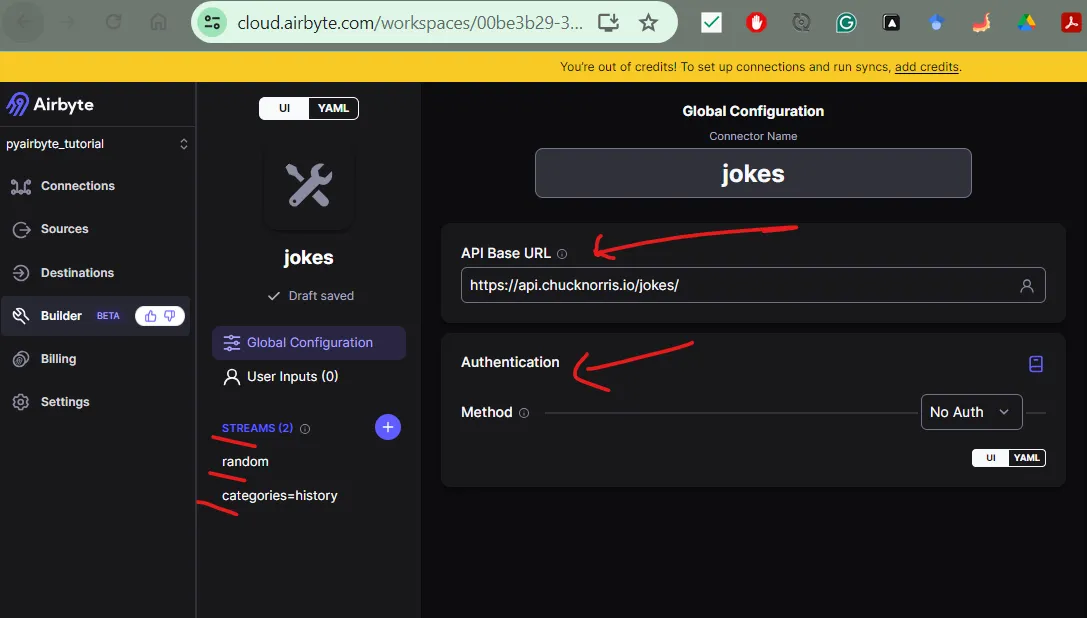
Here are some mandatory fields that you will need to fill in the Global configuration of your connector:
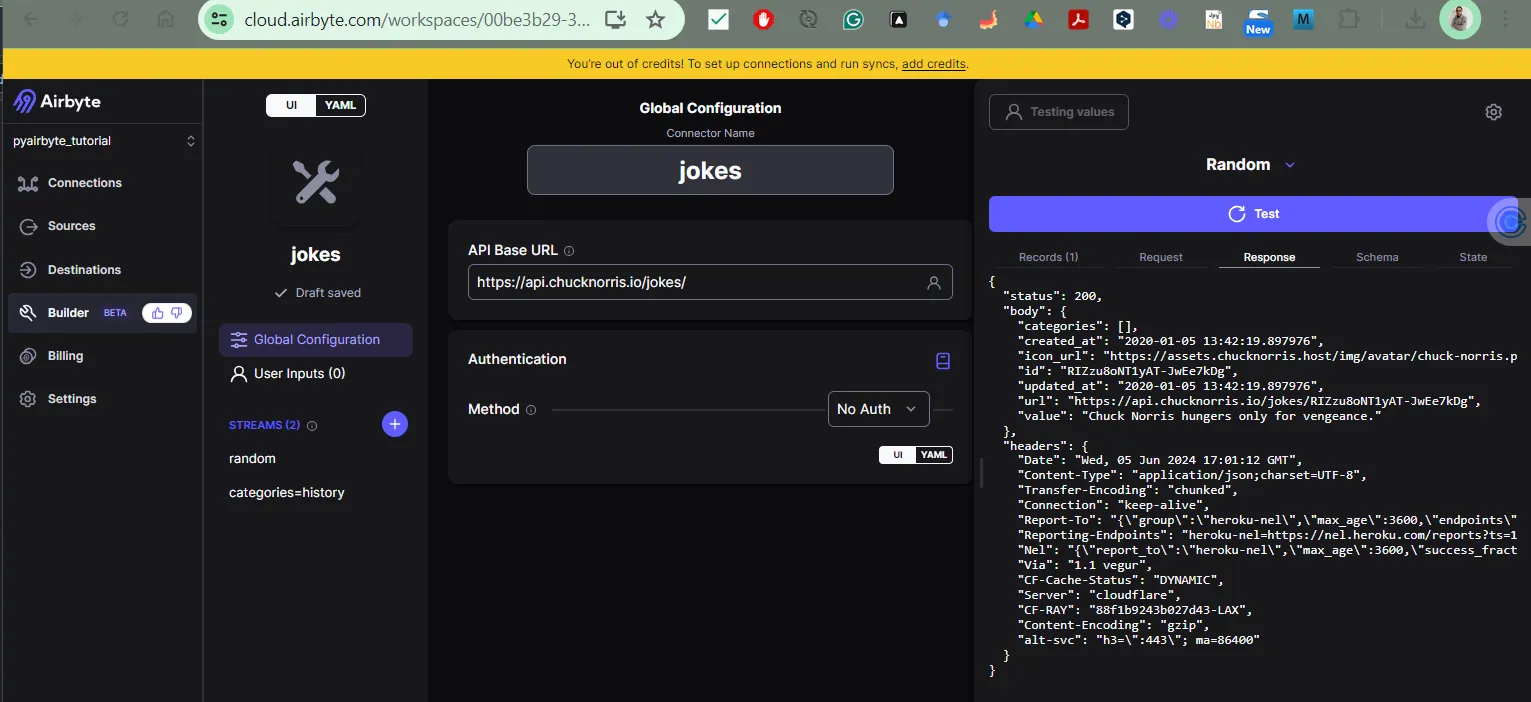
If you're experienced with APIs, you're likely aware that every API responds to each call made to its endpoints by providing a response. Here we are doing a basic API call to our Jokes API endpoint https://api.chucknorris.io/jokes/ , which returns a successful status (200). We can validate this by just clicking the Test button in the right-side panel.
Next, you can define some Streams that your connector will connect to. To set this up, you should have read in detail the corresponding API documentation.
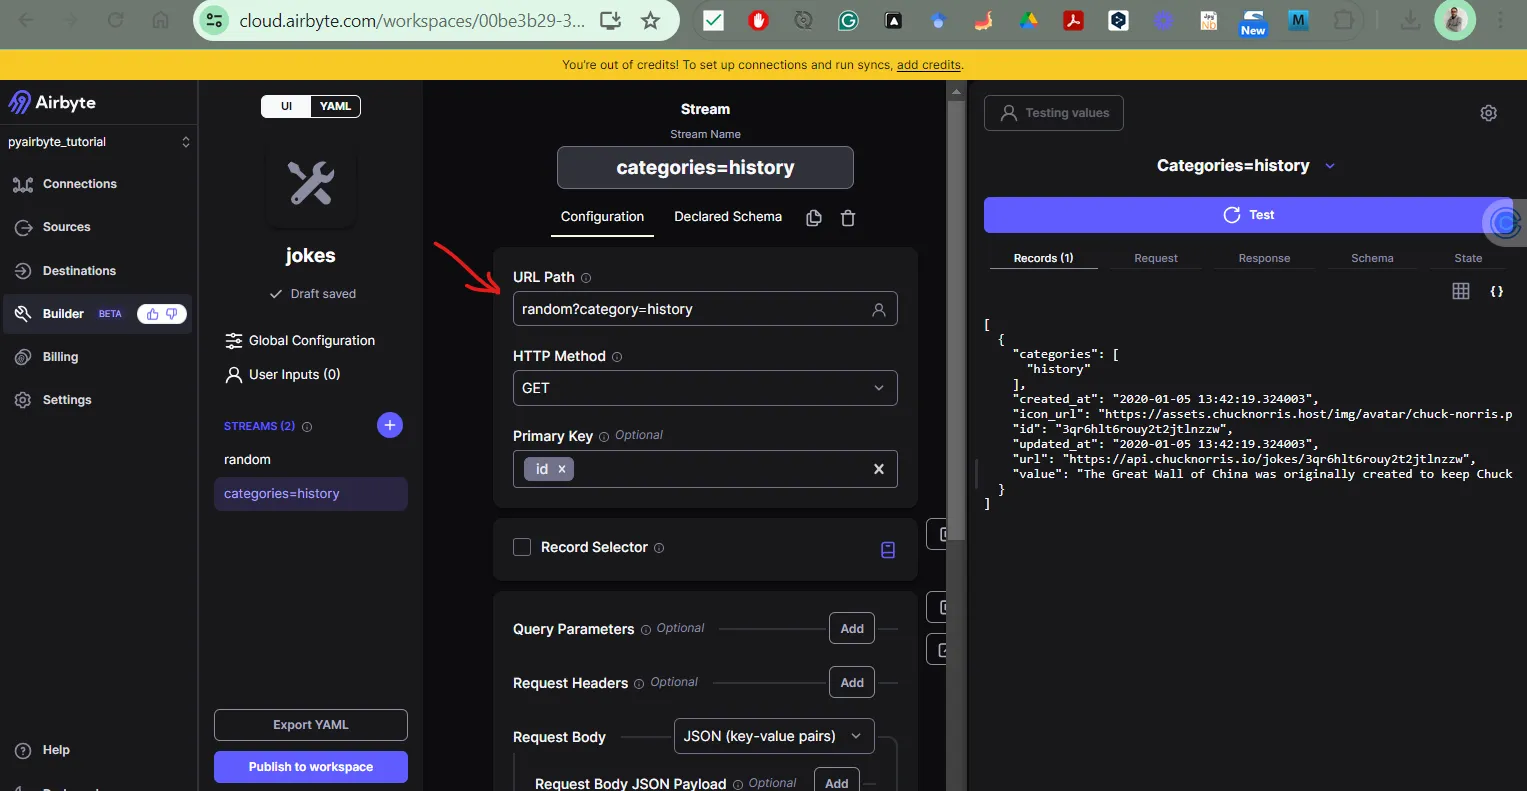
As developers, we aim to reuse the code we've developed across various platforms and environments. This is also achievable in Airbyte; whether we're managing data in Airbyte OSS, Airbyte Cloud, or within a Jupyter Notebook using PyAirbyte.
I've prepared a notebook to demonstrate this process. Once we're satisfied with our connector's output, we can export a YAML file.

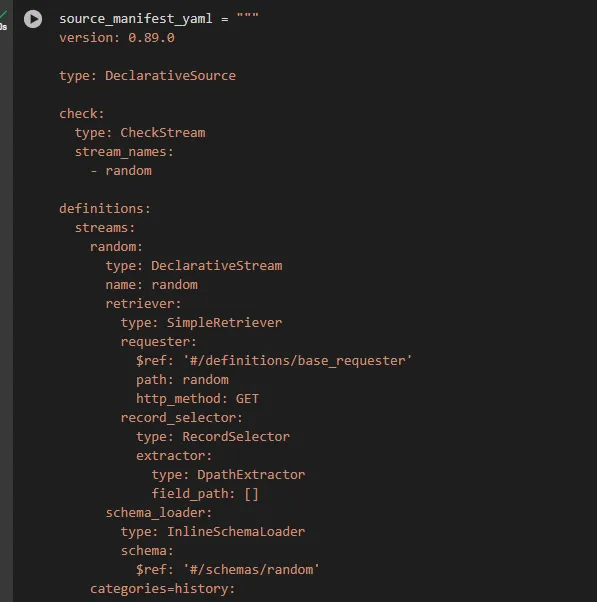
Following is the definition we will utilize in the Notebook, leveraging the new feature introduced by the Airbyte Team to execute declarative YAML sources with PyAirbyte. First, we will define the YAML specs in the Notebook (this is the YAML definition that we have downloaded from the Connector Builder UI), and then save our source_manifest_yaml source_manifest_dict: dict = yaml.safe_load(source_manifest_yaml) as a dictionary in the Notebook.
This is how to use the get_source() implementation provided by the Airbyte Team with the airbyte.experimental method. This method includes the new source_manifest input argument, which we use to pass our defined source_manifest_dict. This allows us to read the YAML defined in the Connector Builder UI.
The first thing we need to call the Airbyte library in Python together with the get_source() method.
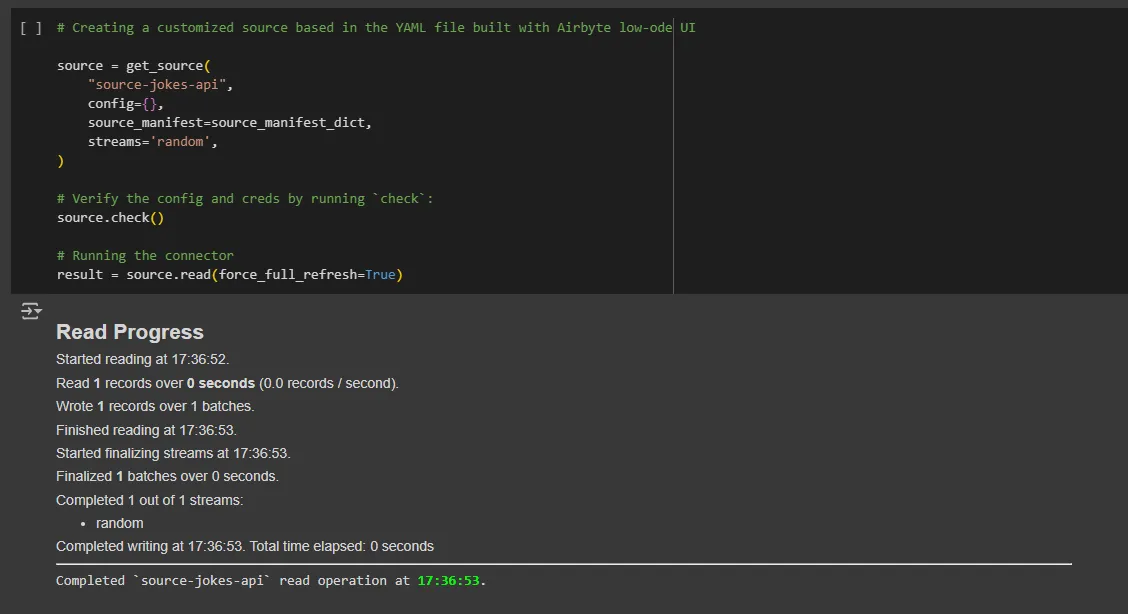
The result of the above code segment is that we have connected to our custom connector using a YAML file passed as an argument to the newly created get_source() method.
The Airbyte Connector Builder is a powerful tool for developers, enabling direct interaction with data and the creation of custom API integrations from scratch. It allows us to tailor connections to our specific needs and share our discoveries with the broader data community.
The notebook containing the code developed for this tutorial is available on Google Colab.
Download our free guide and discover the best approach for your needs, whether it's building your ELT solution in-house or opting for Airbyte Open Source or Airbyte Cloud.
