How to Build Your Own Chatbot with LangChain
Summarize this article with:
✨ AI Generated Summary
Conversational AI has evolved into sophisticated LangChain-powered chatbots that combine large language models (LLMs) with domain-specific data through Retrieval-Augmented Generation (RAG) and memory systems for contextual interactions. Key features include:
- Modular chain and agent architectures enabling multi-step reasoning, dynamic tool selection, and integration with APIs and external data sources.
- Performance optimizations like model quantization, semantic caching, and asynchronous processing, alongside security measures such as input validation, encryption, and access control.
- Airbyte simplifies data integration with 600+ connectors and built-in support for chunking and embedding, facilitating seamless RAG implementations.
- Flexible deployment options support on-premises or cloud setups, allowing tailored chatbot solutions for diverse enterprise use cases.
Conversational AI has undergone a dramatic transformation from the simple pattern-matching systems of the 1960s to today's sophisticated agents powered by large language models. Modern chatbots can now handle complex multi-step reasoning, integrate with external tools, and maintain contextual conversations across extended interactions. This evolution has been accelerated by frameworks like LangChain, which enables developers to build production-ready conversational systems that combine the power of LLMs with domain-specific knowledge and external data sources.
Building your own LangChain chatbot is easier than ever thanks to several open-source frameworks. LangChain stands out as one of the most popular, letting you use large language models (LLMs) in a modular way. This guide walks you through multiple approaches to creating a LangChain-powered chatbot, from basic implementations to advanced agent architectures, and shows how no-code tools such as Airbyte can streamline data ingestion for retrieval-augmented generation (RAG).
What Is the Architecture Behind a LangChain Chatbot?

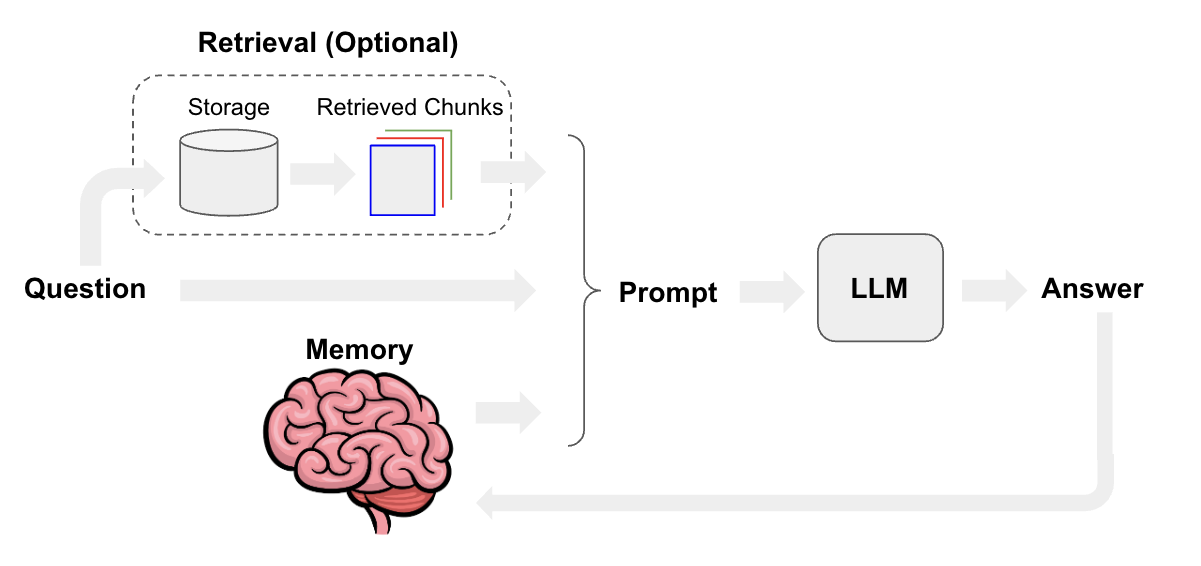
Creating a robust LangChain chatbot involves combining several techniques. When you need accurate, domain-specific answers, retrieval-augmented generation (RAG) is the go-to approach. RAG enriches an LLM's public knowledge with your private data so the model can answer niche questions confidently.
Because this data often comes from many different places, it should be centralized in a single repository such as a data warehouse. Tools like Airbyte make that data integration painless with their 600+ connectors.
A key piece of any chatbot architecture is memory, which stores conversation history so the bot can respond contextually. Better memory usually means higher latency and more complexity, so you need to balance accuracy against speed.
Chain-Based Workflows
LangChain's chain system enables multi-step reasoning processes by linking tools, prompts, and external APIs. Sequential chains handle linear tasks like query validation, retrieval, generation, and post-processing. Branching chains can process parallel workflows for handling ambiguous queries or generating multiple response formats.
Agent Architectures
Advanced LangChain chatbots use agents for dynamic decision-making, allowing bots to select appropriate tools at runtime based on user queries. These agents can invoke APIs, search databases, perform calculations, or execute custom functions. This makes them significantly more powerful than simple Q&A systems.
Memory Systems
LangChain provides sophisticated memory management through several modules. ConversationBufferMemory maintains interaction history, while ConversationTokenBufferMemory optimizes computational efficiency. ConversationSummaryMemory distills complex discussions into concise records that persist across sessions.
How Do You Build a Basic LLM LangChain Chatbot?
Below is a minimal, end-to-end example that uses LangChain and Streamlit to spin up a basic conversational bot. This implementation demonstrates the core components needed for any LangChain chatbot project.
How Do You Build a Basic LLM LangChain Chatbot?
Below is a minimal, end-to-end example that uses LangChain and Streamlit to spin up a basic conversational bot. This implementation demonstrates the core components needed for any LangChain chatbot project.
Step 1 — Install Required Packages
Step 2 — Configure Streamlit
Step 3 — Define the Chatbot Class
Step 4 — Run the Bot
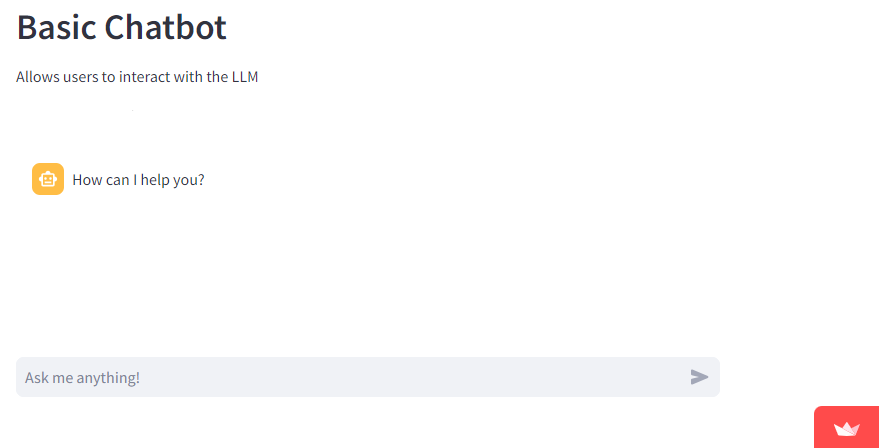
Live Demo
Run the script with Streamlit:
You'll see a web interface where you can type a question in the "Ask me anything!" box and receive an answer from the model.

How Do You Implement Advanced Agent Architectures for LangChain Chatbots?
Modern LangChain chatbots extend far beyond simple conversation chains by implementing sophisticated agent architectures. These advanced patterns enable chatbots to handle complex workflows, make decisions dynamically, and integrate with diverse data sources and APIs.
Advanced agents can perform multi-step reasoning and interact with external tools. This makes them ideal for scenarios requiring complex problem-solving and integration with enterprise systems.
ReAct Framework Implementation
The ReAct (Reasoning and Acting) framework is a foundational and widely adopted architecture for building intelligent agents that can plan and execute actions by integrating tool calling and multi-step reasoning. In many implementations, memory for state retention may also be incorporated to enhance agent capabilities.
Tool calling enables agents to invoke APIs, search databases, perform calculations, or execute custom functions based on user queries. For example, a finance chatbot might chain together credential verification, inventory checks, and order confirmation processes. Each step informs the next based on retrieved data.
Planning capabilities allow agents to generate step-by-step approaches to complex problems. Rather than providing immediate responses, these agents break down queries into manageable subtasks. They execute each component systematically and synthesize results into comprehensive answers.
Dynamic Tool Selection and Binding
Advanced LangChain agents excel at runtime decision-making. They select appropriate tools from available options based on query context and requirements. This flexibility allows a single chatbot to handle diverse scenarios without predefined conversation flows.
The agent architecture enables sophisticated reasoning about which tools to use and when. This creates more natural conversations that feel less scripted and more responsive to user needs.
Context Management and State Persistence
Sophisticated agents maintain comprehensive context across multi-turn conversations and complex workflows. This involves tracking user preferences, intermediate results from tool calls, and conversation history. The result is coherent, contextually appropriate responses that build on previous interactions.
State persistence becomes crucial when dealing with complex workflows that span multiple conversation turns. The agent needs to remember what actions it has taken and what information it has gathered.
What Performance Optimization and Security Considerations Apply to LangChain Chatbots?
Production-ready LangChain chatbots require careful attention to performance optimization and security implementation. These considerations become critical when deploying chatbots at scale or handling sensitive information.
Performance optimization ensures your chatbot can handle user loads efficiently. Security implementation protects both user data and your organization's systems from potential threats.
Performance Optimization Strategies
Model quantization and tiered model selection help balance response quality with computational efficiency. You can use smaller models for simple queries and reserve larger models for complex reasoning tasks.
Semantic caching for repetitive queries reduces API calls and improves response times. This is particularly effective for FAQ-style chatbots where many users ask similar questions.
Asynchronous processing and batching allow your system to handle multiple concurrent users without blocking. This becomes essential as your user base grows.
Security and Compliance Implementation
Input validation and sanitization prevent injection attacks and ensure your chatbot handles malicious input safely. This includes validating user queries and sanitizing any data that gets processed.
Output moderation and PII protection help prevent your chatbot from sharing sensitive information inappropriately. This is crucial for compliance with data protection regulations.
Encryption and role-based access control ensure that only authorized users can access sensitive features. This becomes important when integrating with enterprise systems.
Error Handling and Monitoring
Graceful fallbacks during API outages ensure your chatbot continues functioning even when external services fail. Users should receive helpful error messages rather than system crashes.
Observability dashboards and alerting help you monitor system performance and identify issues before they affect users. This proactive approach improves reliability.
Comprehensive logging and audit trails help with debugging and compliance requirements. You need visibility into how your chatbot processes user queries and makes decisions.
What Can You Build Beyond Basic LangChain Chatbots?
The Streamlit + LangChain bot above is only one option. You can mix and match other frameworks like FastAPI or Neo4j, or swap in different LLMs. For example, you could build a healthcare assistant that pulls patient records from a graph database and answers questions in natural language.
Modern chatbot applications leverage multi-modal capabilities, combining text, voice, and visual inputs. This creates more sophisticated user experiences that feel more natural and intuitive.
Enterprise chatbots increasingly integrate with business workflows. They connect to CRM systems, ERP platforms, and HR tools to provide comprehensive assistance that goes beyond simple Q&A.
The key is understanding what your specific use case requires. Different applications need different architectural approaches and tool integrations.
How Does Airbyte Enhance LangChain Chatbot Development?
Airbyte is an open-source, no-code data integration platform that simplifies getting your data into vector stores such as Pinecone, Milvus, or Weaviate. This integration capability becomes crucial when building RAG-powered chatbots that need access to your organization's data.

Key features include GenAI workflow support with built-in chunking, embedding, and indexing for RAG. This eliminates much of the preprocessing work typically required for vector store integration.
Airbyte offers 600+ connectors to pull data from nearly any source. You can also build your own connectors with the CDK when you need custom integrations.
Flexible deployment options include self-hosted and cloud-based configurations. This lets you choose the deployment model that best fits your security and operational requirements.
Example: GitHub Issues Chatbot With Airbyte & Pinecone
Here's a high-level flow for building a specialized chatbot:
- Use Airbyte to sync GitHub issues from your repositories
- Load the issues directly into Pinecone with automatic chunking & embedding
- Build a LangChain RetrievalQA chatbot on top of the Pinecone index

Below is a condensed version of the Python code that wires everything together:
For a more advanced prompt template and context-formatting logic, see the full script on GitHub.
Conclusion
The combination of LangChain's modular architecture with Airbyte's comprehensive data integration capabilities provides a powerful foundation for building production-ready chatbots. You can create systems that access, process, and reason about diverse data sources while maintaining the performance and security standards required for enterprise deployments. Whether you're building a simple Q&A bot or a complex agent with multi-step reasoning, these tools give you the flexibility to create conversational AI that truly serves your users' needs. Start with the basic implementation and gradually add complexity as your requirements evolve.
Frequently Asked Questions
What makes LangChain different from other chatbot frameworks?
LangChain provides a modular approach to building chatbots that integrates seamlessly with various LLMs, vector stores, and external tools. Unlike monolithic frameworks, LangChain lets you combine different components like memory systems, agents, and chains to create customized solutions for specific use cases.
How do I handle conversation memory in a LangChain chatbot?
LangChain offers several memory modules including ConversationBufferMemory for maintaining full conversation history, ConversationTokenBufferMemory for optimizing token usage, and ConversationSummaryMemory for condensing long conversations. Choose the memory type based on your latency and context requirements.
Can I deploy a LangChain chatbot without using cloud services?
Yes, LangChain chatbots can be deployed entirely on-premises or in self-hosted environments. You can use local LLMs like Ollama, host your own vector stores, and deploy the application on your infrastructure while maintaining full control over your data.
What's the best way to integrate external data sources into my LangChain chatbot?
Use Retrieval-Augmented Generation (RAG) with vector stores like Pinecone or Weaviate to integrate external data. Tools like Airbyte can automate the data pipeline from various sources to your vector store, handling chunking and embedding automatically.
How do I optimize the performance of a LangChain chatbot for production use?
Implement semantic caching for repetitive queries, use asynchronous processing for handling multiple users, and consider model quantization for faster inference. Monitor your system with observability tools and implement graceful fallbacks for external API failures.

.webp)
