How to load data from Exchange Rates Api to MongoDB
Learn how to use Airbyte to synchronize your Exchange Rates Api data into MongoDB within minutes.


































Building your pipeline or Using Airbyte
Airbyte is the only open source solution empowering data teams to meet all their growing custom business demands in the new AI era.
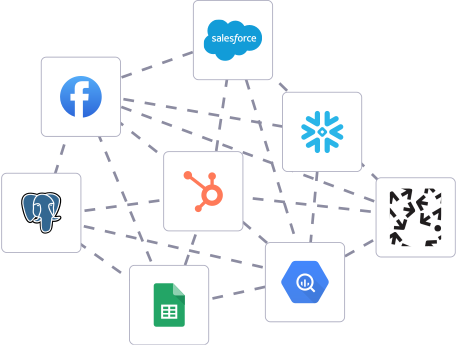
Building in-house pipelines
- Inconsistent and inaccurate data
- Laborious and expensive
- Brittle and inflexible
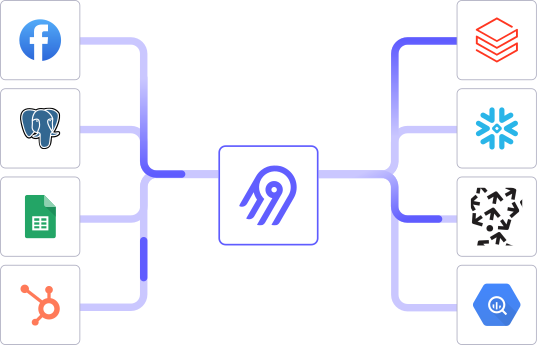
After Airbyte
- Reliable and accurate
- Extensible and scalable for all your needs
- Deployed and governed your way
Start syncing with Airbyte in 3 easy steps within 10 minutes


Take a virtual tour
Demo video of Airbyte Cloud
Demo video of AI Connector Builder
Setup Complexities simplified!

Simple & Easy to use Interface
Airbyte is built to get out of your way. Our clean, modern interface walks you through setup, so you can go from zero to sync in minutes—without deep technical expertise.

Guided Tour: Assisting you in building connections
Whether you’re setting up your first connection or managing complex syncs, Airbyte’s UI and documentation help you move with confidence. No guesswork. Just clarity.

Airbyte AI Assistant that will act as your sidekick in building your data pipelines in Minutes
Airbyte’s built-in assistant helps you choose sources, set destinations, and configure syncs quickly. It’s like having a data engineer on call—without the overhead.
What sets Airbyte Apart
Modern GenAI Workflows
Streamline AI workflows with Airbyte: load unstructured data into vector stores like Pinecone, Weaviate, and Milvus. Supports RAG transformations with LangChain chunking and embeddings from OpenAI, Cohere, etc., all in one operation.
Move Large Volumes, Fast
Quickly get up and running with a 5-minute setup that enables both incremental and full refreshes for databases of any size, seamlessly scaling to handle large data volumes. Our optimized architecture overcomes performance bottlenecks, ensuring efficient data synchronization even as your datasets grow from gigabytes to petabytes.
An Extensible Open-Source Standard
More than 1,000 developers contribute to Airbyte’s connectors, different interfaces (UI, API, Terraform Provider, Python Library), and integrations with the rest of the stack. Airbyte’s AI Connector Builder lets you edit or add new connectors in minutes.
Full Control & Security
Airbyte secures your data with cloud-hosted, self-hosted or hybrid deployment options. Single Sign-On (SSO) and Role-Based Access Control (RBAC) ensure only authorized users have access with the right permissions. Airbyte acts as a HIPAA conduit and supports compliance with CCPA, GDPR, and SOC2.
Fully Featured & Integrated
Airbyte automates schema evolution for seamless data flow, and utilizes efficient Change Data Capture (CDC) for real-time updates. Select only the columns you need, and leverage our dbt integration for powerful data transformations.
Enterprise Support with SLAs
Airbyte Self-Managed Enterprise comes with dedicated support and guaranteed service level agreements (SLAs), ensuring that your data movement infrastructure remains reliable and performant, and expert assistance is available when needed.
What our users say

Raman Singh

Predictable, straightforward pricing model that simplified budgeting and significantly reduced overall spend

Chase Zieman

“Airbyte helped us accelerate our progress by years, compared to our competitors. We don’t need to worry about connectors and focus on creating value for our users instead of building infrastructure. That’s priceless. The time and energy saved allows us to disrupt and grow faster.”

Rupak Patel

"With Airbyte, we could just push a few buttons, allow API access, and bring all the data into Google BigQuery. By blending all the different marketing data sources, we can gain valuable insights."
How to Sync to Manually
Step 1: Set Up Your Environment
Begin by setting up a local or cloud environment where you will run your scripts. Ensure you have Node.js and MongoDB installed on your system. Node.js will be used to write the script that fetches data from the API and inserts it into MongoDB.
Step 2: Access Exchange Rates API
Identify the exchange rates API you want to use and obtain an API key if required. Familiarize yourself with the endpoint from which you will fetch the data. This typically involves a simple GET request. For example, if using a service like ExchangeRate-API, your endpoint might look like `https://api.exchangerate-api.com/v4/latest/USD`.
Step 3: Fetch Data Using Node.js
Create a new Node.js script to fetch data from the API. Utilize the `axios` library to make HTTP requests. First, install axios by running `npm install axios`. Then, write a function within your script to fetch the data:
```javascript
const axios = require('axios');
async function fetchExchangeRates() {
try {
const response = await axios.get('https://api.exchangerate-api.com/v4/latest/USD'); // Replace with your API URL
return response.data;
} catch (error) {
console.error('Error fetching data:', error);
return null;
}
}
```
Step 4: Prepare MongoDB Connection
In the same Node.js script, set up a connection to your MongoDB database. Use the `mongodb` package for this purpose. Install it via `npm install mongodb`. Then, establish a connection:
```javascript
const { MongoClient } = require('mongodb');
async function connectToMongoDB() {
const uri = 'mongodb://localhost:27017'; // Replace with your MongoDB URI
const client = new MongoClient(uri, { useNewUrlParser: true, useUnifiedTopology: true });
try {
await client.connect();
console.log('Connected to MongoDB');
return client;
} catch (error) {
console.error('MongoDB connection error:', error);
return null;
}
}
```
Step 5: Insert Data into MongoDB
With both the exchange rates data and MongoDB connection ready, write a function to insert the data into a specified collection in your MongoDB database:
```javascript
async function insertDataToMongoDB(client, data) {
try {
const database = client.db('exchangeRatesDB'); // Replace with your database name
const collection = database.collection('rates'); // Replace with your collection name
const result = await collection.insertOne(data);
console.log(`Data inserted with id: ${result.insertedId}`);
} catch (error) {
console.error('Error inserting data:', error);
}
}
```
Step 6: Execute the Data Transfer
Now, you can execute the entire data transfer process in a coordinated manner. Write a main function to fetch the data, connect to MongoDB, and insert the data:
```javascript
async function main() {
const exchangeRates = await fetchExchangeRates();
if (!exchangeRates) return;
const client = await connectToMongoDB();
if (!client) return;
await insertDataToMongoDB(client, exchangeRates);
await client.close();
}
main().catch(console.error);
```
Step 7: Schedule Regular Data Transfers
To automate this process, you can use a scheduling tool like `cron` on Unix-based systems or Task Scheduler on Windows to run your Node.js script at desired intervals. Alternatively, integrate a scheduling library like `node-cron` into your script for more control over the scheduling directly in your Node.js environment.
```javascript
const cron = require('node-cron');
cron.schedule('0 ', () => { // Runs every hour
console.log('Running data transfer script...');
main().catch(console.error);
});
```
This guide provides a straightforward approach to moving data from an exchange rates API to a MongoDB database using Node.js, without relying on third-party connectors or integrations.