Learn how to easily extract data from the Intercom API and replicate it into S3.
Published on Jul 25, 2022
Summarize this article with:


Airbyte Cloud allows you to seamlessly move data between hundreds of data sources and destinations, including popular destinations such as databases, data warehouses, and business applications.
One data source which you may wish to extract data from is Intercom, which markets itself as “the world's first Conversational Relationship Platform”. Intercom allows you to see who is using your product or website and makes it easy to personally communicate with them with targeted content, behavior-driven messages, and conversational support. It is used by sales, marketing, product, support, and customer success teams.
For various reasons, you may wish to export your Intercom data to an alternative platform. For example, you may need to move your data into a platform that is designed for advanced analytics or one that is designed for storing large amounts of data. To meet such requirements you may consider the following options:
Although data that is extracted from Intercom API can easily be sent into any Airbyte destination – in this article the focus is on using the S3 destination connector for replicating data into Amazon S3. Below are a few use-cases that you will be able to implement if you move your data from Intercom to Amazon S3:
This tutorial will take you through the steps to set up Airbyte Cloud to move data from the Intercom API to S3. Because Airbyte handles the complexities of interfacing with the Intercom API, you won’t need to hire specialized Intercom developers to get your data out of Intercom and into S3!
Below are the prerequisite tools you’ll need to get started in order to move your Intercom data to Amazon S3:
For demonstration purposes, in this tutorial you will load your Contacts data from Intercom to Amazon S3. If you click on Contacts on the left side of the Intercom UI, and then select All users, you should see the users in your Intercom account, as follows:

Once you have confirmed that you have Contacts data in Intercom, you can begin setting up Airbyte Cloud to move this data into S3.
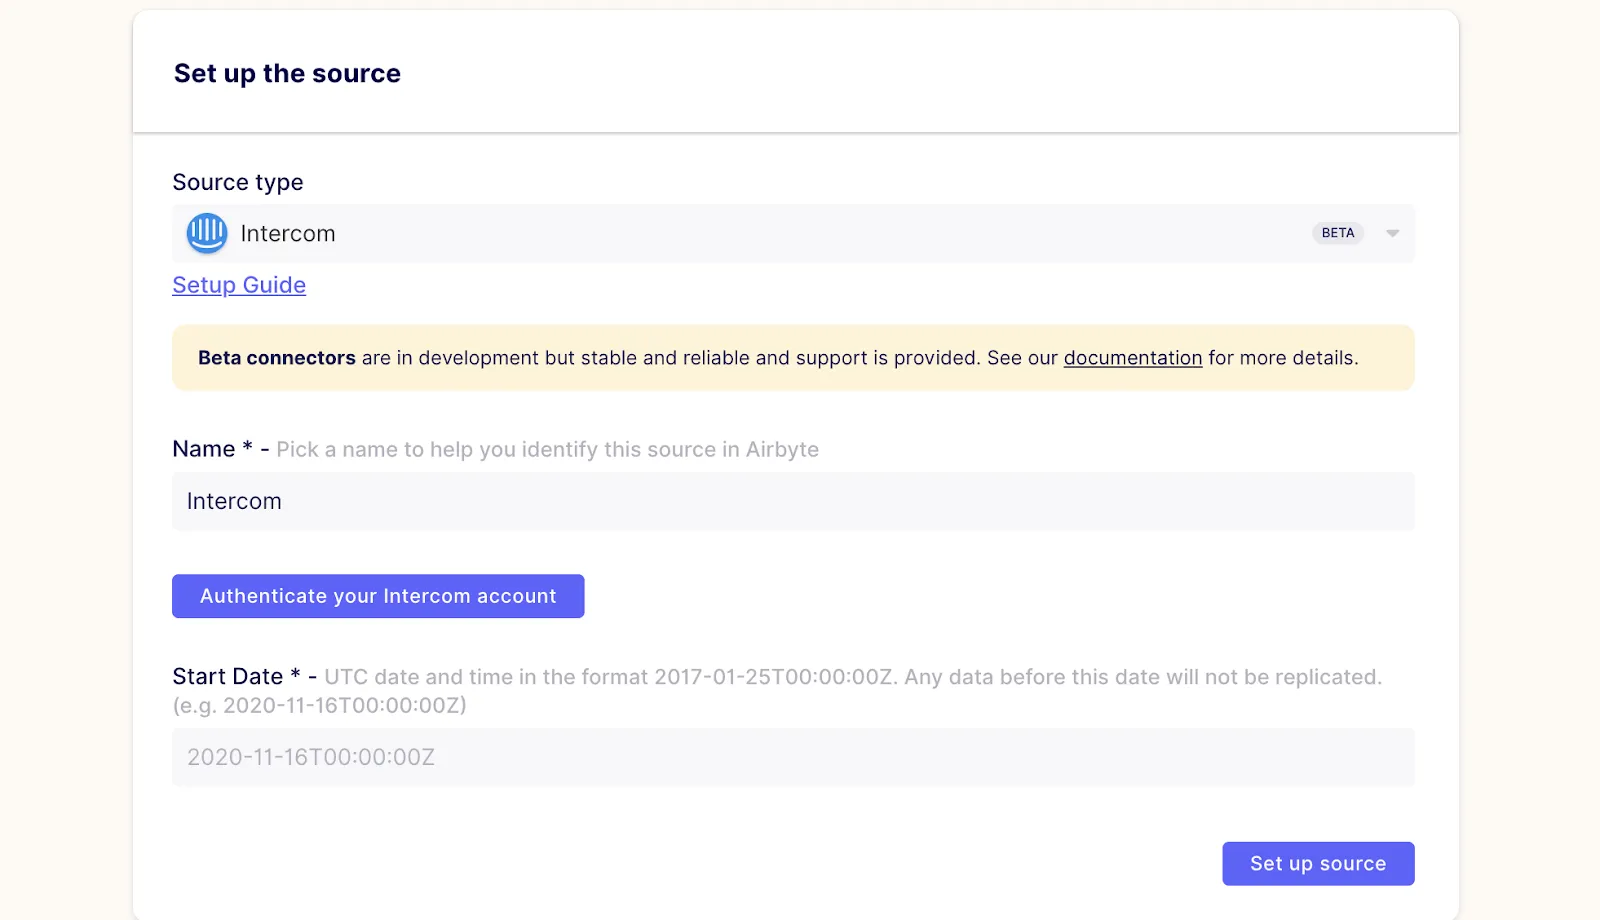
Login to Airbyte Cloud and create a new Airbyte connection. Select the Intercom connector as the source type as shown below, and give it a name.

Next, authenticate the Intercom account that will connect to the Intercom API by clicking on the Authenticate your Intercom account button, as shown below.
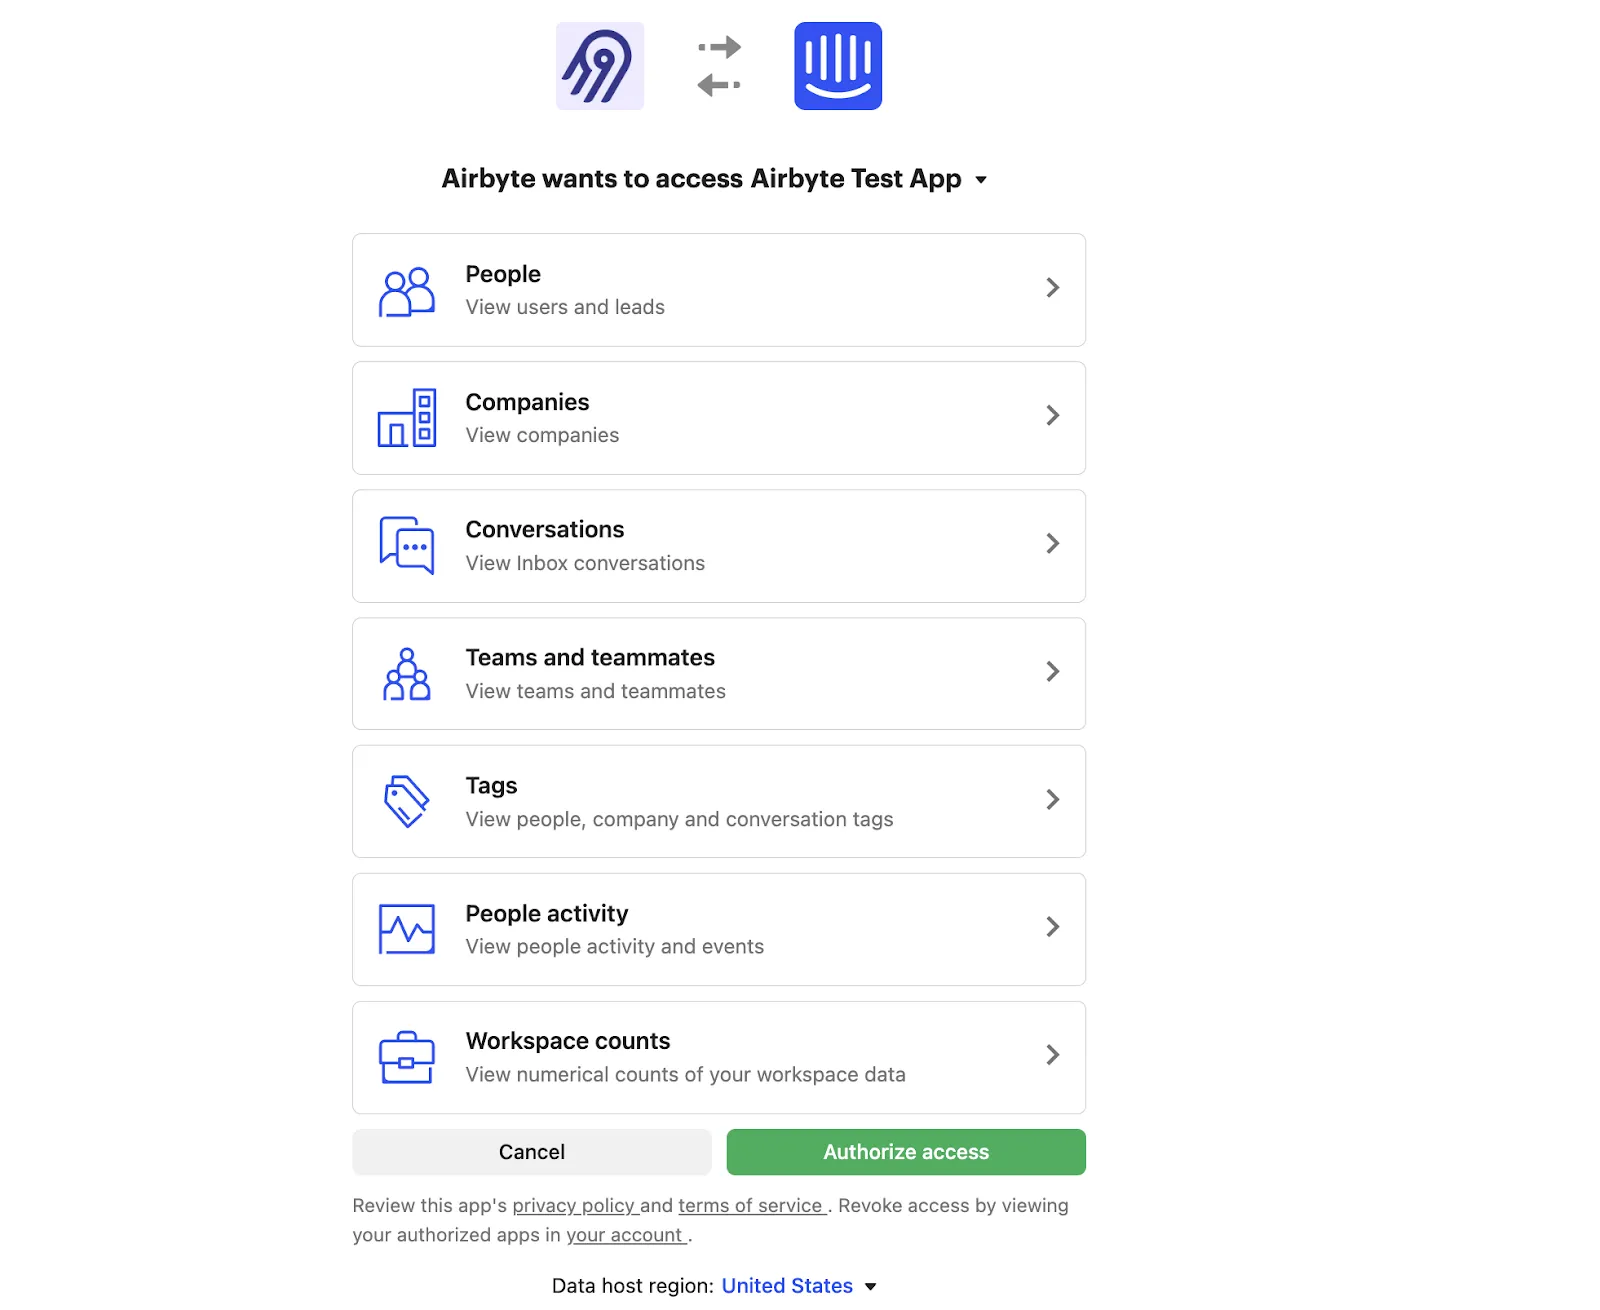
Once signed-in, you will be prompted to authorize Airbyte.
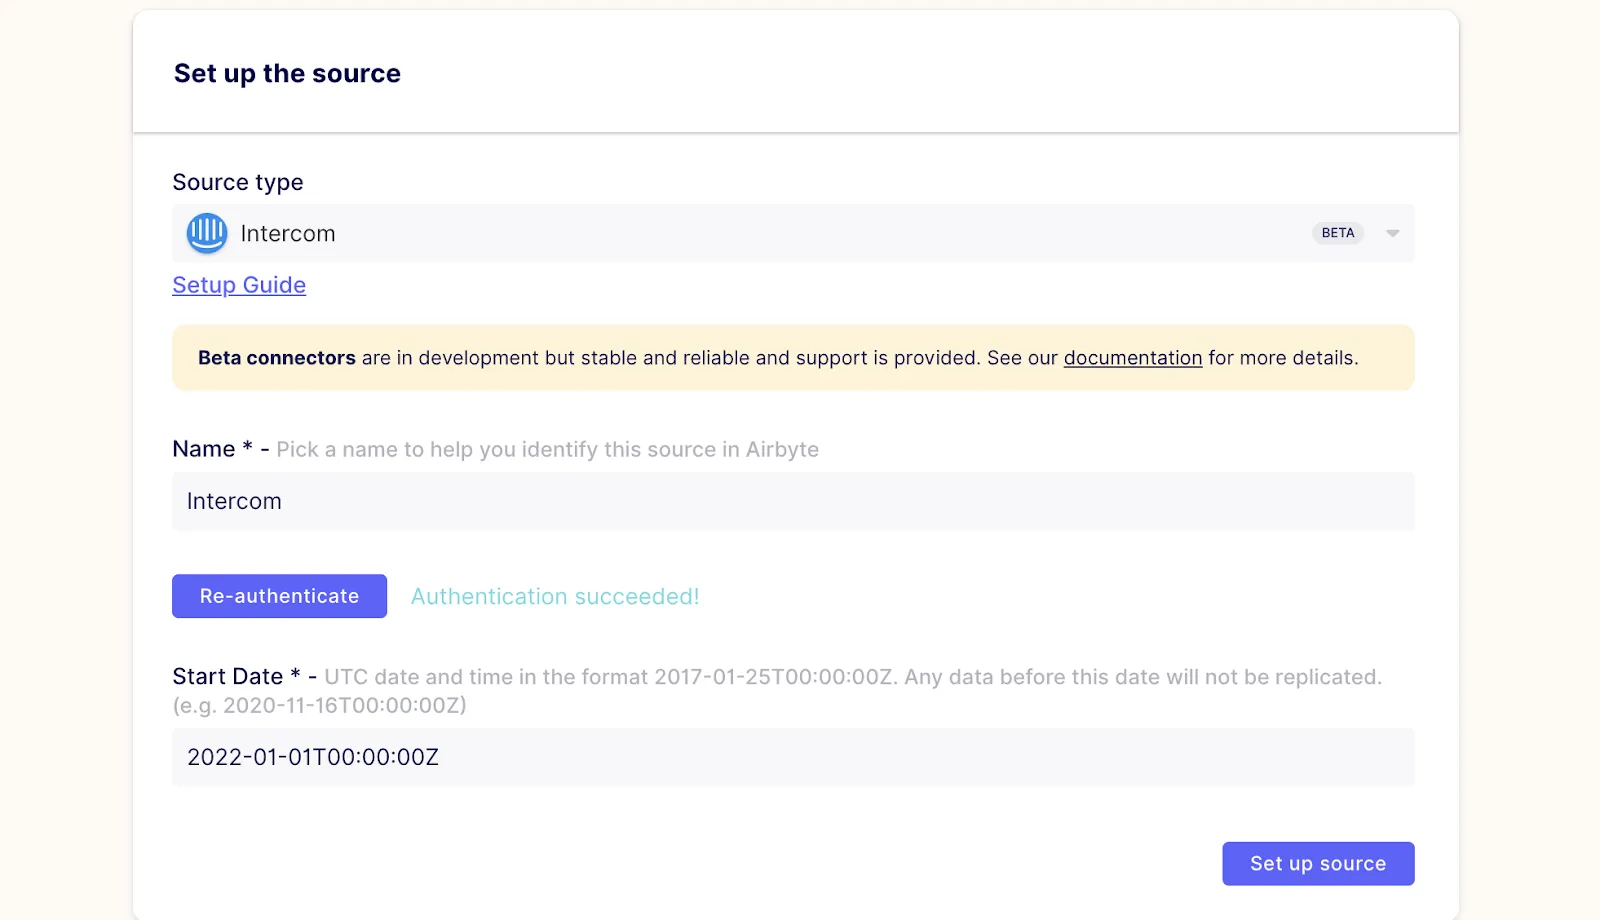
You will be then redirected back to Airbyte Cloud, where you should see an ‘Authentication succeeded’ message. As shown below, set the start date for when to begin replicating data and click on Set up source.
Download our free guide and discover the best approach for your needs, whether it's building your ELT solution in-house or opting for Airbyte Open Source or Airbyte Cloud.

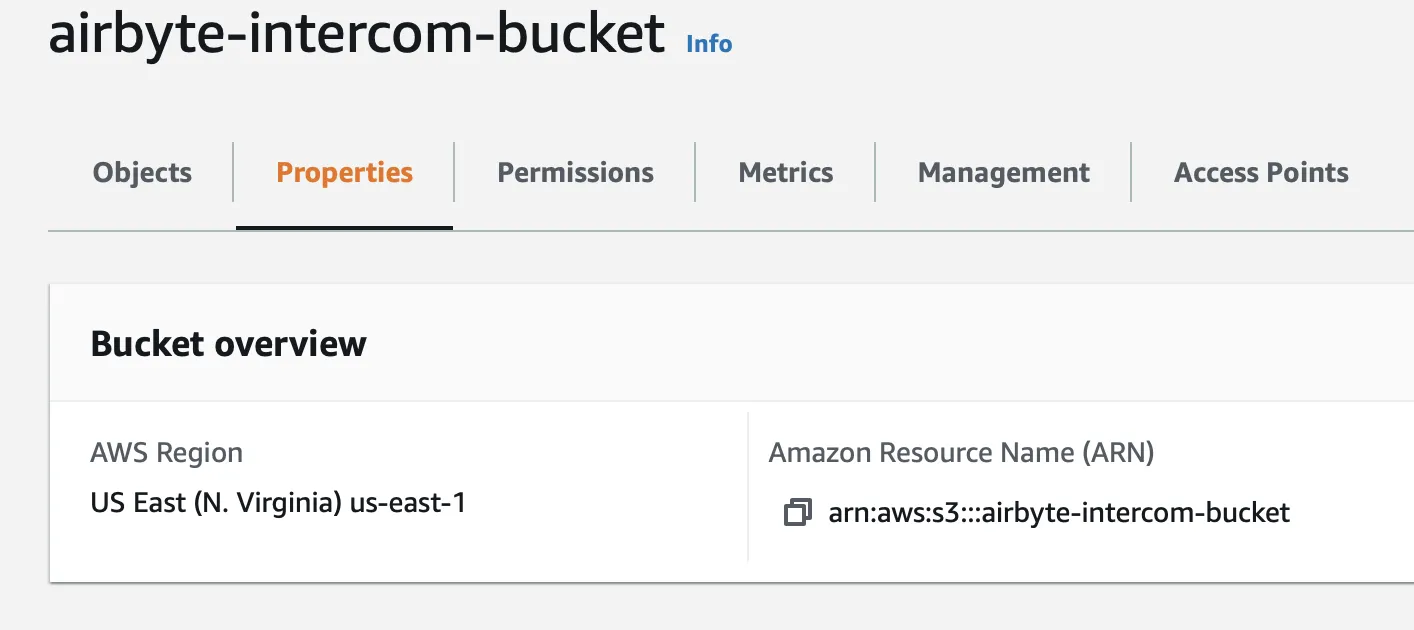
Login to AWS and go to S3 > Buckets > [YOUR_BUCKET] > Properties and make a note of the AWS Region your bucket is hosted in.
If you don’t already have a user group with Amazon S3 access, you must create one. Go to IAM > User Groups > Create Group. Give the group a name and attach a policy that has write access to S3.
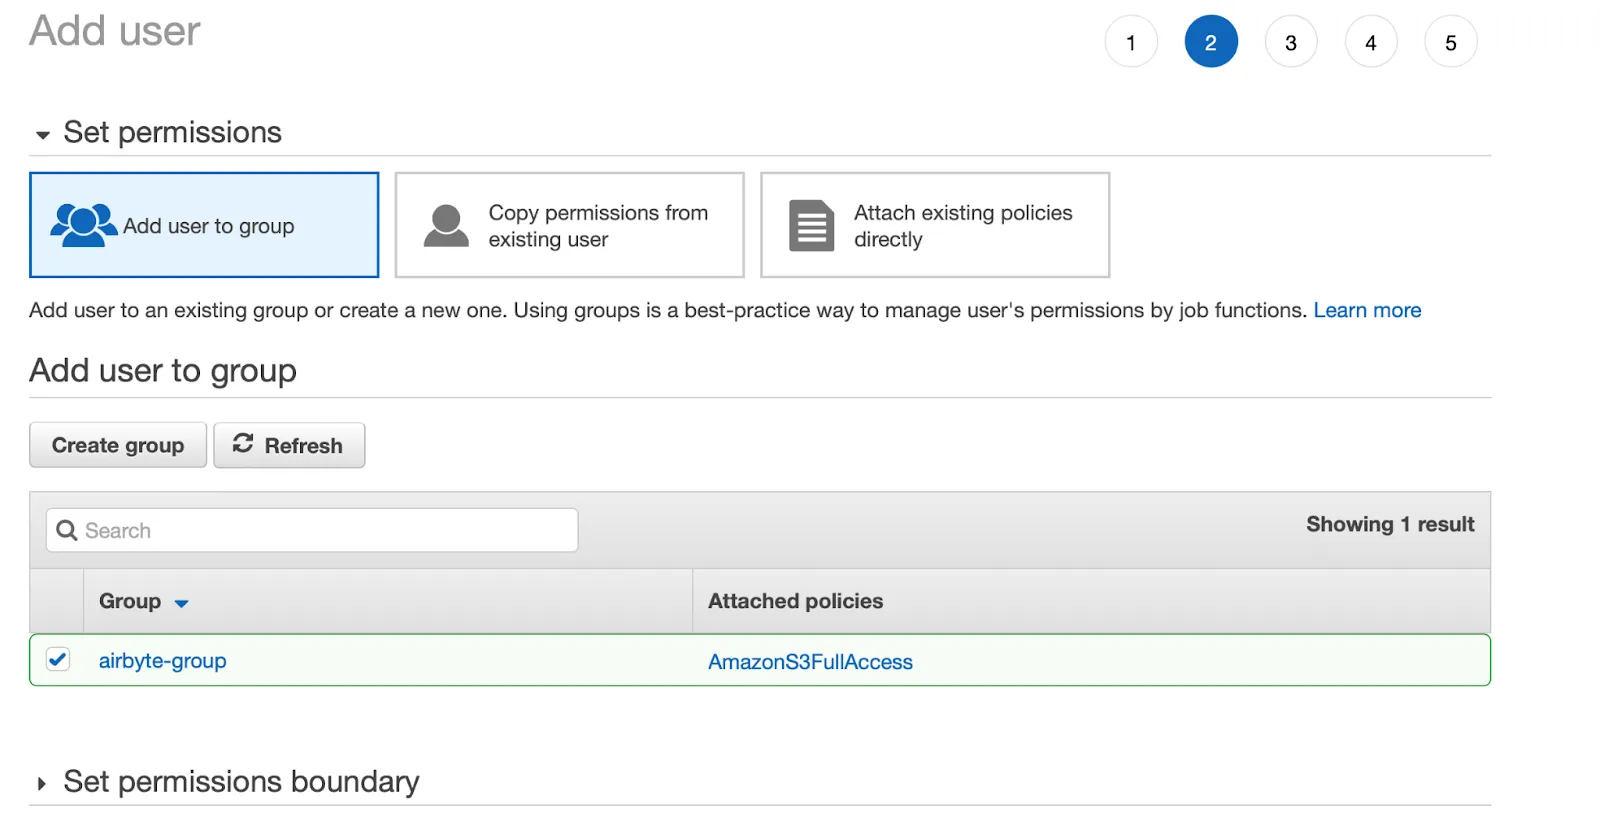
Once your group has been created and your user has been added to it, you will be able to copy the Access key ID and the Secret access key. Make a note of these values, as they will be required to configure Airbyte.

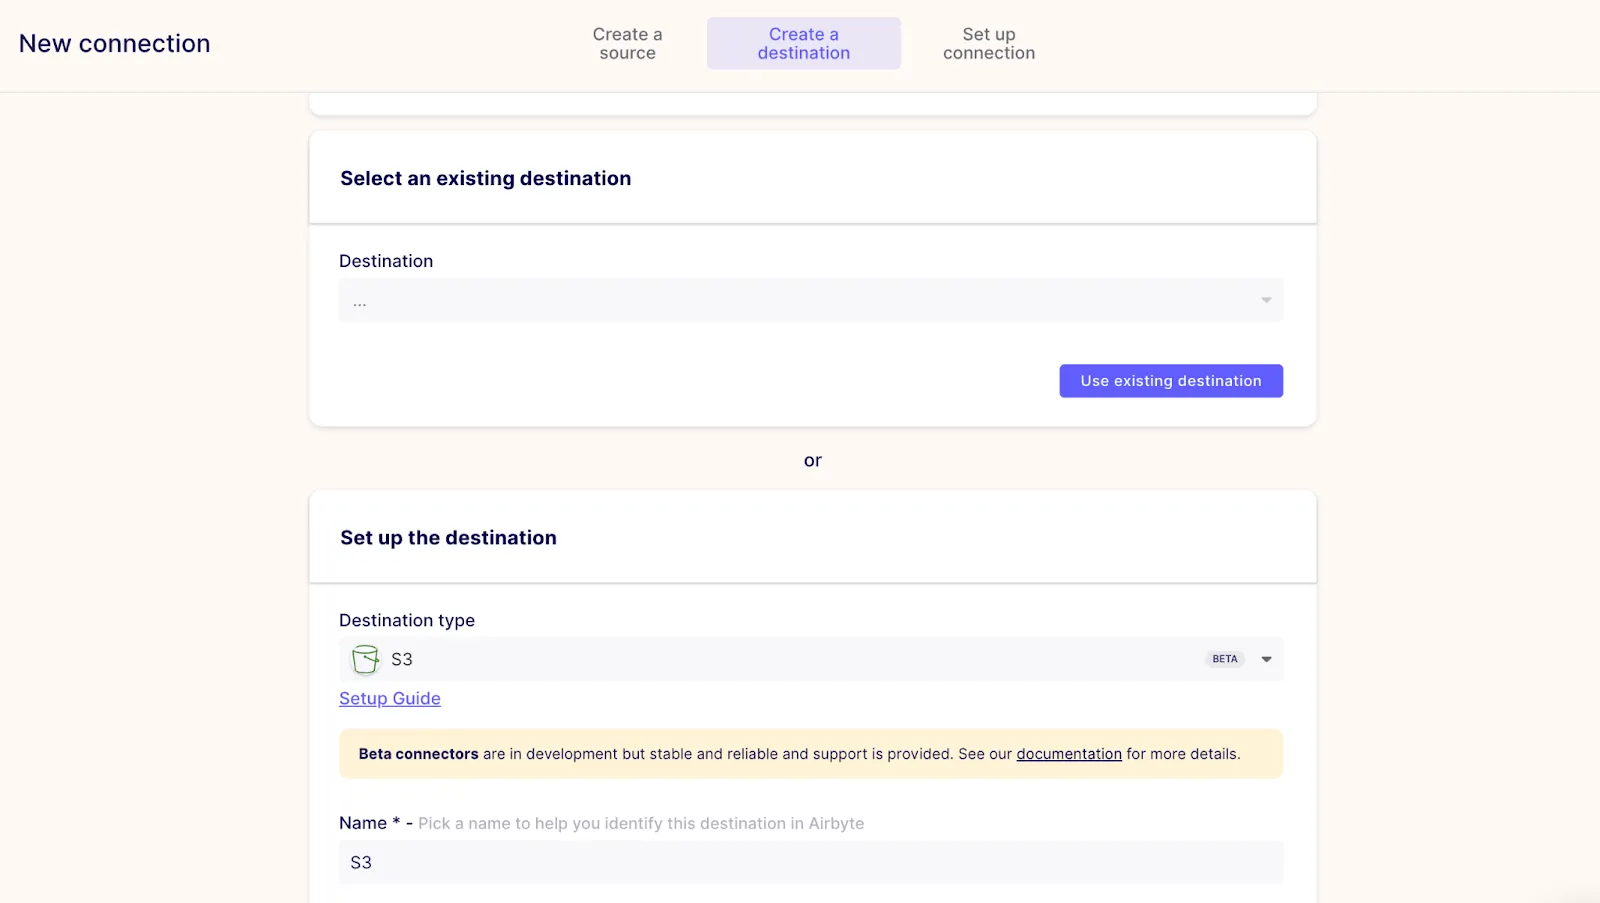
Once you have your access keys and your S3 bucket region, you can configure Amazon S3 as your Airbyte Cloud destination. As shown in the image below, choose S3 as the destination type and give it a name.
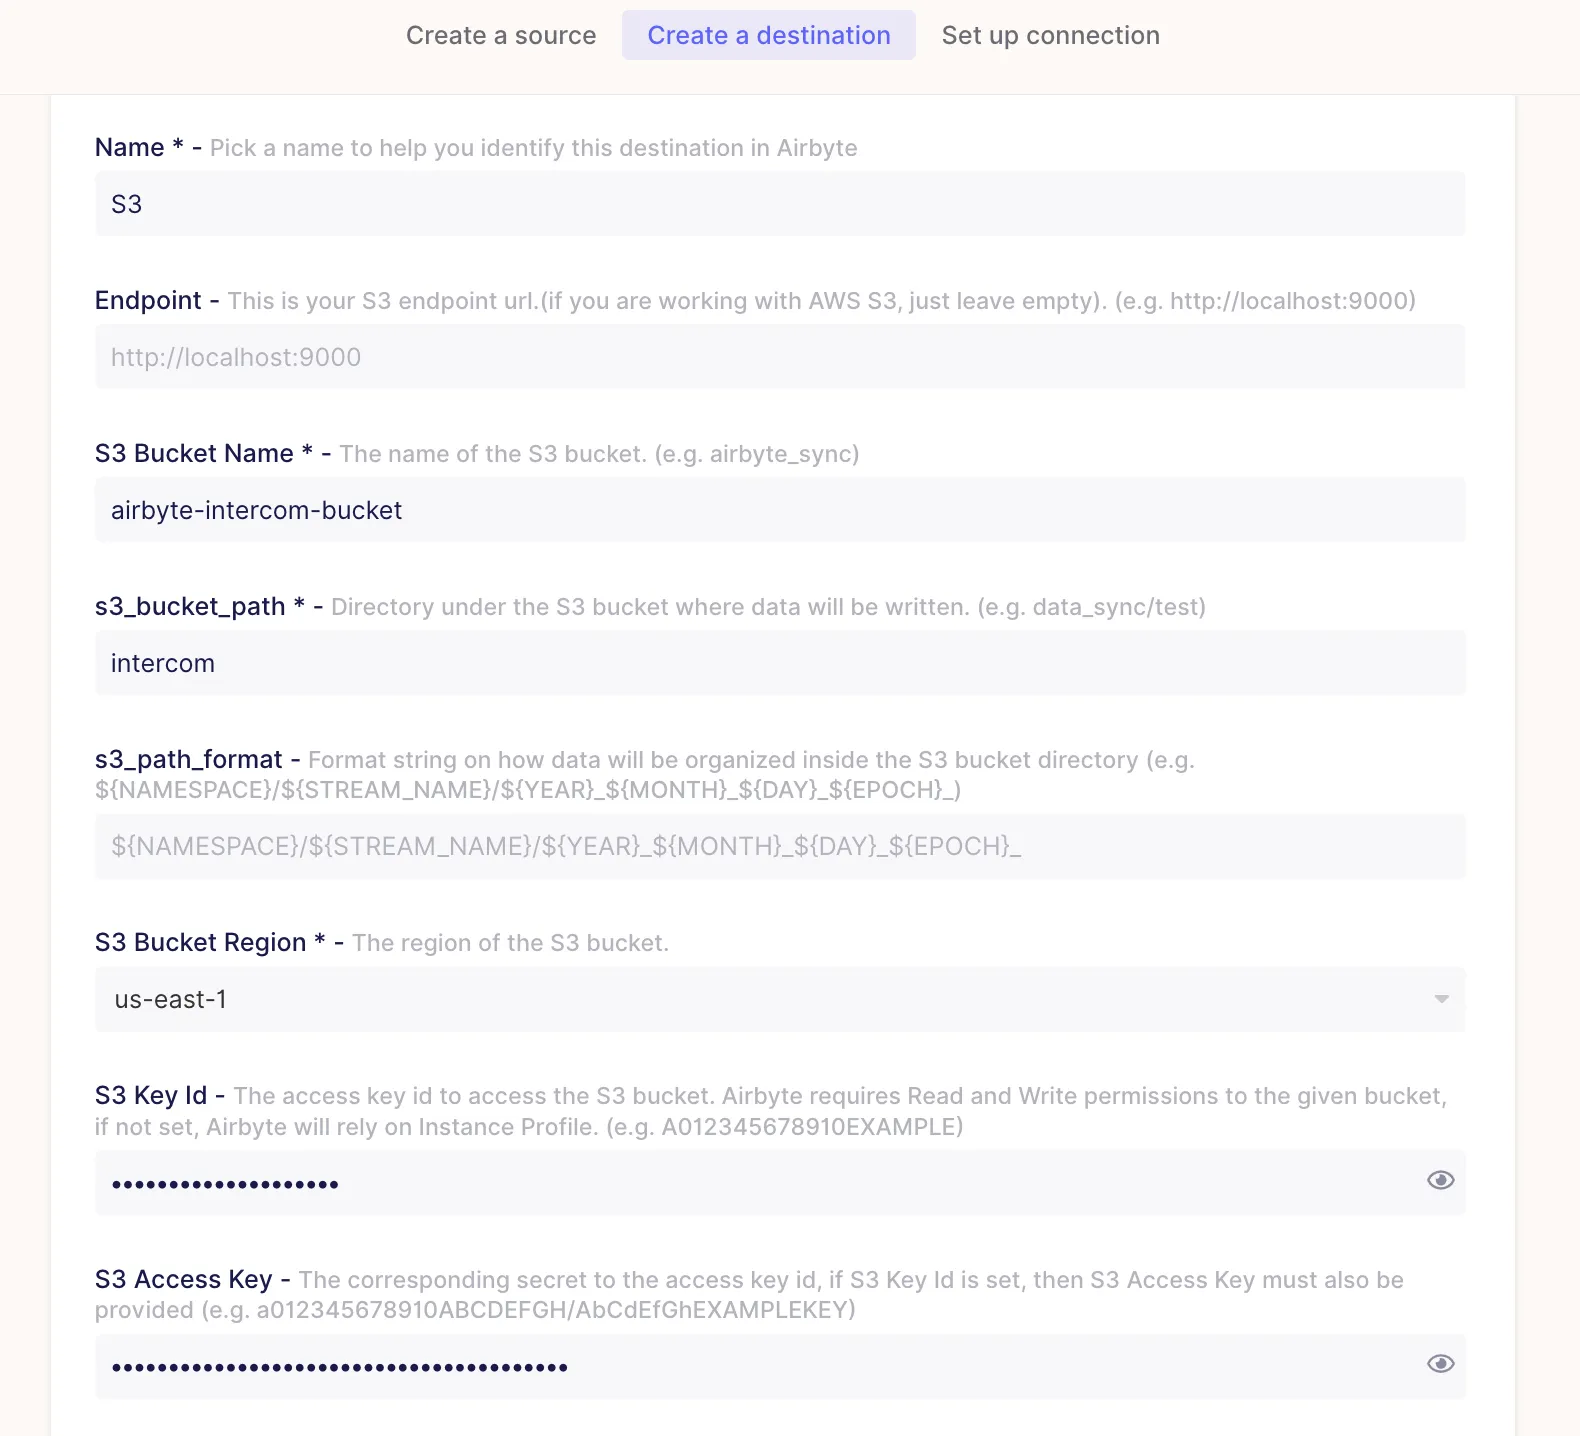
Next, enter your S3 bucket name, path, bucket region, S3 Key ID and S3 Access Key as shown below.
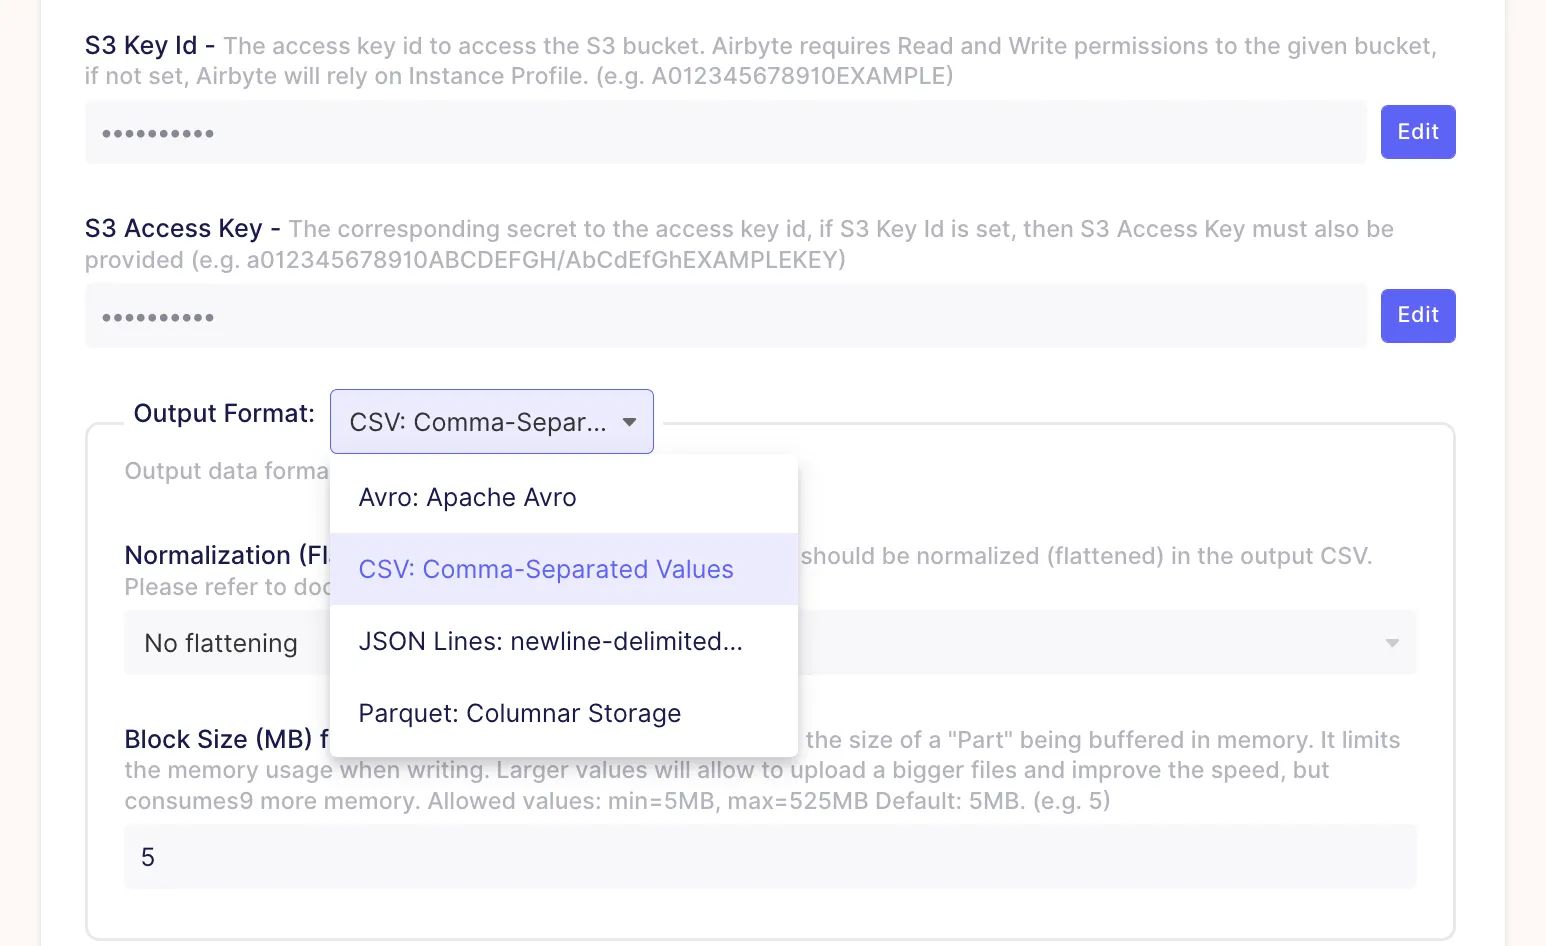
You can also choose the Output Format for your replication. In this example, we have selected CSV, but you can select whichever data type is appropriate for your use case. Once configured, click on Set up destination to complete the process.
Once the source and destination are configured, you can define your connection settings. Choose the sync frequency, which data streams to sync, and the sync mode for each data stream. This example shows how to replicate the contacts data stream using the Incremental | Append replication mode.

Once configured, save the connection and select Sync now to run your first sync. After the sync is complete, you should see a Succeeded status along with additional information such as how many items were loaded.

You can then view the data in your bucket on AWS.
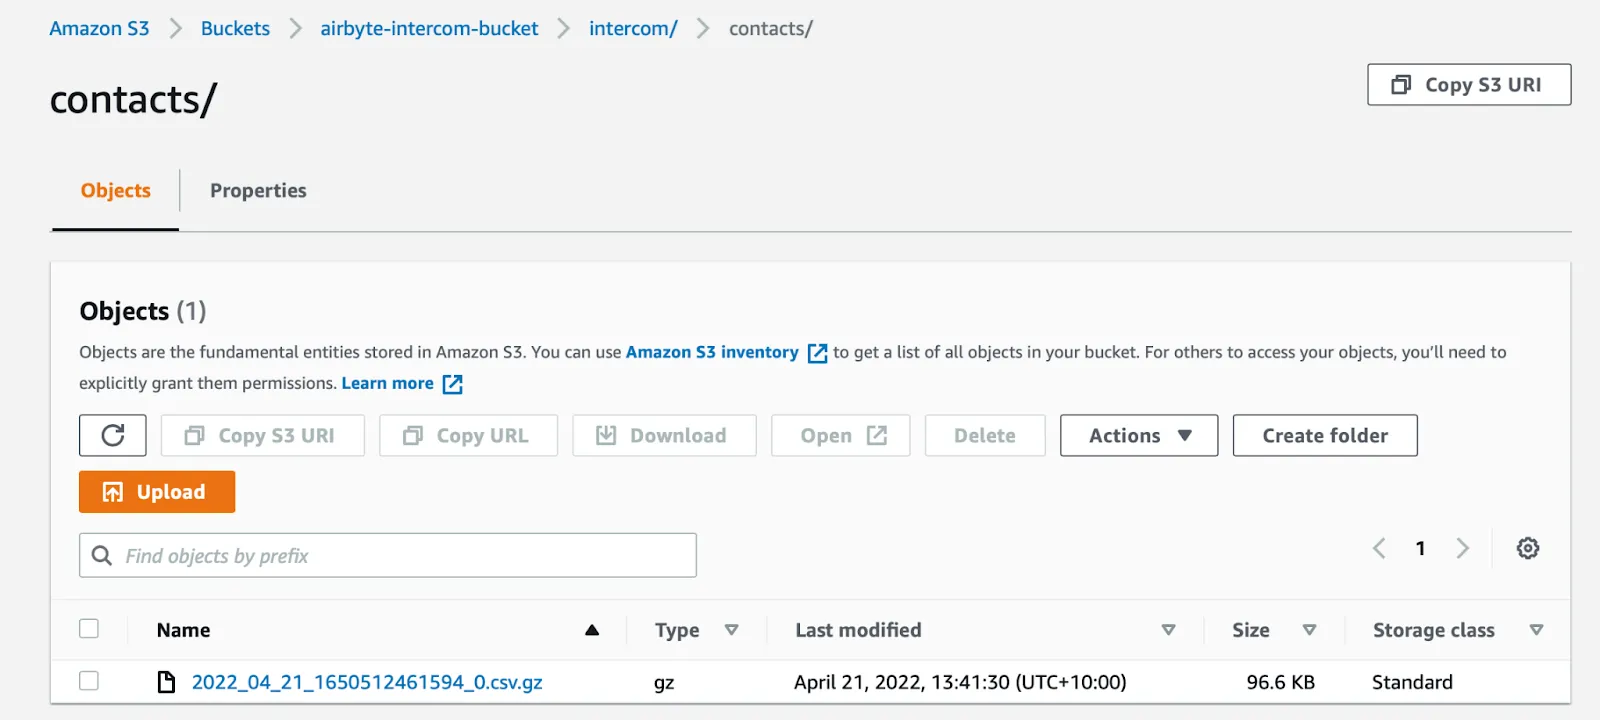
You can optionally download the file to view the data loaded into S3 by Airbyte.

You can then test out the incremental sync by adding more data to your Intercom account. For example, you can click on New users or leads to create some new contacts.

Running another sync will extract the new contacts from the Intercom API and send them to S3.

You can view the new data by going to your S3 bucket. The new data (i.e. data that has been added after the previous sync) will be stored in a new object file.

You can download and view the new data.

Airbyte Cloud allows you to seamlessly move data between hundreds of data sources and destinations. A specific example of moving data from the Intercom API to S3 was demonstrated in this tutorial, which involved the following steps:
Because Airbyte handles the complexities of interfacing with the Intercom API, you don’t need to hire specialized Intercom developers to get your data out of Intercom and into S3!
With Airbyte, the data integration possibilities are endless, and we look forward to seeing you make use of it! We invite you to join the conversation on our community Slack Channel, to participate in discussions on Airbyte’s discourse, or to sign up for our newsletter. You may also be interested in other Airbyte tutorials, and in Airbyte’s blog!
Download our free guide and discover the best approach for your needs, whether it's building your ELT solution in-house or opting for Airbyte Open Source or Airbyte Cloud.

Learn how to easily extract data from the Intercom API and replicate it into S3.
Learn how to measure customer support sentiment analysis using GPT, Airbyte, and MindsDB. Set up sentiment analysis of Intercom chats, extract and analyze the data with GPT models, and visualize the results using Metabase.