Mongodb CDC: How to Sync in Near Real-Time
Summarize this article with:
✨ AI Generated Summary
Change Data Capture (CDC) enables real-time data synchronization across systems, with MongoDB offering three main CDC methods: oplog tailing, change streams, and timestamp-based tracking. Tools like Airbyte and Confluent Cloud simplify MongoDB CDC implementation by providing user-friendly interfaces and integrations for streaming data to destinations such as data warehouses or Kafka topics. MongoDB CDC is widely used for audit logging, real-time analytics, and maintaining data consistency in distributed systems.
Organizations use more than one database to handle different applications to serve reporting and analytics use cases. Therefore, there are situations where data from one database needs to be relayed to another database or a system. This is where Change Data Capture (CDC) comes in. It allows you to sync data across the system in real time.
Let’s examine CDC from the standpoint of the MongoDB database to learn how to perform MongoDB CDC, how it works, and multiple ways to implement it.
What is Change Data Capture?
Change Data Capture (CDC) is the process of identifying and tracking changes to data in a database. It provides real-time or near real-time movement of data by processing and moving data continuously as new changes occur. In ETL, CDC is a method used for data replication where data is extracted from a source, transformed into a standard format, and loaded to a destination such as a data warehouse or analytics platform. However, the CDC is not limited to replicating data across platforms; it also ensures data quality and integrity.
What is MongoDB?
MongoDB is an open-source, document-oriented NoSQL database designed to store and manage large volumes of data. Unlike traditional relational databases that use tables, the MongoDB database stores data in a flexible, JSON-like format called BSON (Binary JSON).
This structure makes capturing data across diverse applications easy and supports complex data types, making MongoDB an ideal data store for modern applications with dynamic schemas.
Leading organizations like Uber, Coinbase, Forbes, and Accenture use MongoDB. Its robust features, such as real-time ad-hoc queries, built-in indexing, load balancing, and seamless scalability, stand out. Whether deployed on-prem or in the cloud via MongoDB Atlas, it enables efficient data replication, consistency, and scale change tracking.
If you're looking to implement CDC (Change Data Capture) in your MongoDB instance—whether for syncing with a data warehouse, maintaining an audit log, or replicating data to downstream systems—MongoDB provides multiple CDC methods to effectively access real-time data changes.
What are the CDC Methods in MongoDB?
MongoDB supports several CDC processes that allow you to monitor, track, and act on change events as they happen. The three most common CDC methods include:
1. Tailing the MongoDB Oplog
At the heart of MongoDB’s native replication system is the oplog (operation log), a capped collection that logs every write operation—insert, update, and delete—performed on your MongoDB cluster. By tailing the oplog, you can stream CDC events from the source database to target systems using custom applications or CDC tools.
This method is particularly useful for full data replication across replica set protocol versions, or for building pipelines to stream data to analytics platforms and audit trail systems. While powerful, oplog tailing is low-level and requires managing connection states and recovery logic manually, which can increase setup complexity.
2. MongoDB Change Streams
MongoDB change streams provide a high-level abstraction built directly on top of the oplog. They allow applications to immediately react to data changes without polling the database. With a simple .watch() method, you can subscribe to real-time change events on a MongoDB collection, database, or even across your entire deployment.
Change streams return change stream documents that represent each inserted document, deleted document, or updated record. Developers can filter these streams to monitor specific data types, non-system collections, or even listen at the replica set or sharded cluster level.
Change streams simplify CDC implementation and are compatible with integrations like Apache Kafka through the MongoDB Kafka connector or Debezium's MongoDB connector—allowing you to ingest data and push it to Confluent Cloud, a popular event streaming platform.
Key use cases include:
- Auditing changes in your MongoDB data
- Synchronizing with an external data warehouse
- Feeding real-time events into your analytics platform
3. Timestamp-Based Data Tracking
Another option is to track database changes manually using timestamps in each document. Every time a record is inserted, updated, or deleted, the document is tagged with a primary key and a last modified timestamp. This allows you to compare the current state of data with its historical versions, supporting rudimentary data capture for batch processing.
While not a native CDC method, this approach gives developers flexibility in how and when they capture data, especially when paired with custom scripts or a configuration file for batch extraction and further processing. However, it lacks the real-time capabilities and robustness of change streams or oplog tailing.
How to Implement MongoDB CDC?
There are different ways to implement CDC in MongoDB. Here are two ways with a detailed guide to set up MongoDB CDC:
- MongoDB CDC With Airbyte
- Using Change Streams With Confluent Cloud
MongoDB CDC With Airbyte
Airbyte is a popular data integration tool that allows you to streamline the MongoDB CDC process with its easy-to-use interface and extensive library of connectors. Here’s a step-by-step guide on performing CDC with the MongoDB connector of Airbyte:
Prerequisites
- MongoDB Atlas.
Step 1: Setting MongoDB Atlas
- Create a MongoDB Atlas account and a database cluster if you don’t have one.
Step 2: Setting MongoDB As a Source
- Sign up or log in to the Airbyte cloud. After navigating to the main dashboard, click the Sources option in the left navigation bar.
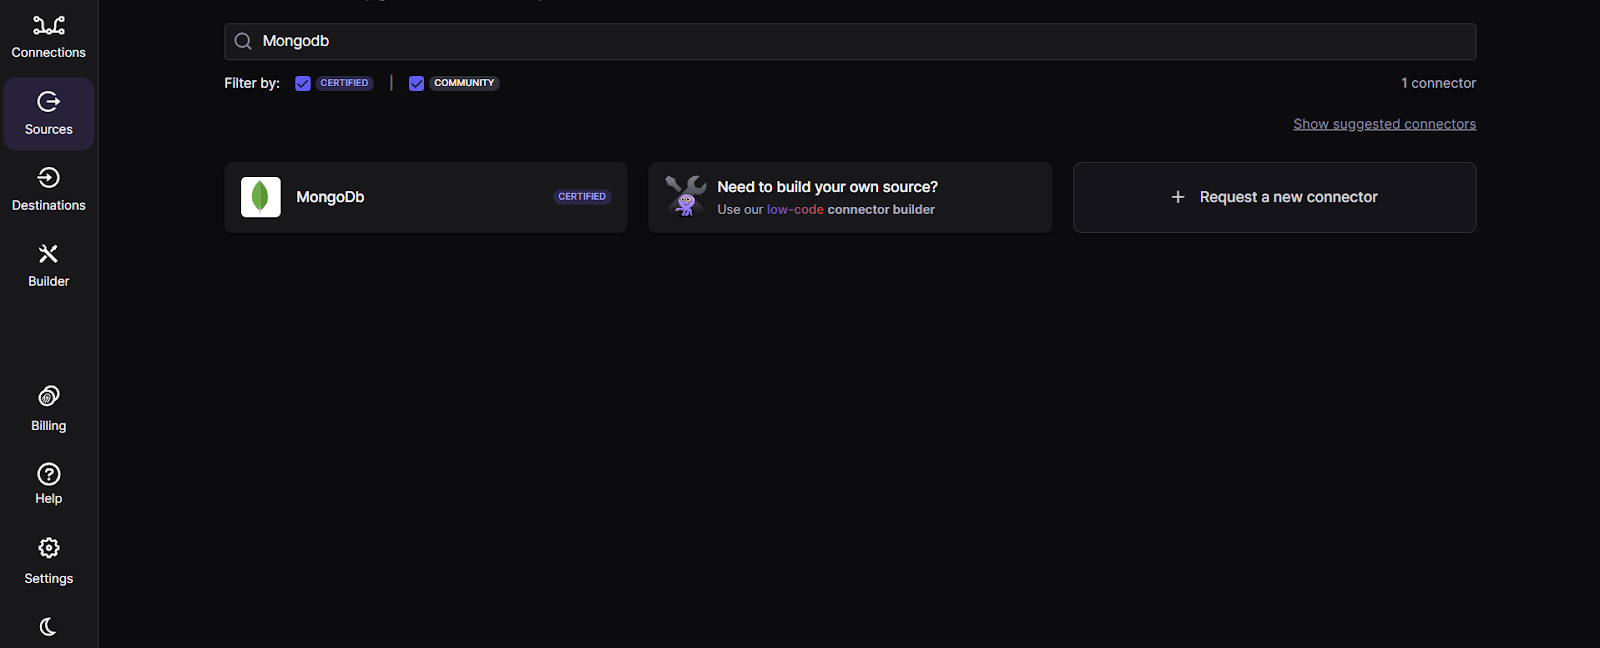
- On the Sources section, use the search bar at the top and type in MongoDB. Click on it when you see the connector.
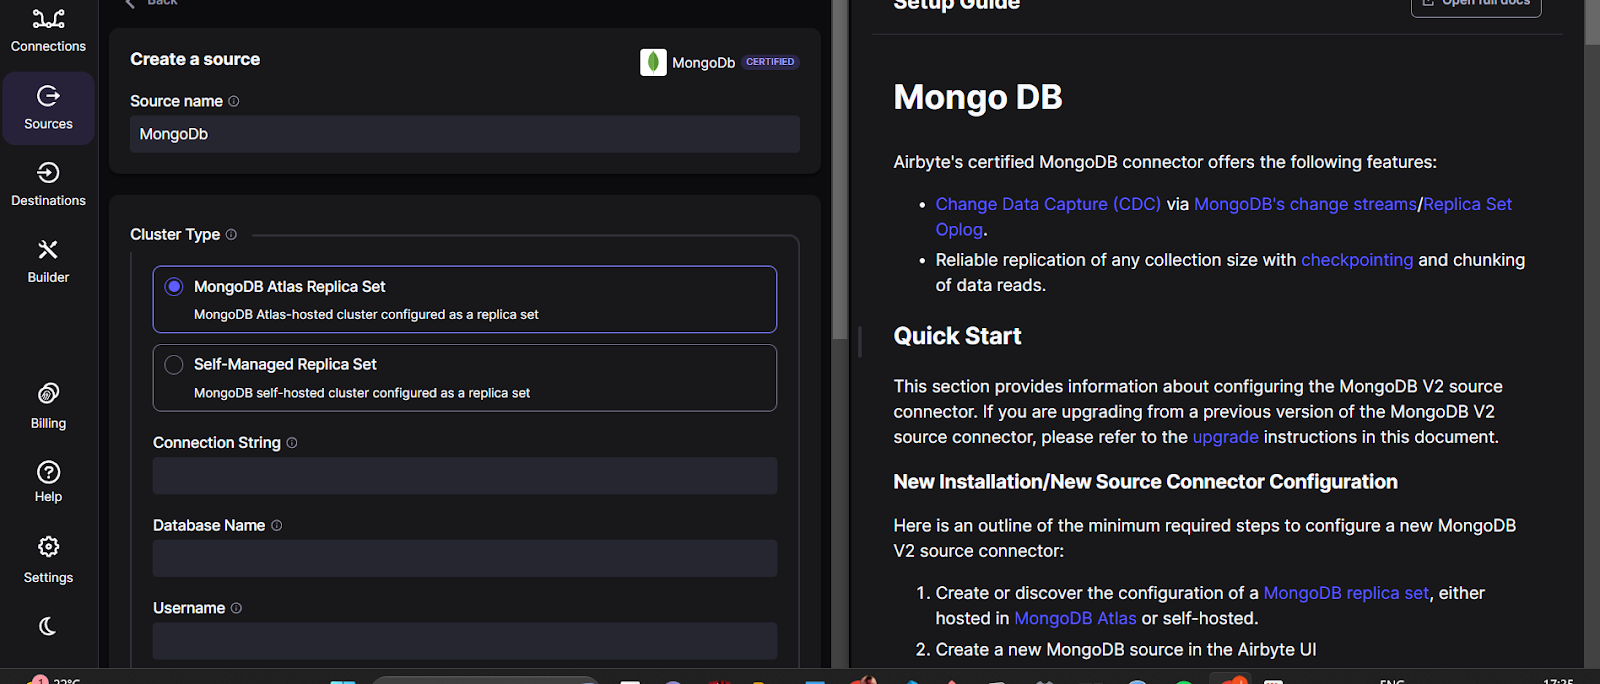
- You’ll be redirected to the New Source page. Select the ‘MongoDB Atlas Replica Set’ option on top and fill in the details such as Connection String, Database name, Username, and Password from the MongoDB cluster. Toggle the Advanced window, and you can optionally select Initial Waiting Time in Seconds, Size of the queue, and Document discovery sample size.
- Click on Set up source.
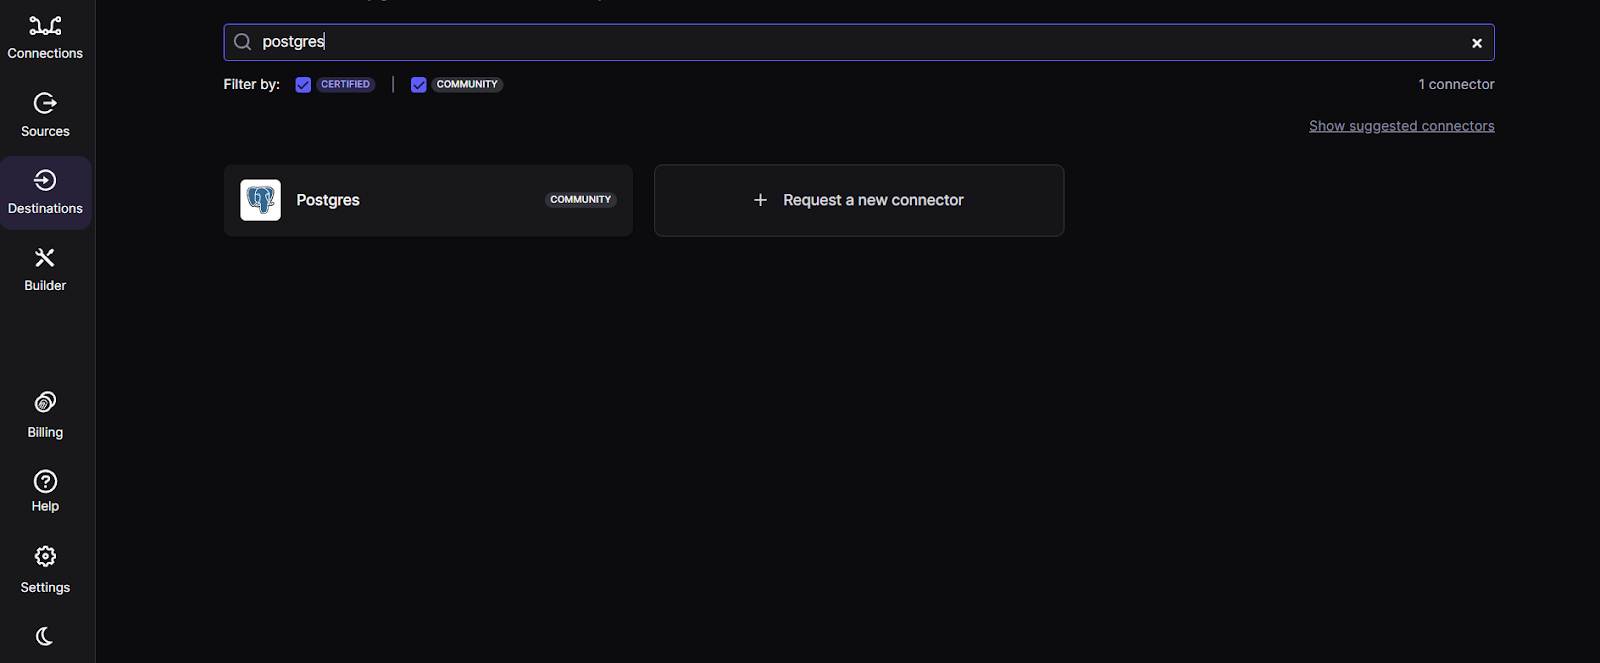
- On the Destinations page, use the search bar to find the destination of your choice (let’s take PostgreSQL).
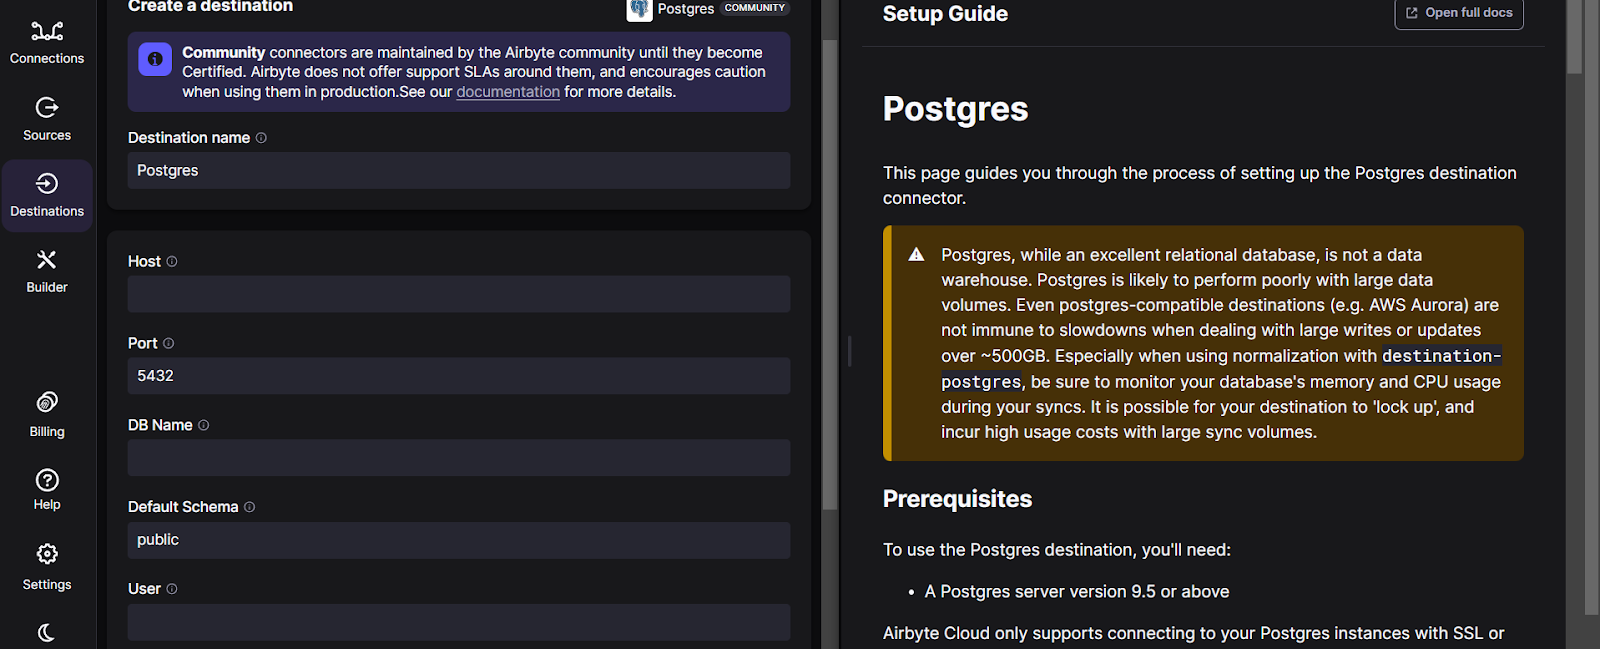
- Fill in the details on the Create a destination page, including Host, Port, DB Name, and User.
- Click on Set up destination.
- Go to the home page. Click on Connections > Create a new Connection.
- Select MongoDB as a source and Postgres as a destination to establish a connection between them.
- Enter the Connection Name and configure Replication frequency according to your requirements. You can optionally tweak the additional configuration options, including Schedule type, Destination namespace, Detect and propagate schema changes, and Destinations Stream Prefix.
- The connection page has a section titled "Activate the streams you want to sync." You can select which streams to sync, and they will be loaded in the destination. Click here to learn more about sync modes.
- Click on the Set up connection button. Once setup is complete, you must run the sync by clicking the Sync now button. This will successfully establish a connection between MongoDB and Postgres.
- User Interface: The intuitive and user-friendly interface of Airbyte streamlines the CDC processes for users with varying levels of technical expertise.
- Ease of Use: Airbyte's rich features, such as workflow orchestration and logging, can help you monitor MongoDB CDC efficiently.
- Scalability: Airbyte provides horizontal scalability, which enables you to scale your data integration efforts as MongoDB data grows.
- MongoDB Atlas.
- Confluent Cloud.
- Confluent CLI.
- Kafka.
- Windows Powershell.
- Create a MongoDB account.
- Create a Cluster.
- Enable the API access for the cluster.
- Create a Confluent account.
- Install Confluent Cloud CLI to interact with Confluent Cloud from the command line.
- Create a Kafka cluster within the Confluent Cloud environment.
- Launch the Confluent Cloud Cluster.
- In the left menu, click Connectors. Search for MongoDB Atlas Source and select the connector card.
- On the connector screen, fill in the required details, such as Kafka Credentials, Authentication, Sizing, etc.
- Launch Confluent CLI in your system and access it with the required credentials.
- Now, create a file in JSON format that contains configuration properties. The configuration file looks like this:
Step 5: Load the Configuration File and Create a Connector
Enter the code mentioned below in the command line:
Here, --config-file refers to the location, and .json is the file name we created in the above step.
Step 6: Check Kafka Topic
By now, MongoDB documents should be populating the Kafka topic. Run the following command in Confluent CLI to check the topics:
Replace with the address of the Kafka cluster bootstrap server. If the connector restarts for any reason, you may see duplicate records in the topic.
If you have carefully followed the abovementioned steps, you should have a MongoDB CDC setup using Atlas and Confluent.
Ready to Power Real-Time Data with MongoDB?
MongoDB is an ideal database if you want to build a real-time notification system, conduct historical analyses, or ensure data consistency. It provides a flexible collection of tools for performing CDC that meets your development requirements.
Techniques like MongoDB's oplog and change stream not only ensure data synchronization across platforms but also enable dynamic features like event-driven architecture and automated notification. By incorporating the methods and implementations mentioned above, you can harness the full potential of MongoDB CDC.
You can use Airbyte to streamline the CDC process with MongoDB. Its rich features, like an easy-to-use interface and extensive connector library, elevate MongoDB's CDC capabilities and simplify data movement. Sign up or Log in to Airbyte now.
Frequently Asked Questions
1. What's the difference between MongoDB Oplog and Change Streams?
Oplog is MongoDB's low-level operation log that records every write operation, requiring manual management of connection states and recovery logic. Change Streams provide a simpler, high-level abstraction built on top of the oplog with an easy .watch() method that lets you subscribe to real-time changes without managing complex implementation details.
2. Can I use MongoDB CDC for real-time data synchronization?
Yes! MongoDB CDC methods like Change Streams and oplog tailing enable real-time data synchronization across systems. You can stream changes instantly to data warehouses, analytics platforms, or downstream applications as they happen in your MongoDB database.
3. Do I need to write custom code to implement MongoDB CDC?
Not necessarily. While you can build custom solutions using oplog tailing, tools like Airbyte provide a no-code interface with pre-built MongoDB connectors for CDC implementation. For developers, MongoDB's native Change Streams offer a simple API that requires minimal coding effort.
4. What are the main use cases for MongoDB CDC?
MongoDB CDC is commonly used for maintaining audit logs, syncing data with external data warehouses, and feeding real-time events into analytics platforms. It's also ideal for building event-driven architectures, ensuring data consistency across distributed systems, and powering real-time notification systems.
Suggested Reads:

.webp)
